About VictorOps and Uptime Robot
Every five minutes, Uptime Robot can check up to fifty monitors to determine website downtime and performance. In addition to monitoring uptime, downtime and website response times, Uptime Robot offers the ability to create public status pages. Integrated with VictorOps, Uptime Robot gives you the capability to seamlessly notify both internal and external stakeholders to application performance issues and downtime.
Set monitors and thresholds in Uptime Robot and manage associated on-call rotations and calendars, alert rules, and escalation policies in VictorOps. Build visibility into website performance and automate critical on-call processes to create efficient incident response workflows and make on-call suck less
Spend less time worrying about website performance or downtime. The VictorOps and Uptime Robot integration creates a holistic system for website monitoring, incident detection, on-call response and remediation.
Versions Supported: Starter, Growth, or Enterprise
VictorOps Version Required: N/A SaaS
What you need to know: Uptime Robot is a service that monitors websites at five-minute intervals. The Uptime Robot homepage can be found here.
Enable Uptime Robot In VictorOps
In VictorOps, select Uptime Robot within the integrations page.
If the integration has not yet been enabled, click the Enable Integration button to generate your endpoint URL as seen below.
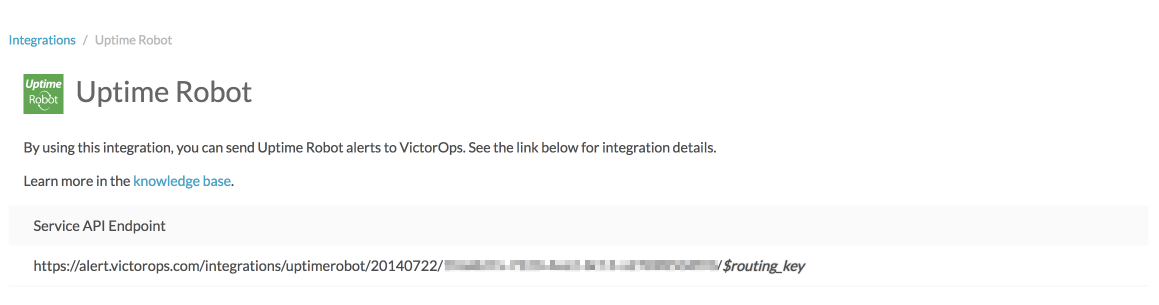
Please note, when integrating the endpoint in Uptime Robot, be sure to replace the “$routing_key” section with the actual routing key you intend to use (To view or configure route keys in VictorOps visit the settings page). For further reference regarding Routing Keys and their usage please follow the link to our Knowledge Base article on the subject here.
Once you’ve enabled the Uptime Robot Specific Endpoint you’re ready to move on to The Uptime Robot UI.
Configure VictorOps In Uptime Robot
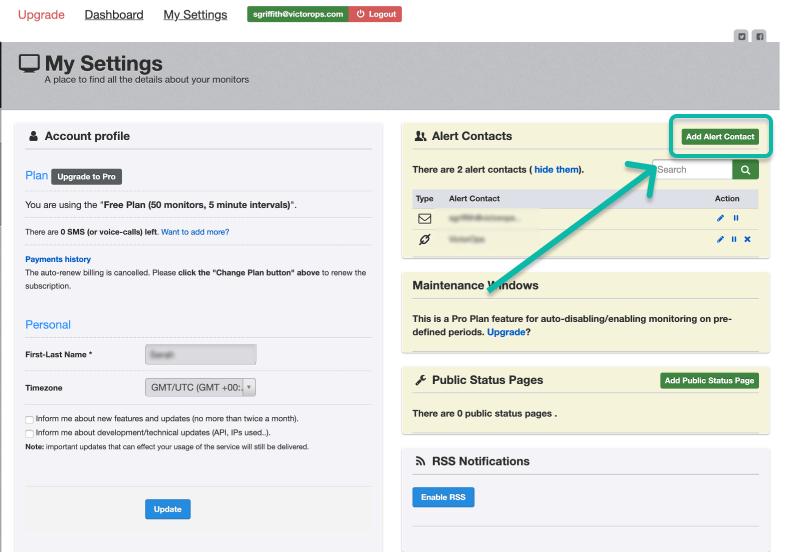
From the main dashboard select My Settings. Under “Alert Contacts“ select Add Alert Contact.
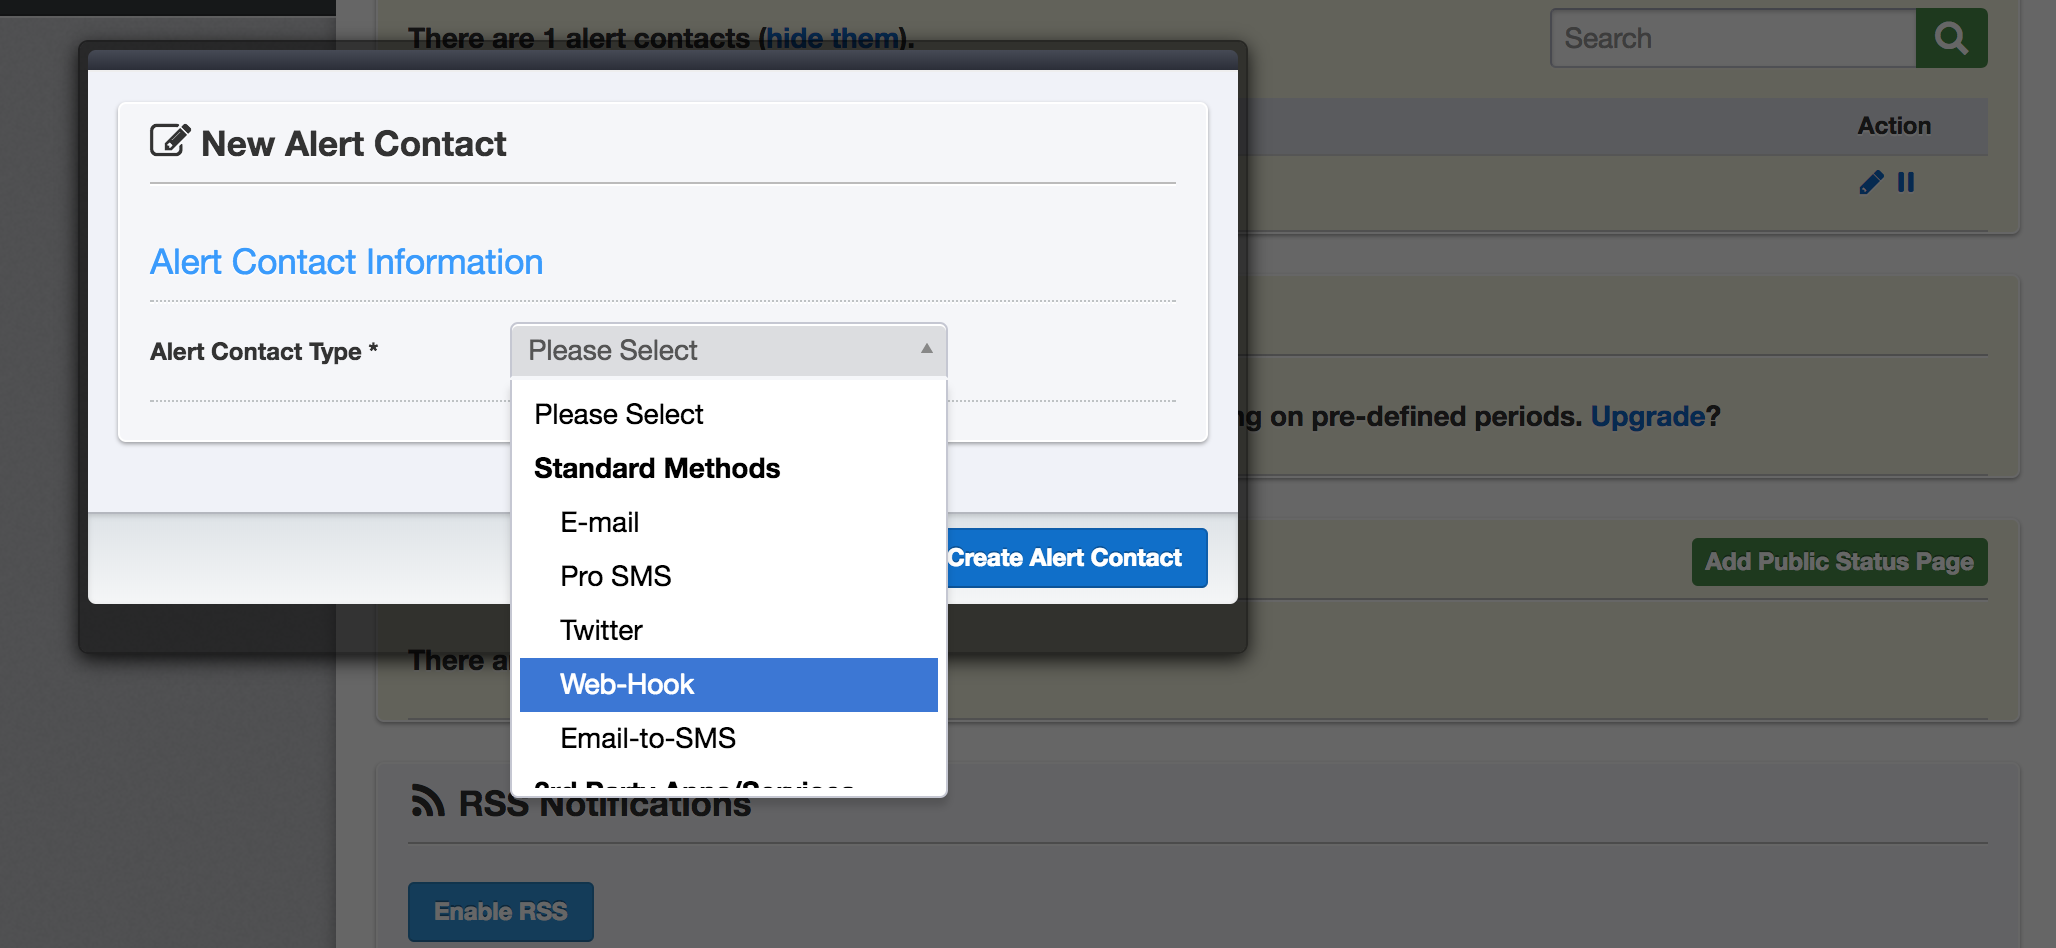
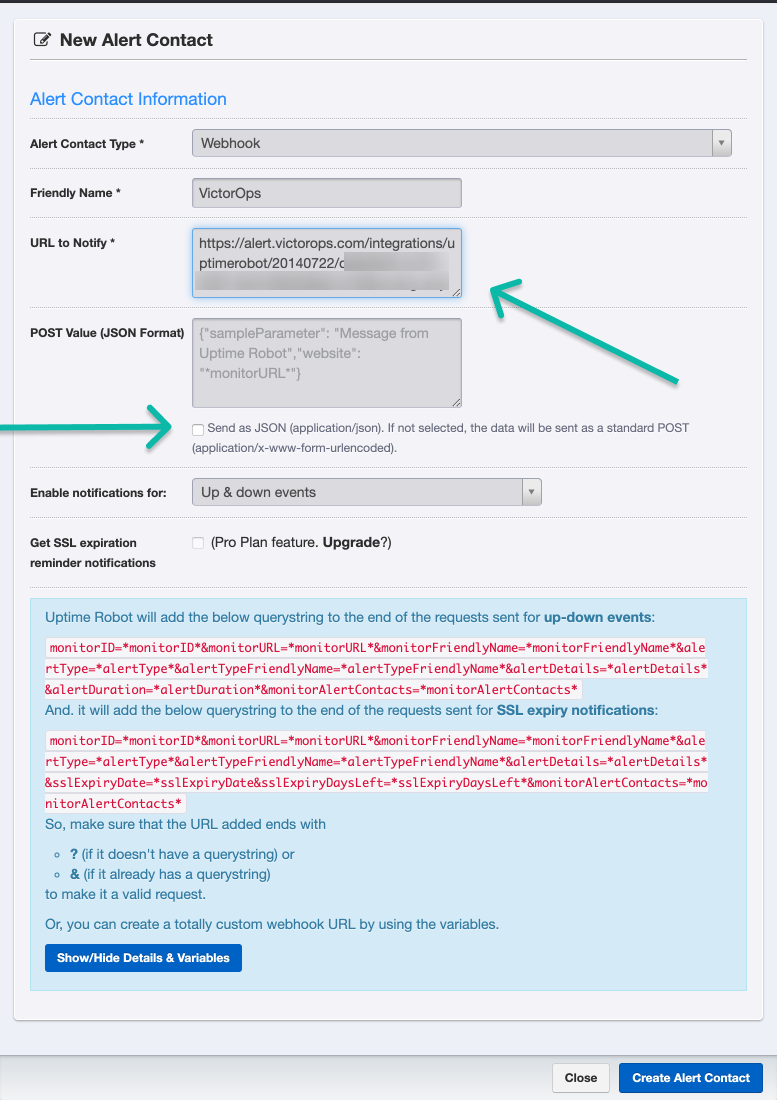
Select Web-Hook for the Alert Contact Type and give it a Friendly Name and then paste your VictorOps “URL to Notify” into the box, ensuring a trailing ? character is added to the end of the URL.
NOTE: A trailing ? character must be added to the URL (following the routing key) due to syntax requirements by Uptime Robot. This will not affect alert routing.
Leave the POST Value blank, keep the JSON checkbox deselected, and, finally, select Create Alert Contact.
Your set-up should look similar to the configuration depicted below.
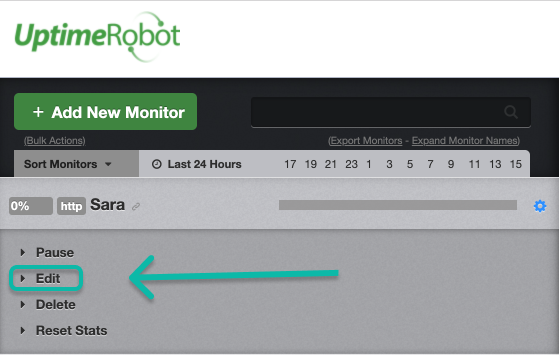
To add this Alert Contact to one of your monitors select the gear icon next to the monitor and then Edit it.
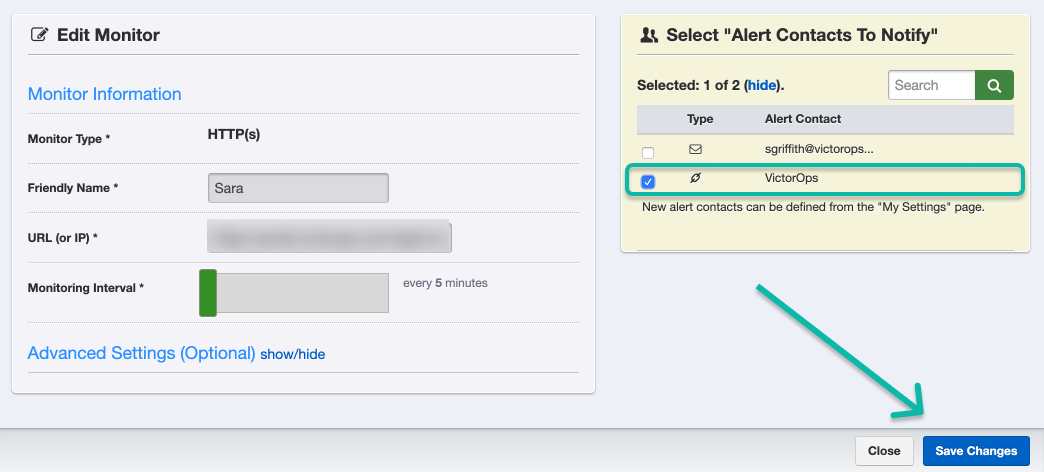
Select the VictorOps Alert Contact and then Save Changes.
Now whenever an alert is triggered in Uptime Robot a message will be sent to the VictorOps timeline.
That’s it! If you have any questions please reach out to VictorOps Support.