Jira Version Required: Jira Server 7.7.0 – 8.22.6, Jira Cloud (versionless)
Splunk On-Call Version Required: Starter, Growth, or Enterprise
Configuration in Splunk On-Call
NOTE:
- Global Admin privileges are required for the Splunk On-Call portion of the configuration.
- There is presently an outstanding issue that prevents successful re-integration if this app has been uninstalled in Jira. To avoid this situation, only uninstall the Splunk On-Call Jira Add-On if you intend to never use it again
In Splunk On-Call, navigate to Integrations >> API.
Click the New Key button. Give the key a description. Note the resulting API key and existing API ID.
Installing the Splunk On-Call Add-On
- Log in as a Jira administrator, then navigate to the Atlassian Marketplace by clicking on Jira administration gear icon > Manage apps.
- In the left-hand sidebar, click Find new apps under the Atlassian Marketplace header.
- If on Jira Server, search for the app Splunk On-Call for Jira Server. If on Jira Cloud, search for the app VictorOps for Jira Cloud. Once you’ve located the right app, click Install.
Once installation completes, click on Configure.
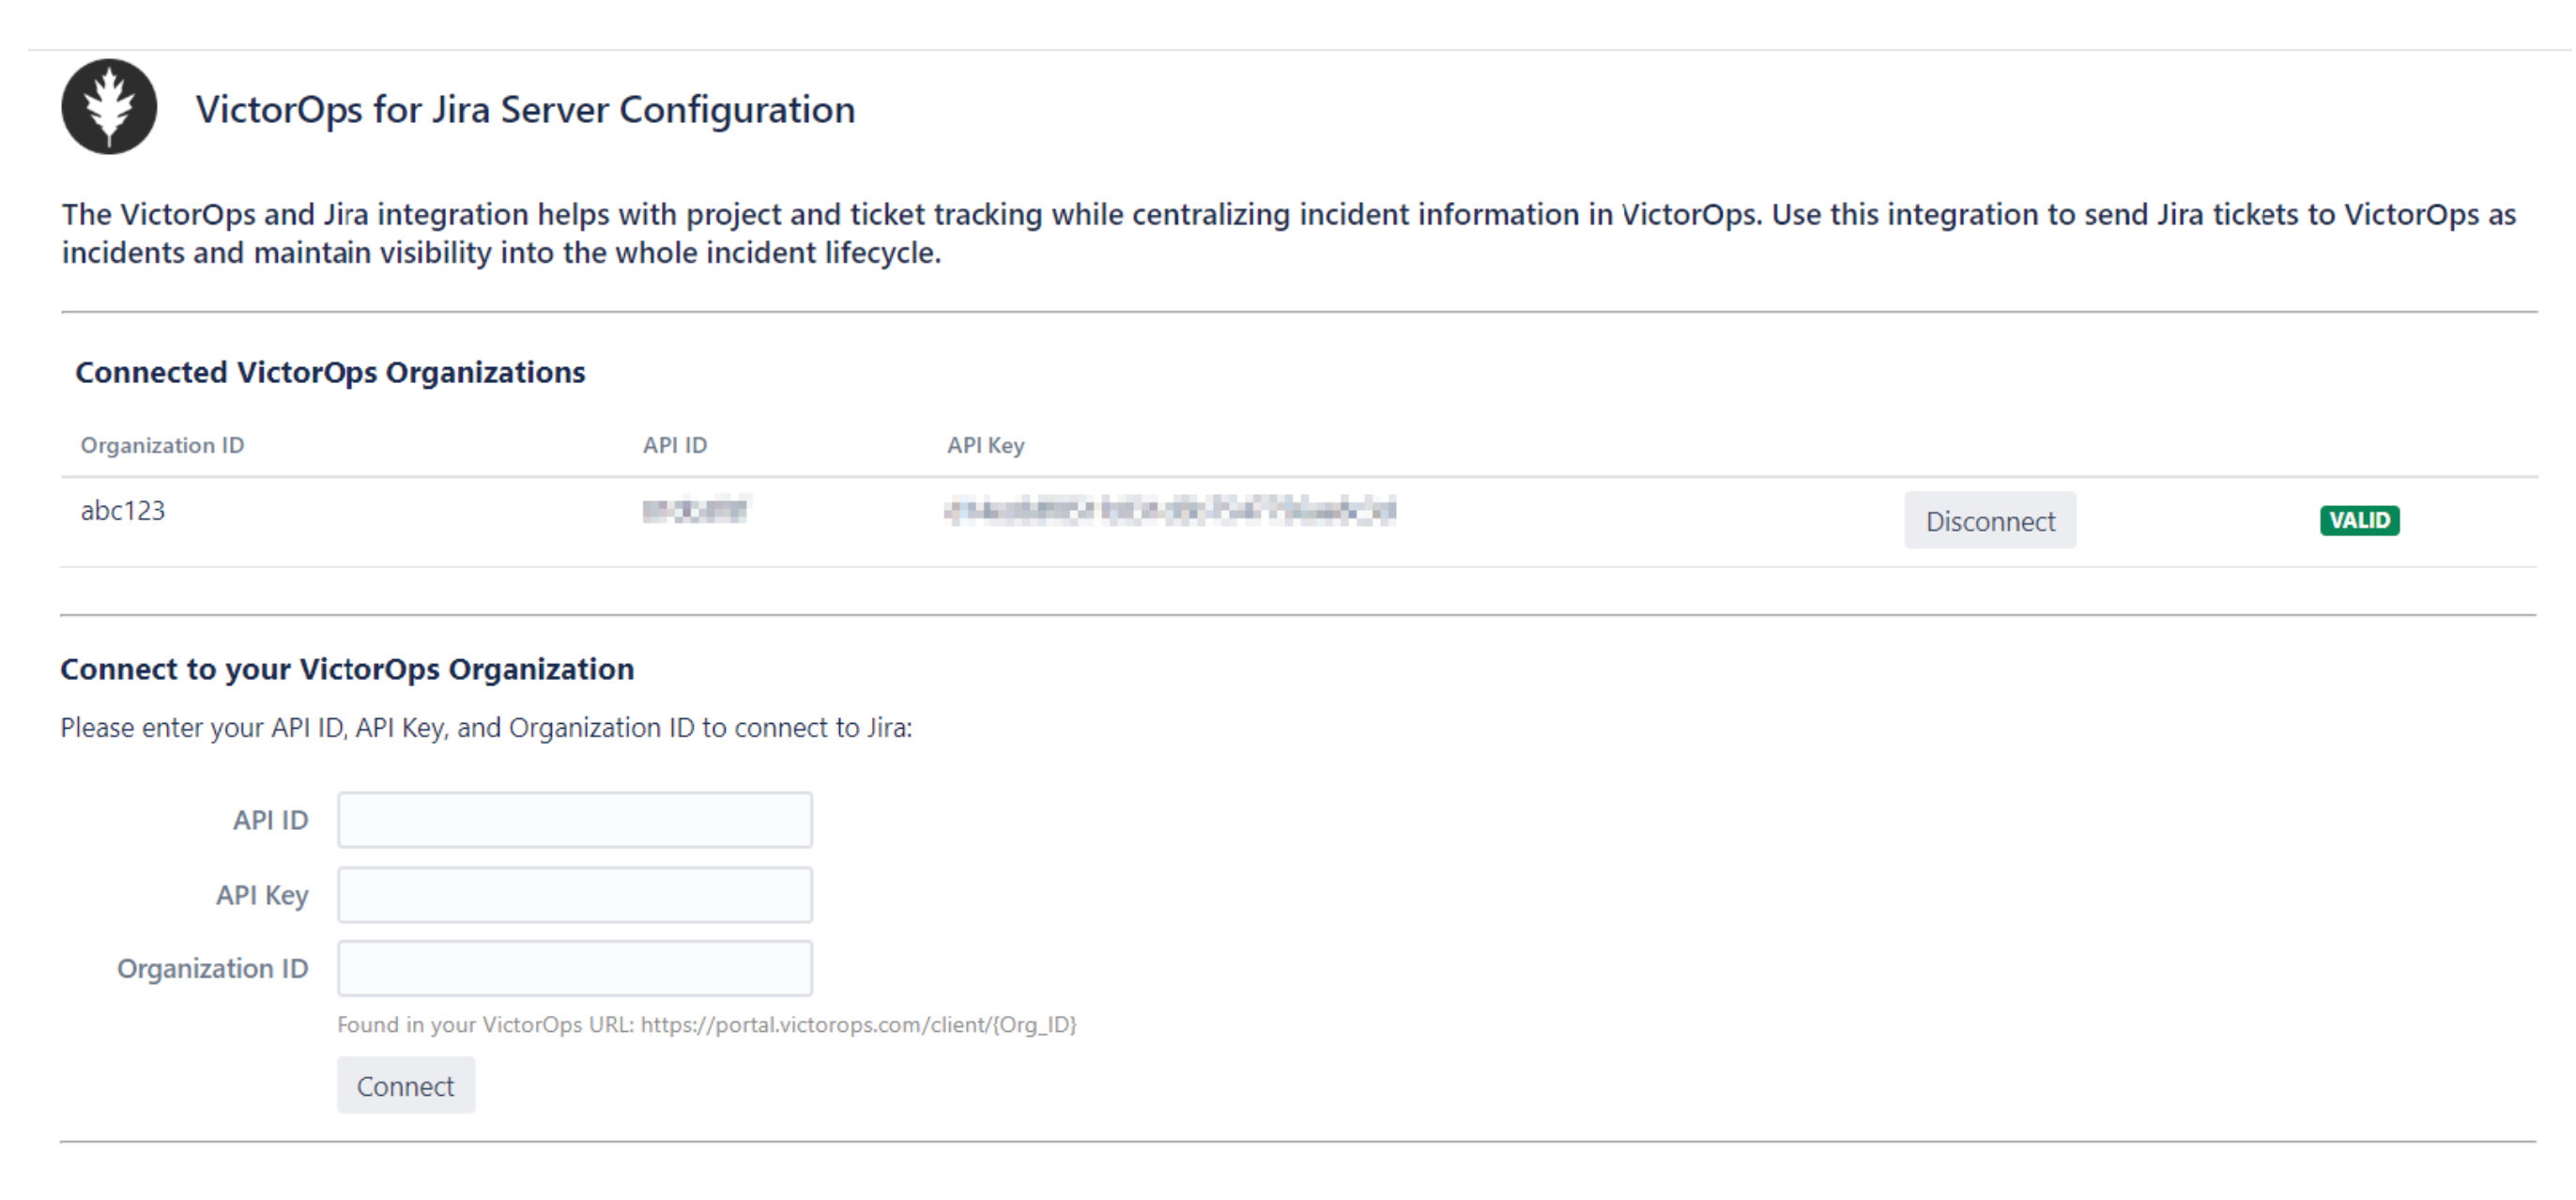
Configuring Application Settings
- Insert the API key you generated in VictorOps into the API Key field under the Connect to your VictorOps Organization section of Jira’s VictorOps for Jira Server Configuration page.
- In the API ID field in the same section, insert the API ID you noted in the Splunk On-Call step above.
- Copy the Splunk On-Call Org ID displayed in your VictorOps URL (e.g. https://portal.victorops.com/client/{Org_ID}) and paste it in Jira’s Organization ID field. This is appended to the incident link within Jira tickets.
- Once all three fields have been populated, click Connect. On success, a new entry will appear in the Connected VictorOps Organizations section, and display a green “VALID” flag.
Configuring Jira Project Settings
The Splunk On-Call add-on must be enabled and configured for each Jira project you wish to associate. Note that while multiple projects can connect to the same Splunk On-Call organization, projects cannot share the same Default Team Escalation Policy.
- In Jira, click Projects
- Navigate to Project settings of the project you wish to enable for the Splunk On-Call add-on, then click VictorOps Settings.
- Click Enable VictorOps for this Project. This will expand the page to display a list of configurable fields.
Default Incident Settings
- Under VictorOps Instance, select the Splunk On-Call organization you wish to associate with this project.
- Under Default Team Escalation Policy, select the Splunk On-Call Escalation Policy you would like to page when Jira issues create incidents in Splunk On-Call. NOTE: Incoming VictorOps incidents assigned to this Escalation Policy will be the only ones allowed to create issues in your Jira project.
- Under Default User, select the Jira user you wish to designate as Reporter for issues generated by incoming Splunk On-Call incidents.
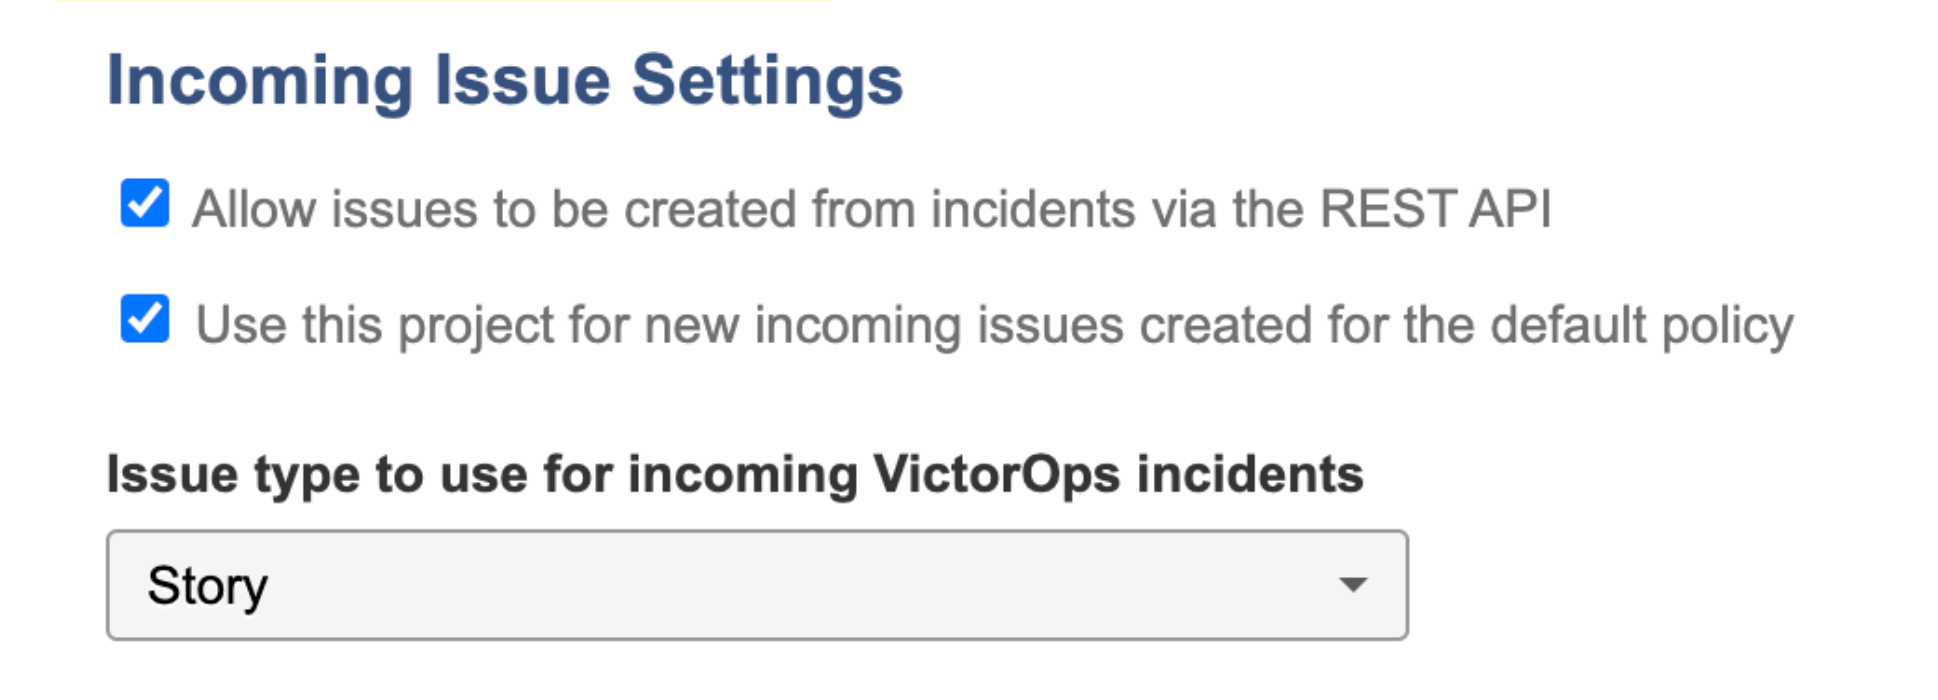
Incoming Issue Settings
Splunk On-Call incidents created for a project’s Default Team Escalation Policy will automatically generate Jira issues. The default type for such issues (Bug, Epic, Story, or Task) is set by selecting the desired option from the Issue type to use for incoming VictorOps incidents dropdown.
If you wish to disable such issue creation, deselect the Allow issues to be created from incidents via the REST API checkbox.
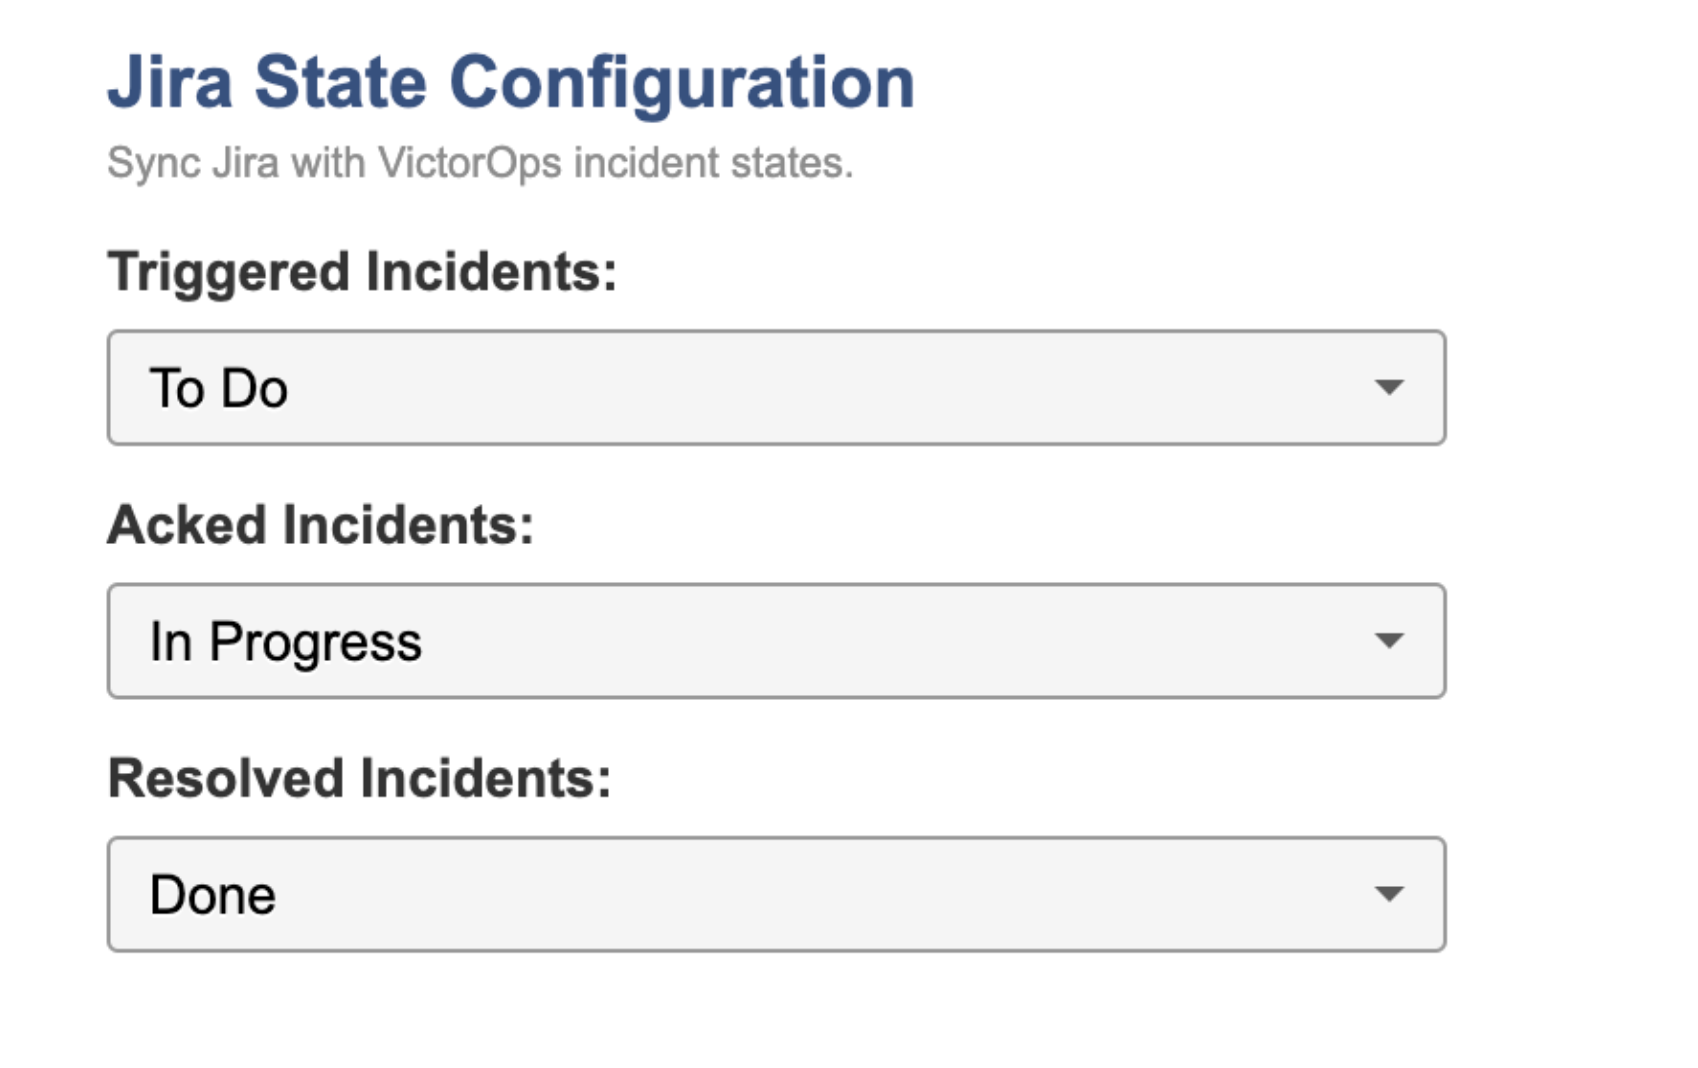
Jira State Configuration
Defining state mapping allows Jira issues to remain synchronized as incidents move through their life cycle in VictorOps.
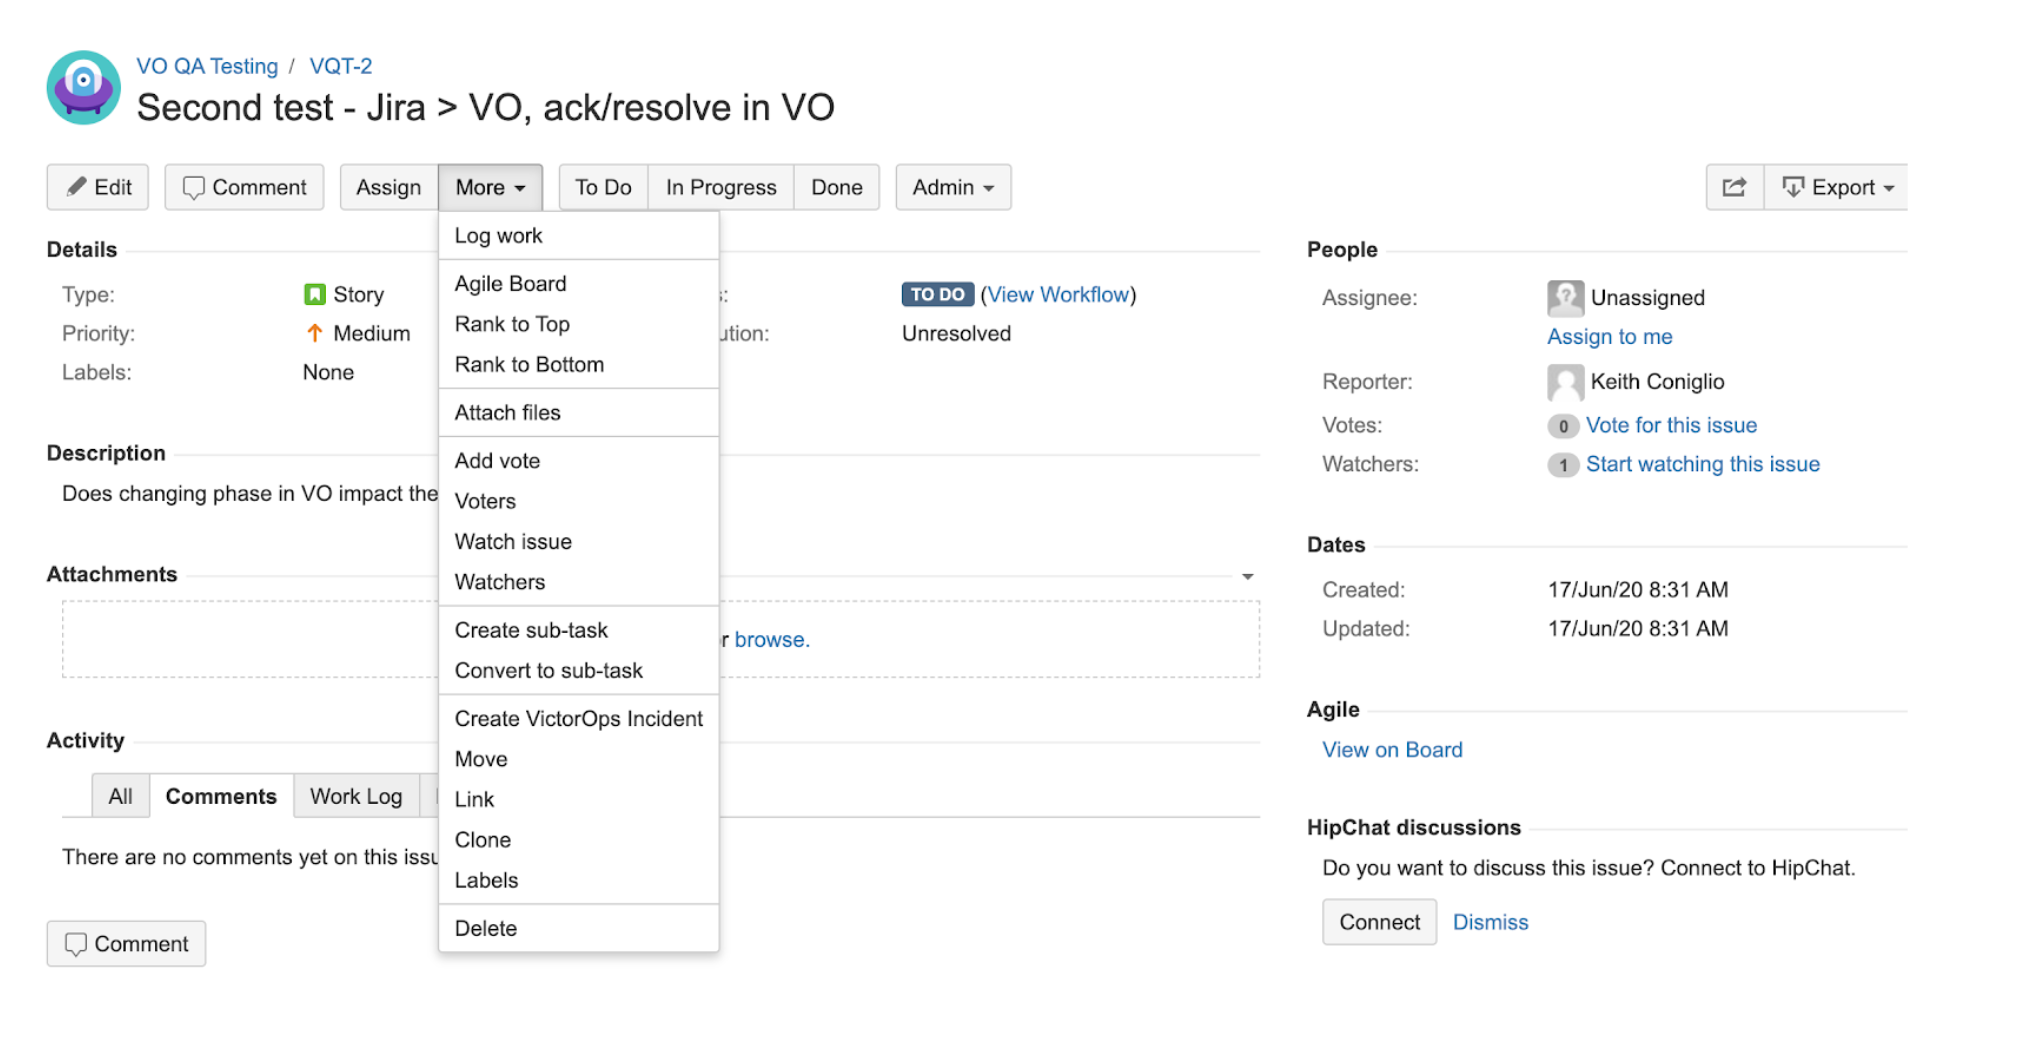
Creating a Splunk On-Call Incident Within Jira
Currently, Splunk On-Call incidents can only be created from the Jira issue view.
- Click More > Create VictorOps Incident. A preview of the Splunk On-Call incident card will display, using the project’s Default Team Escalation Policy.
Note: For Jira Cloud, the More button is an ellipsis button. - You may select a different escalation policy from the VictorOps Team Escalation Policy dropdown. You may also use the Additional Users dropdown to optionally include additional users for response. Note that adding users to an incident will not create a “Multi-Responder incident” in Splunk On-Call.
- Click Create Incident to generate a Splunk On-Call incident. This will then display a Triggered Splunk On-Call incident card under the VictorOps section in the lower right frame of the issue view.
- Click the incident card’s Incident Details link to display the incident in Splunk On-Call in a new browser tab.