Send your Rackspace alerts directly into the VictorOps timeline using the following guide.
In VictorOps
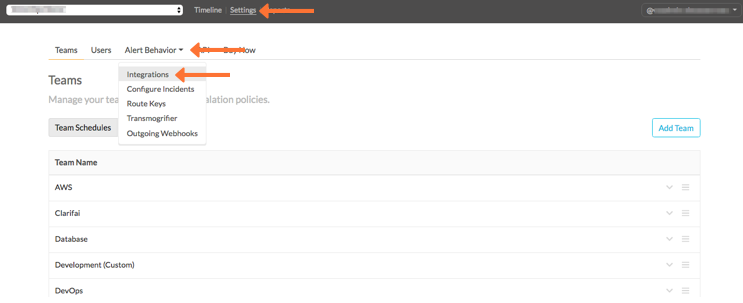
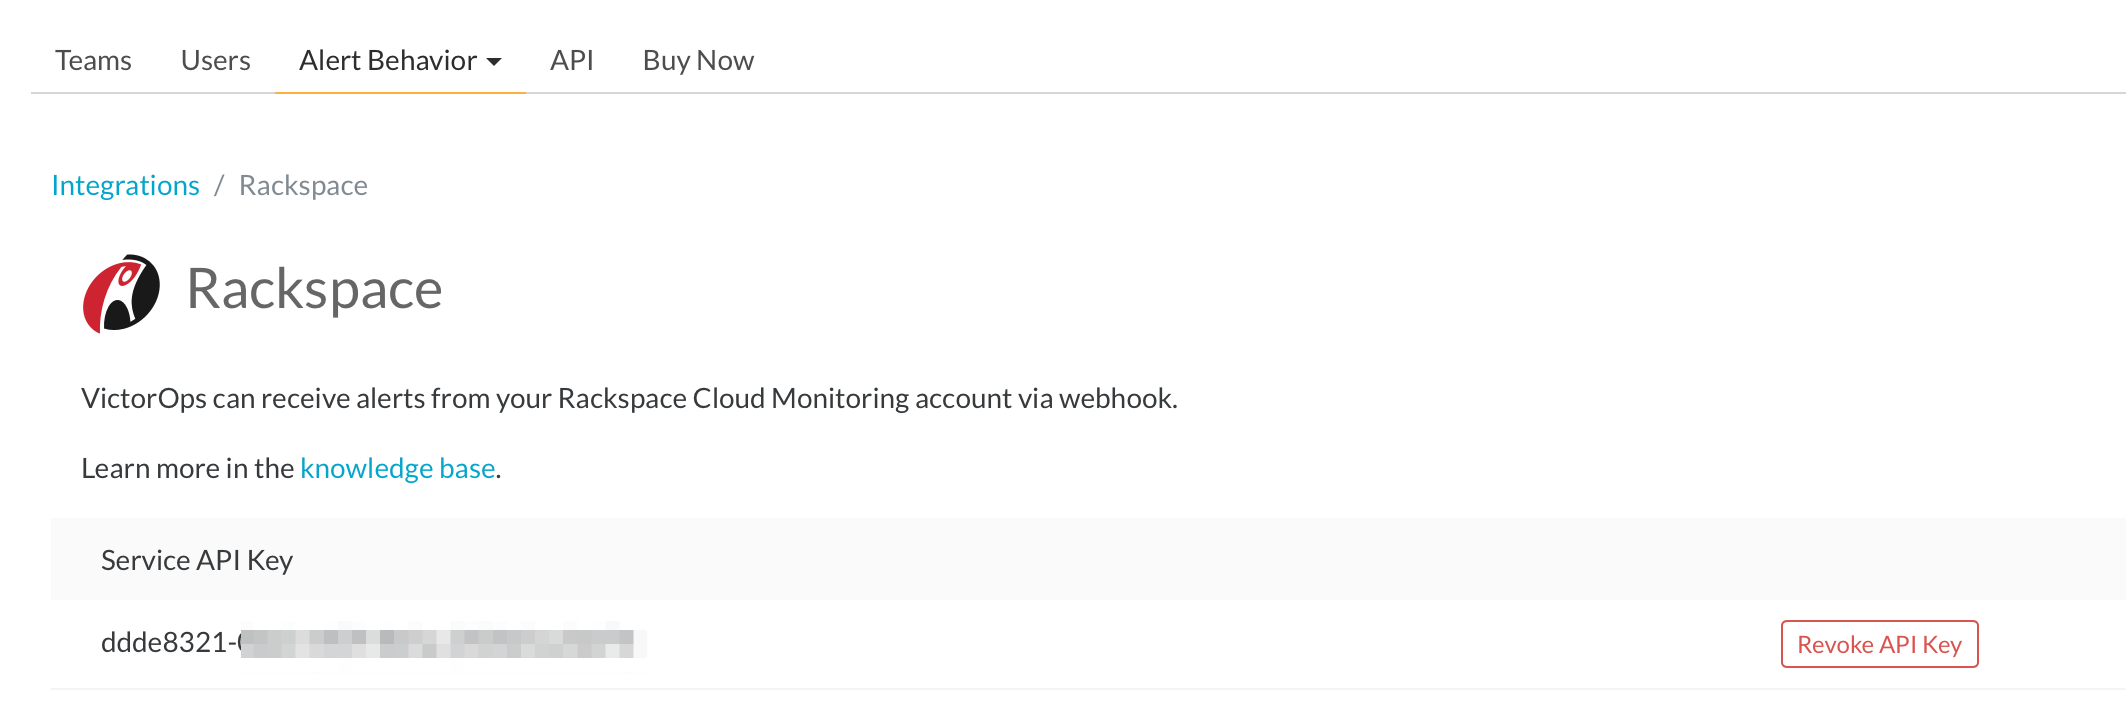
In VictorOps, select Settings >> Alert Behavior >> Integrations >> Rackspace
If the integration has not yet been enabled, click the “Enable Integration” button to generate your endpoint URL as seen below. Be sure to replace the “$routing_key” section with the actual routing key you intend to use. (To view or configure route keys in VictorOps, click Alert Behavior >> Route Keys)
In Rackspace
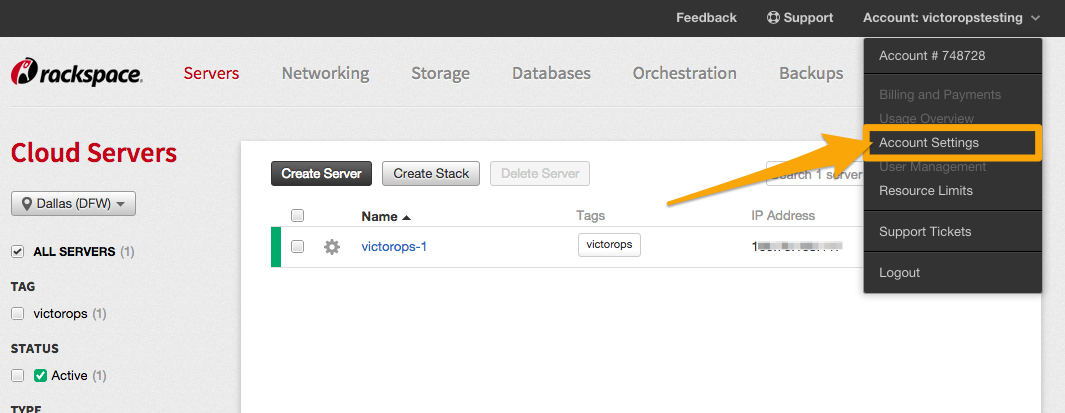
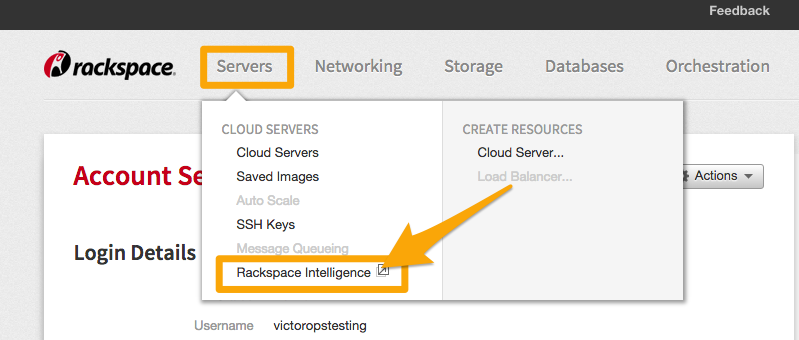
From the web portal select the account dropdown in the upper right hand corner and then Account Settings.
From the account settings screen select the Servers dropdown and then Rackspace Intelligence.
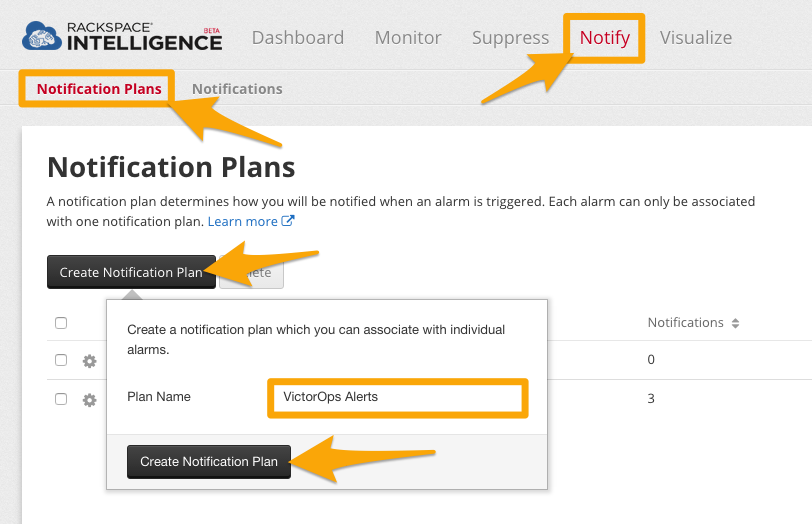
From the Rackspace Intelligence screen select the Notify option and then Notification Plans then Create Notification Plan. Give the Plan a name and select Create Notification Plan.
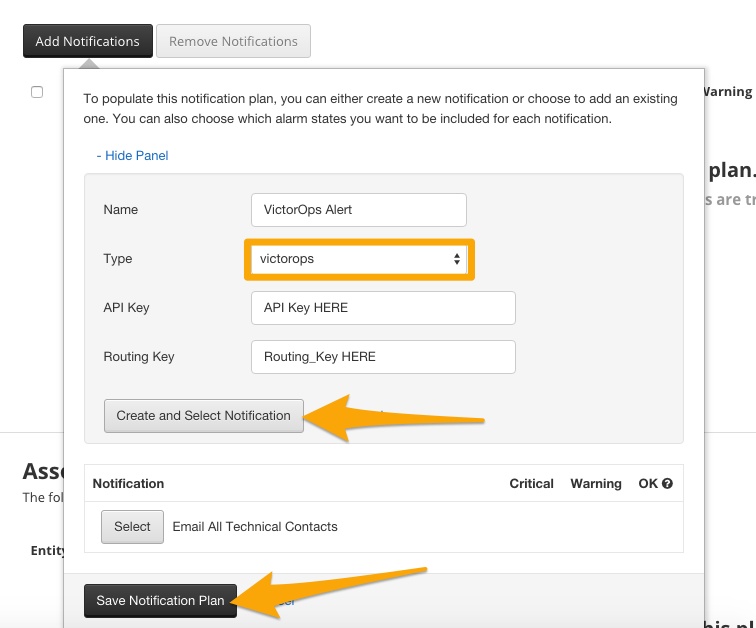
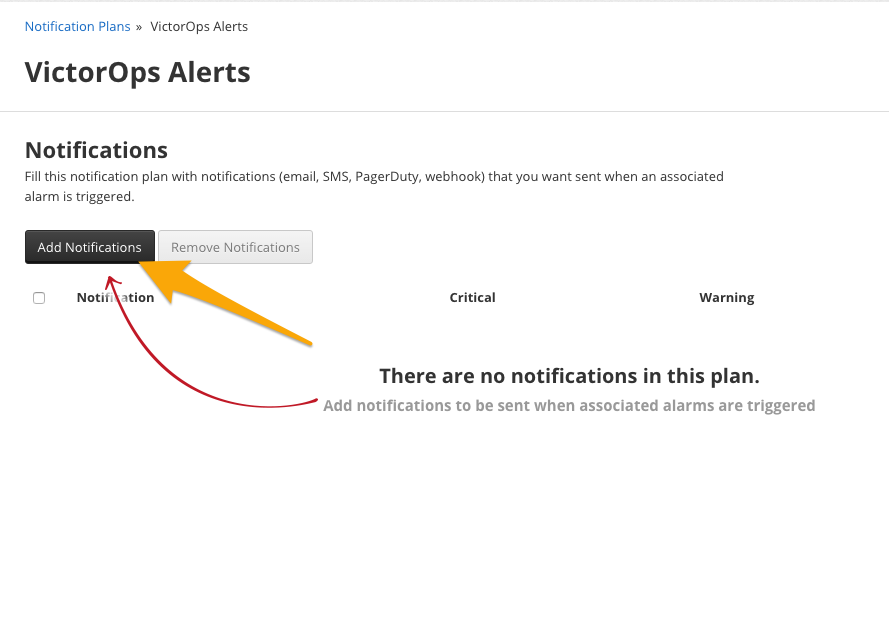
Once the plan has been created select Add Notifications.
Select Create a new notification
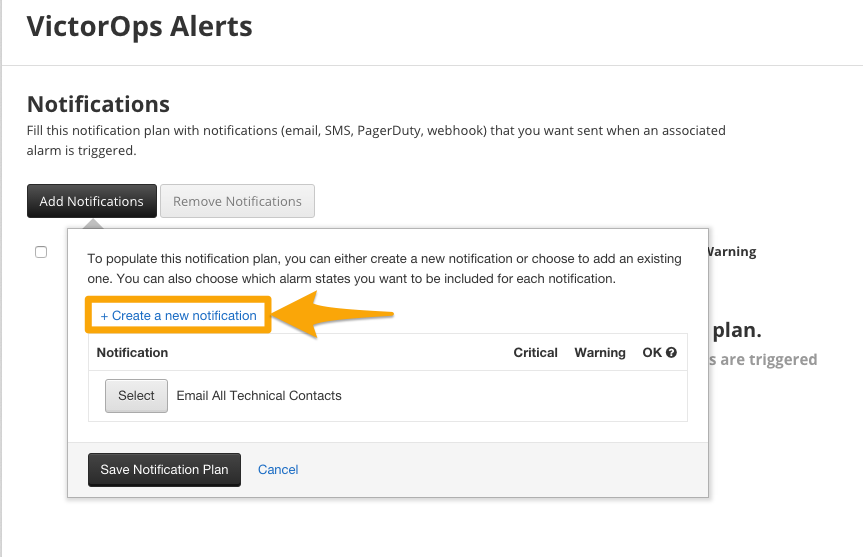
A dropdown will appear, enter in a name for your new notification, then select VictorOps as the type, paste in your API key and add the appropriate Routing Key for this “Notification Plan”. Select Create and Select Notification then Save Notification Plan and you are done!