Mailhop automatically backs up your email and acts as a queue while your email server is offline. Mailhop can be configured to send alerts to VictorOps. The following guide will walk you through this integration.
In VictorOps
From the VictorOps web portal, select Settings >> Alert Behavior >> Integrations
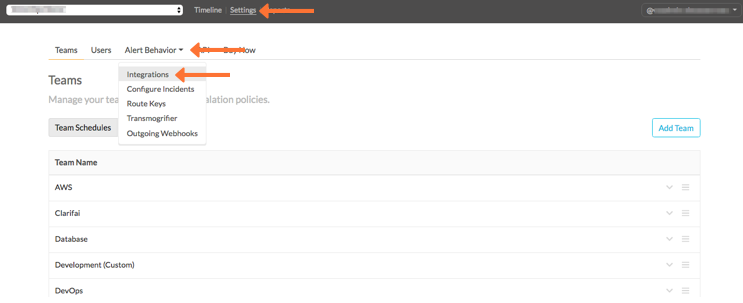
Select the Mailhop integration option.

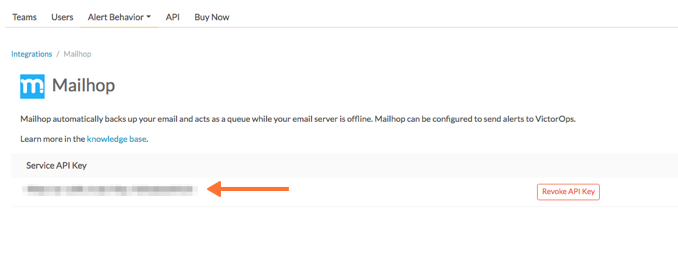
Copy the Service API Key to the clipboard.
In Mailhop
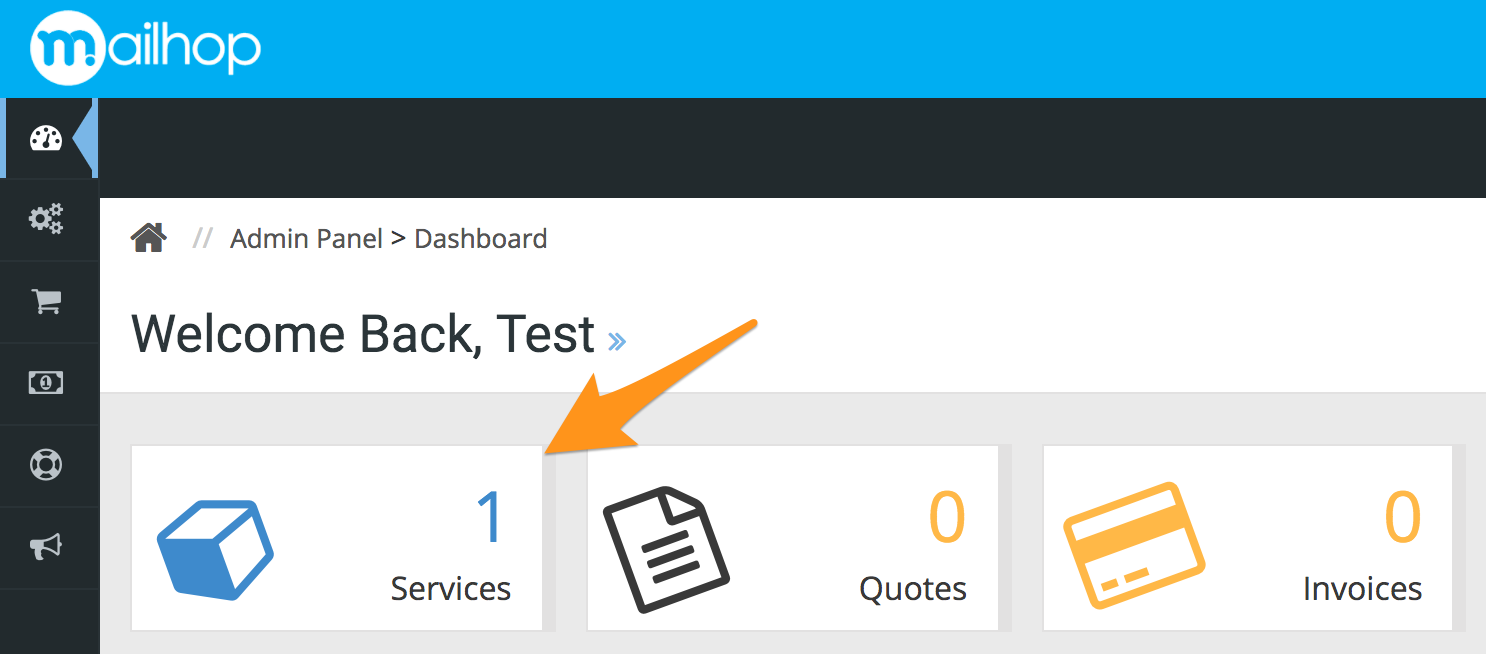
Login to the Mailhop web interface as an admin.

From the Mailhop dashboard, click Services.
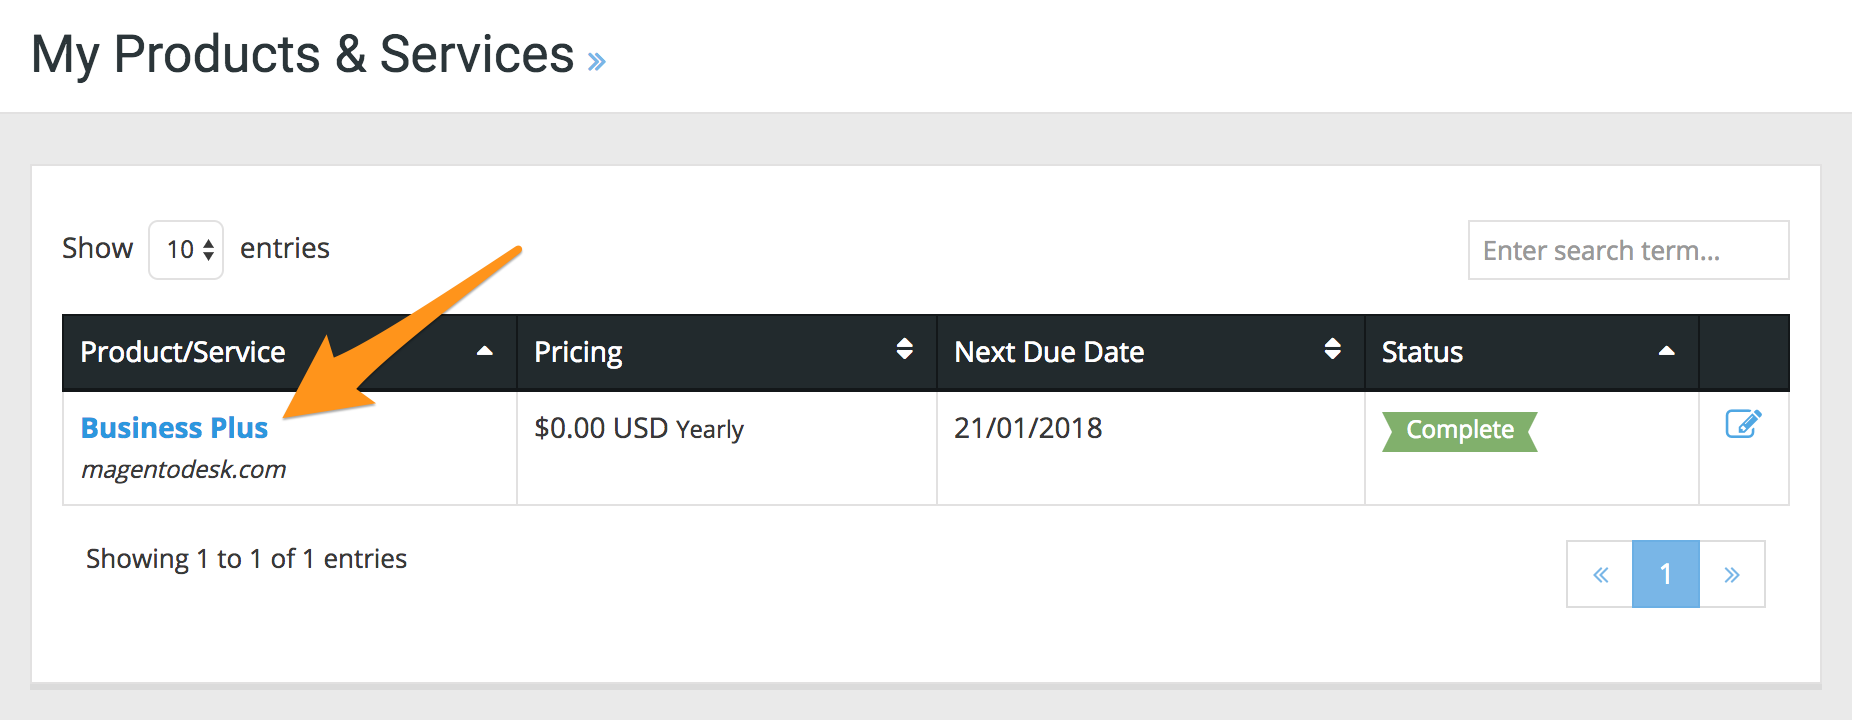
Select your “Product/Service”. In this example, we select Business Plus.
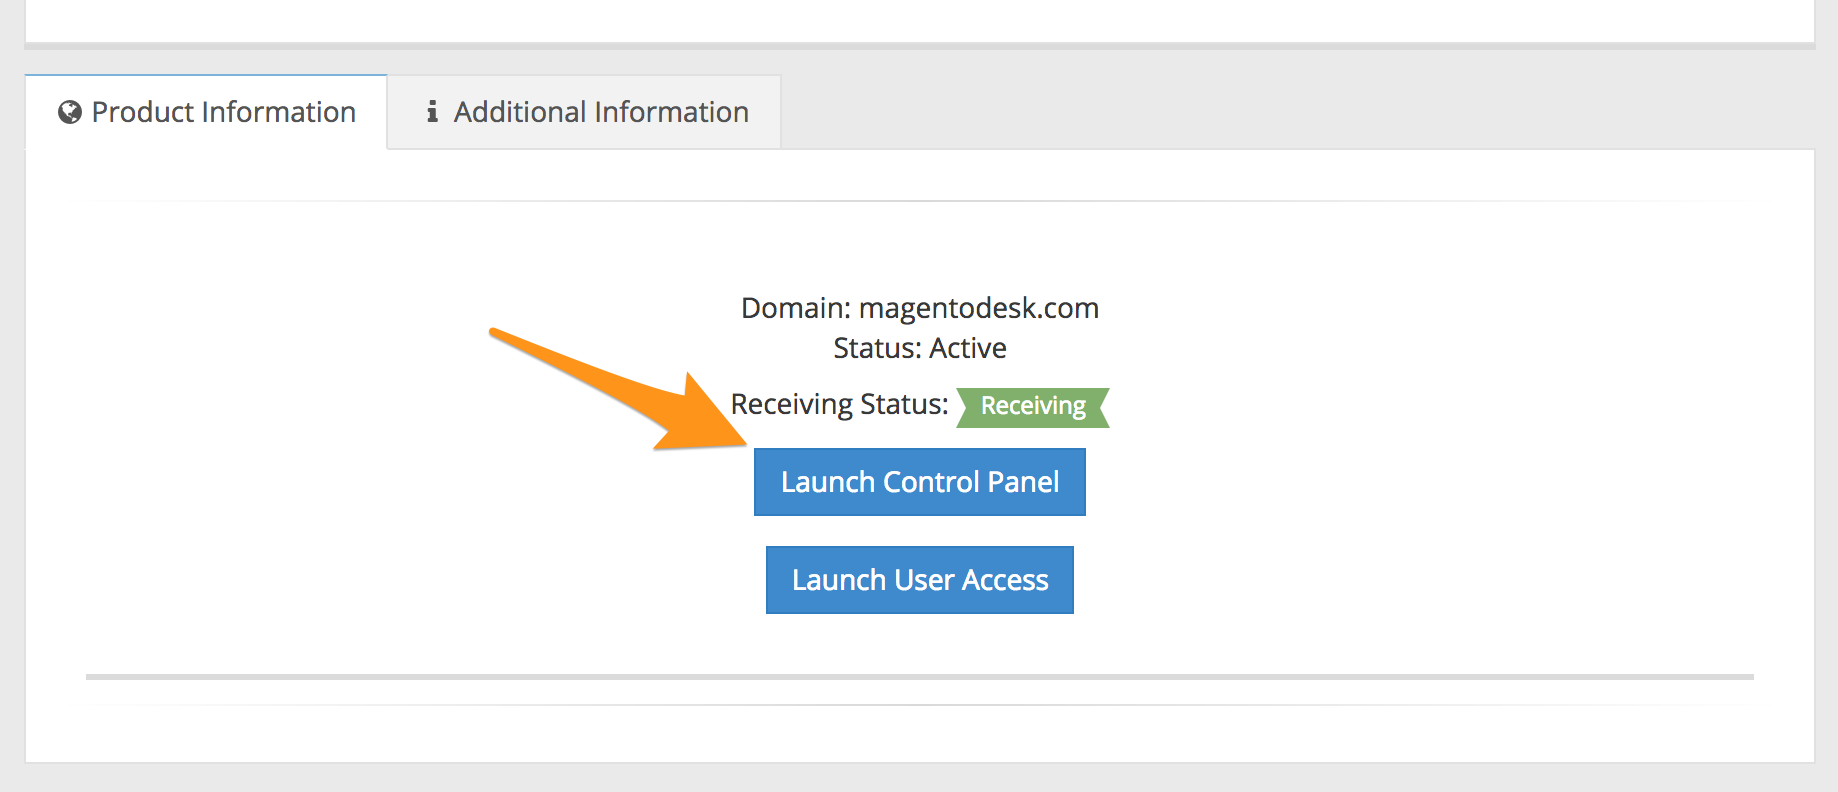
Scroll down on the “Manage Product” page, then click Launch Control Panel on the “Product Information” tab.
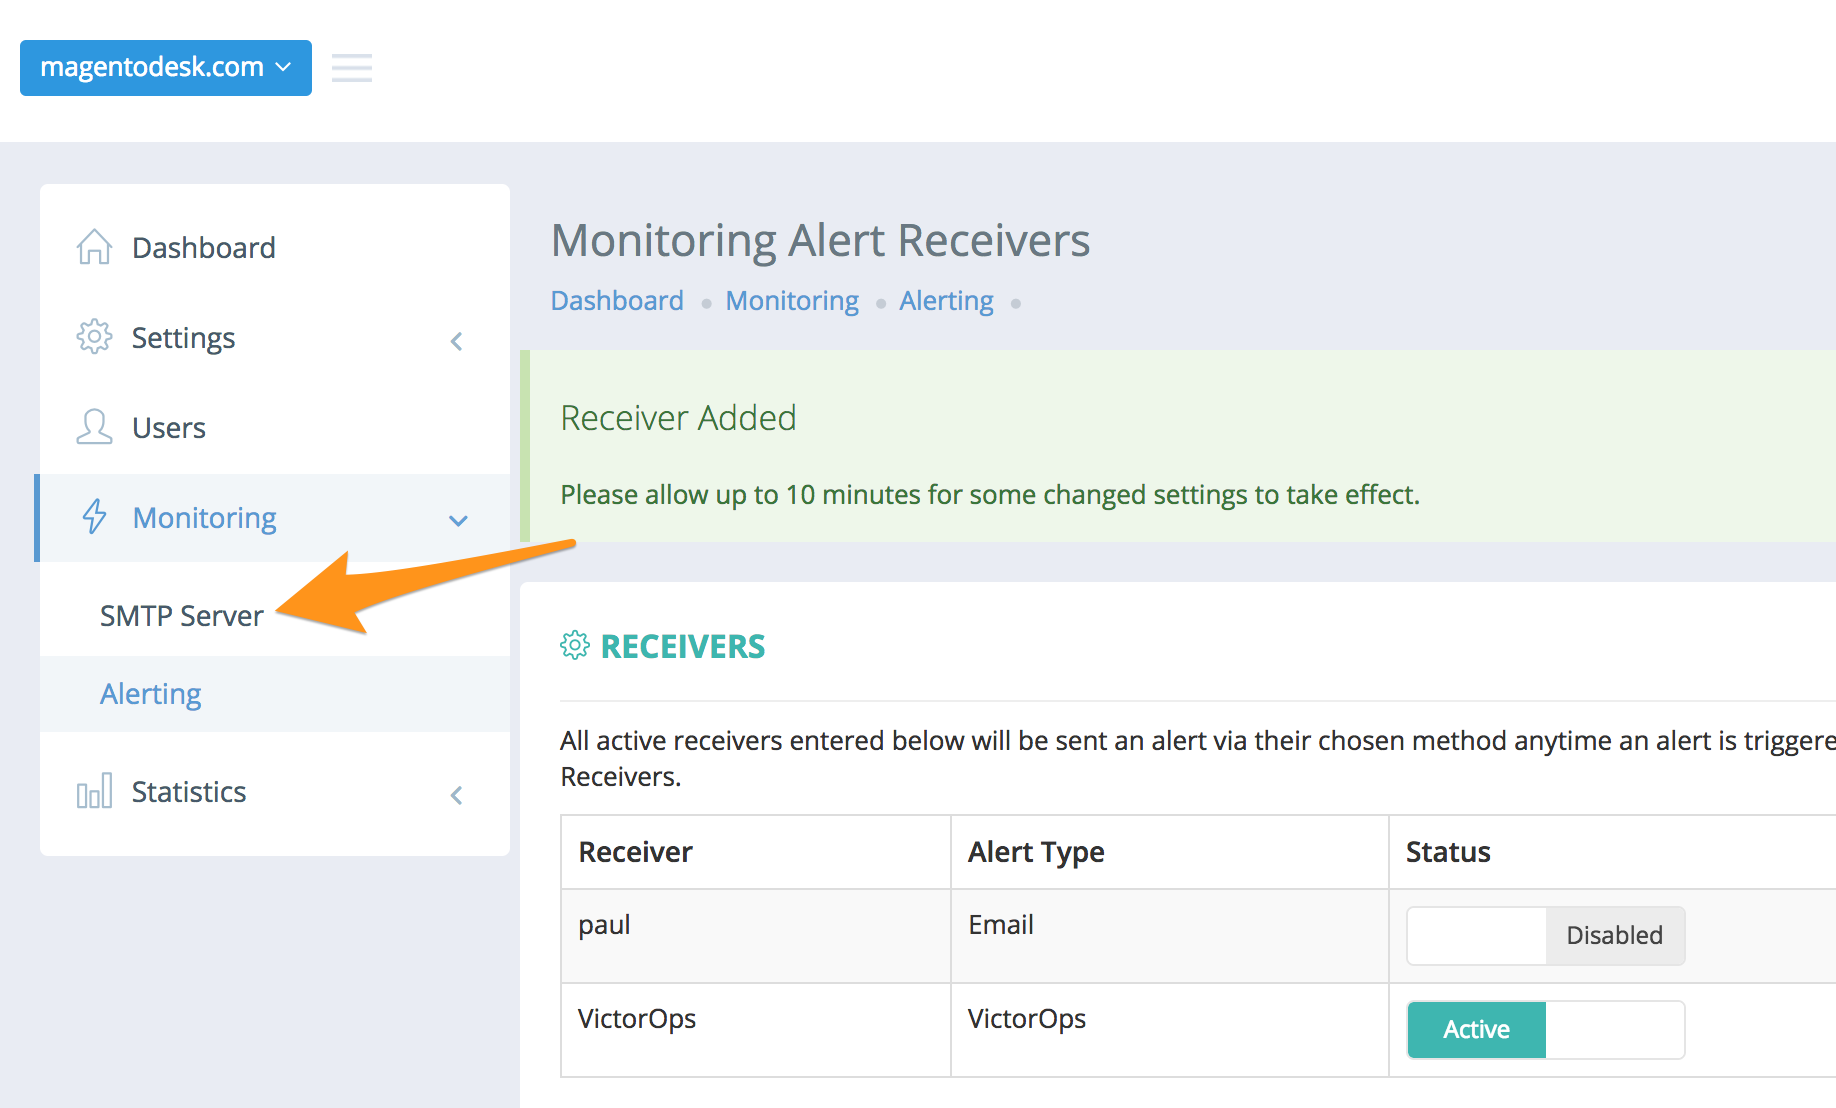
From the Mailhop Control Panel, select Monitoring from the menu of the left, then select Alerting.

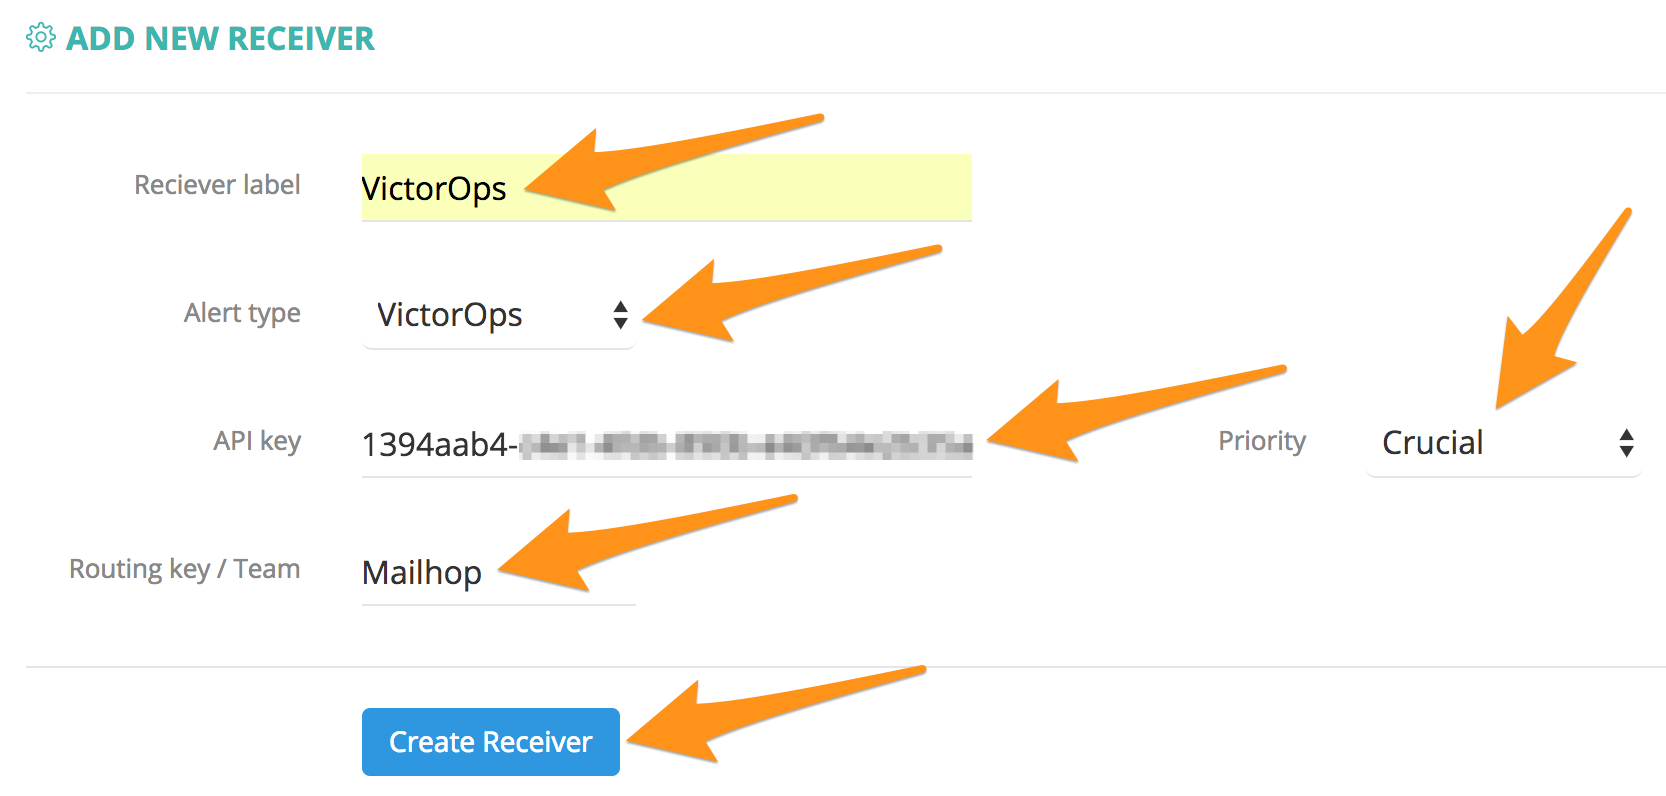
In the “ADD NEW RECEIVER” section, select VictorOps from the “Alert type” dropdown menu, then enter a label in the “Receiver label” field. Next, paste the “API key” from the “In VictorOps” section into the “API key” field, then enter the routing key you want to use into the “Routing key / Team” field. Finally, select the option you want from the “Priority” dropdown menu and click Create Receiver.
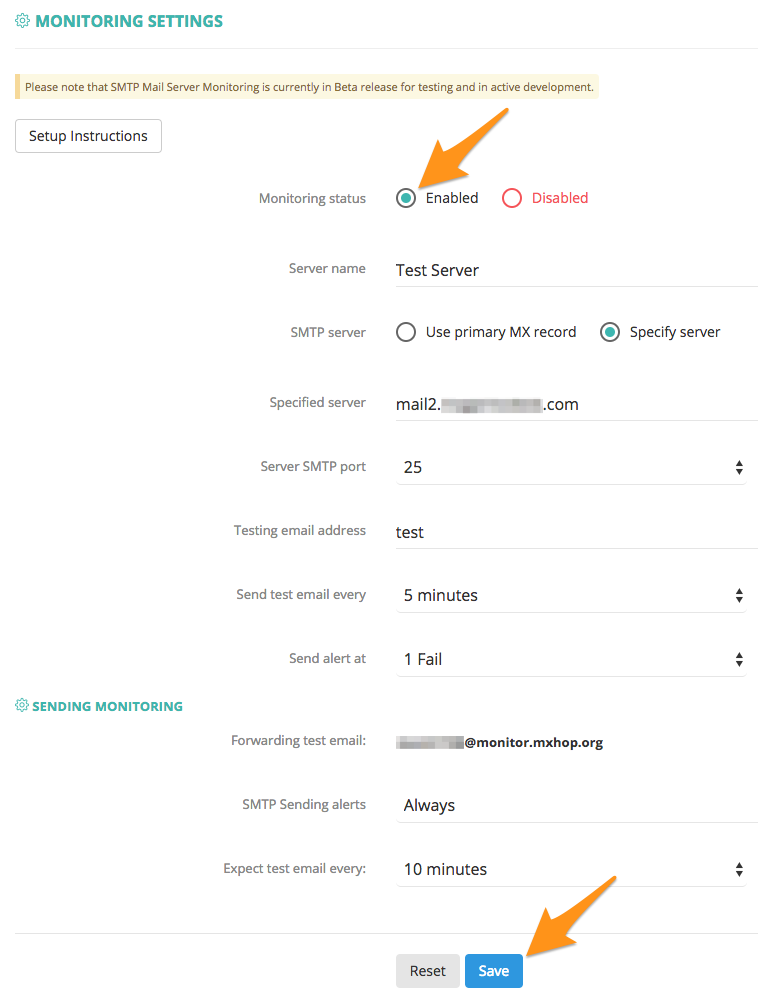
Select SMTP Server from the menu on the left.
Set “Monitoring status” to Enabled, then click Save.
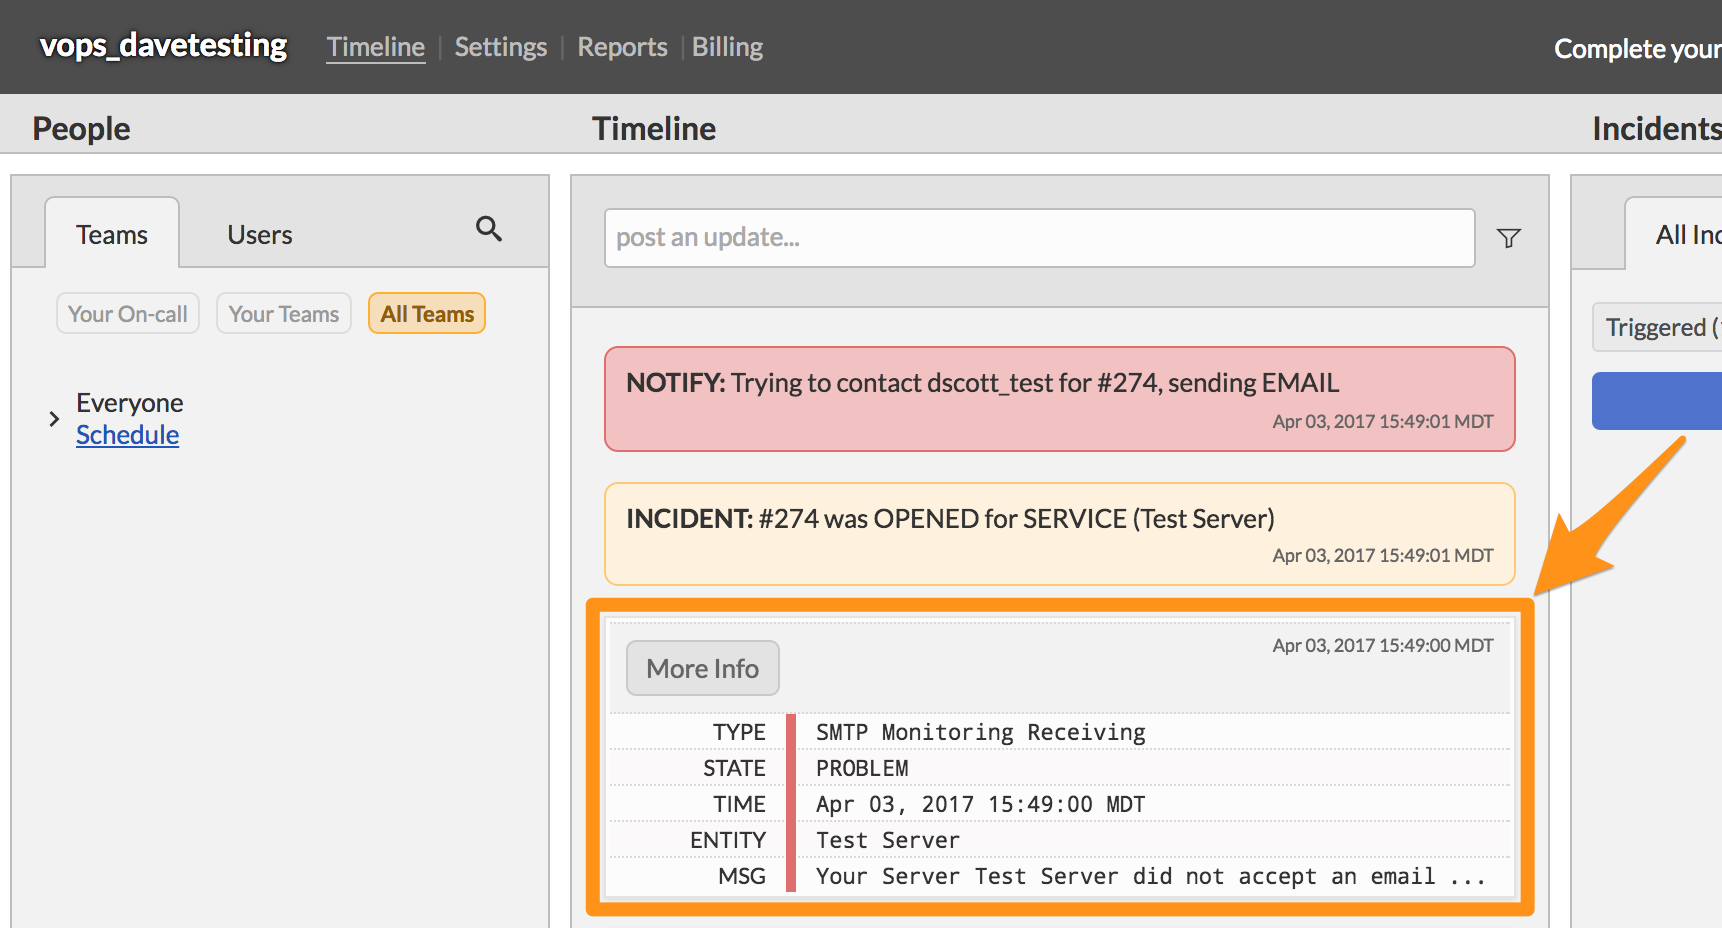
Mailhop alerts should start showing up in your VictorOps timeline as they are generated after a 10-15 minute delay for the settings to take effect.
You have completed setting up this integration. If you have any questions, please contact VictorOps support.