About Splunk On-Call and New Relic
Operations and development teams can use the New Relic integration in multiple ways to instrument browsers, JVMs, ruby apps, and more. Teams can define alert queries inside New Relic, then deliver them through Splunk On-Call to the proper escalation team. With varied URLs that hold different routing keys, you can easily manage multiple on-call teams and New Relic channels.
With the Splunk On-Call and New Relic Integration, teams are able to:
- Integrate New Relic with Splunk On-Call for complete awareness of application performance and alerts
- Collaborate in the Splunk On-Call timeline around New Relic monitoring data to solve problems in real-time
- Route alerts and New Relic incidents through Splunk On-Call with on-call schedules to ensure the right people are appropriately notified (via email, SMS, phone, iPhone/Android push notification, etc.)
Versions Supported: N/A (SaaS)
Splunk On-Call Version Required: Starter, Growth, or Enterprise
The following is a walkthrough of both versions of the New Relic integration. Use it to send alerts from New Relic into the Splunk On-Call timeline.
Enable the New Relic Integration in Splunk On-Call
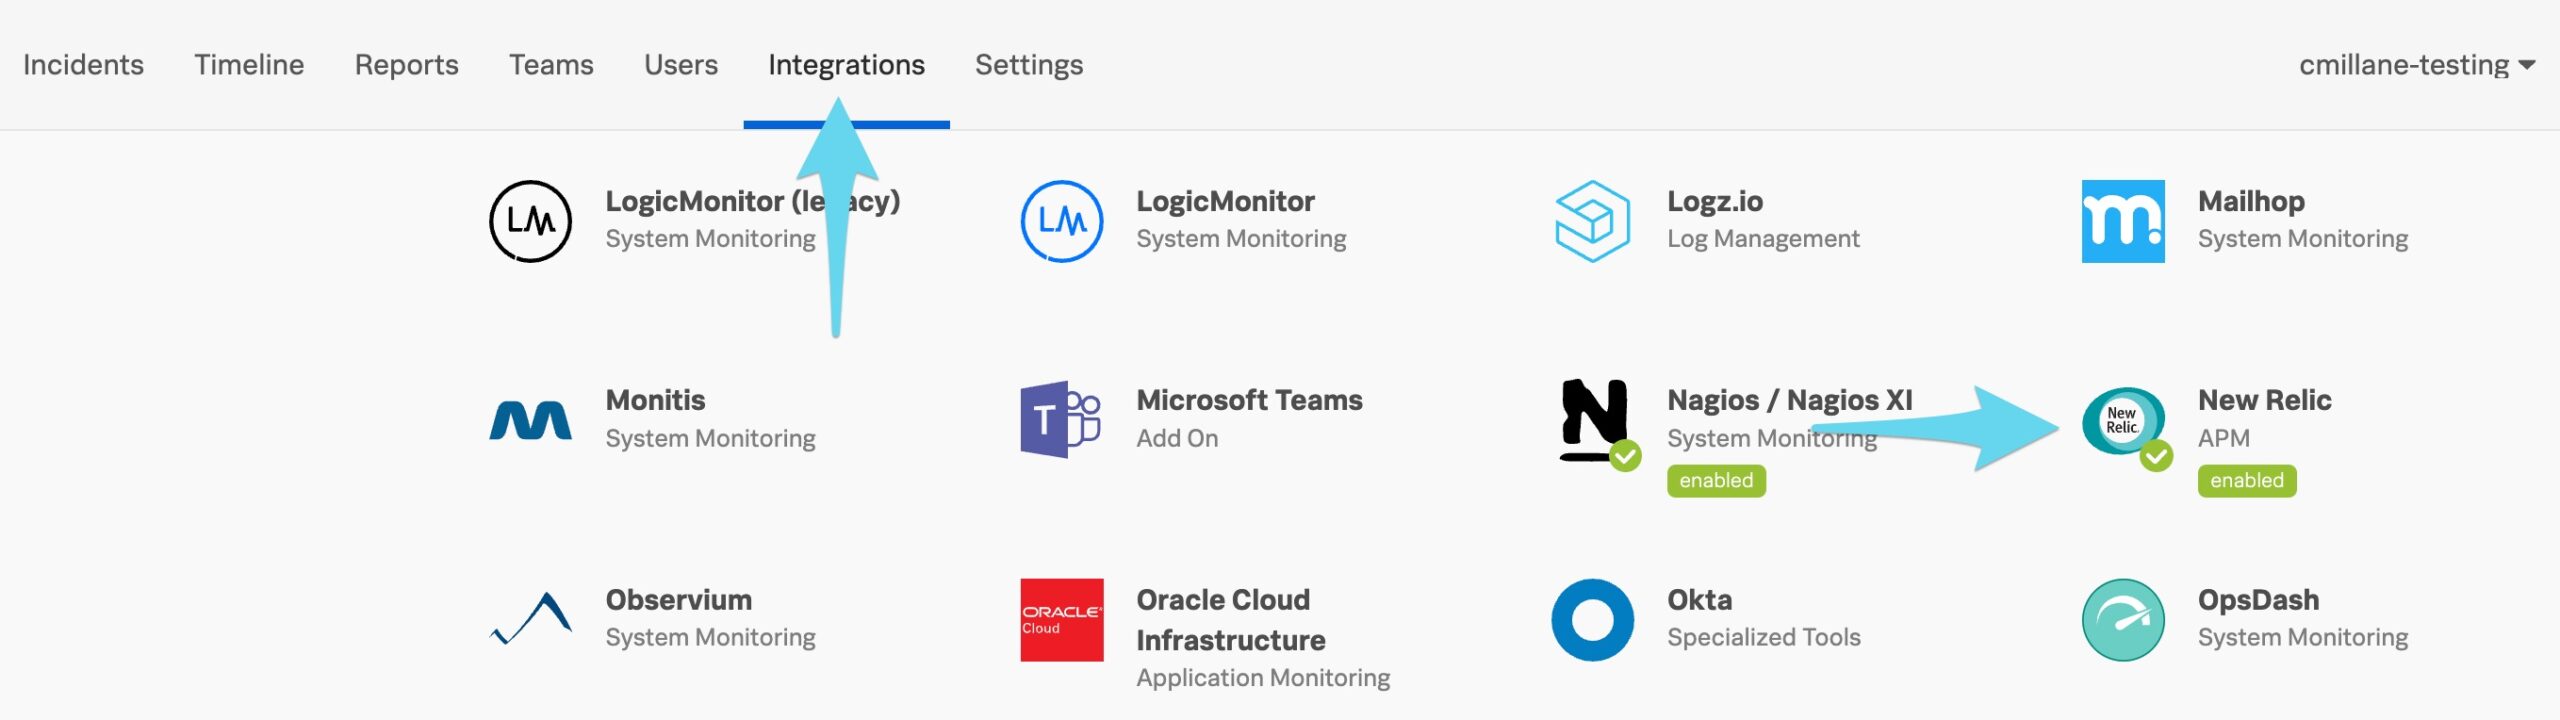
From the main timeline select Integrations >> 3rd Party Integrations >> New Relic.
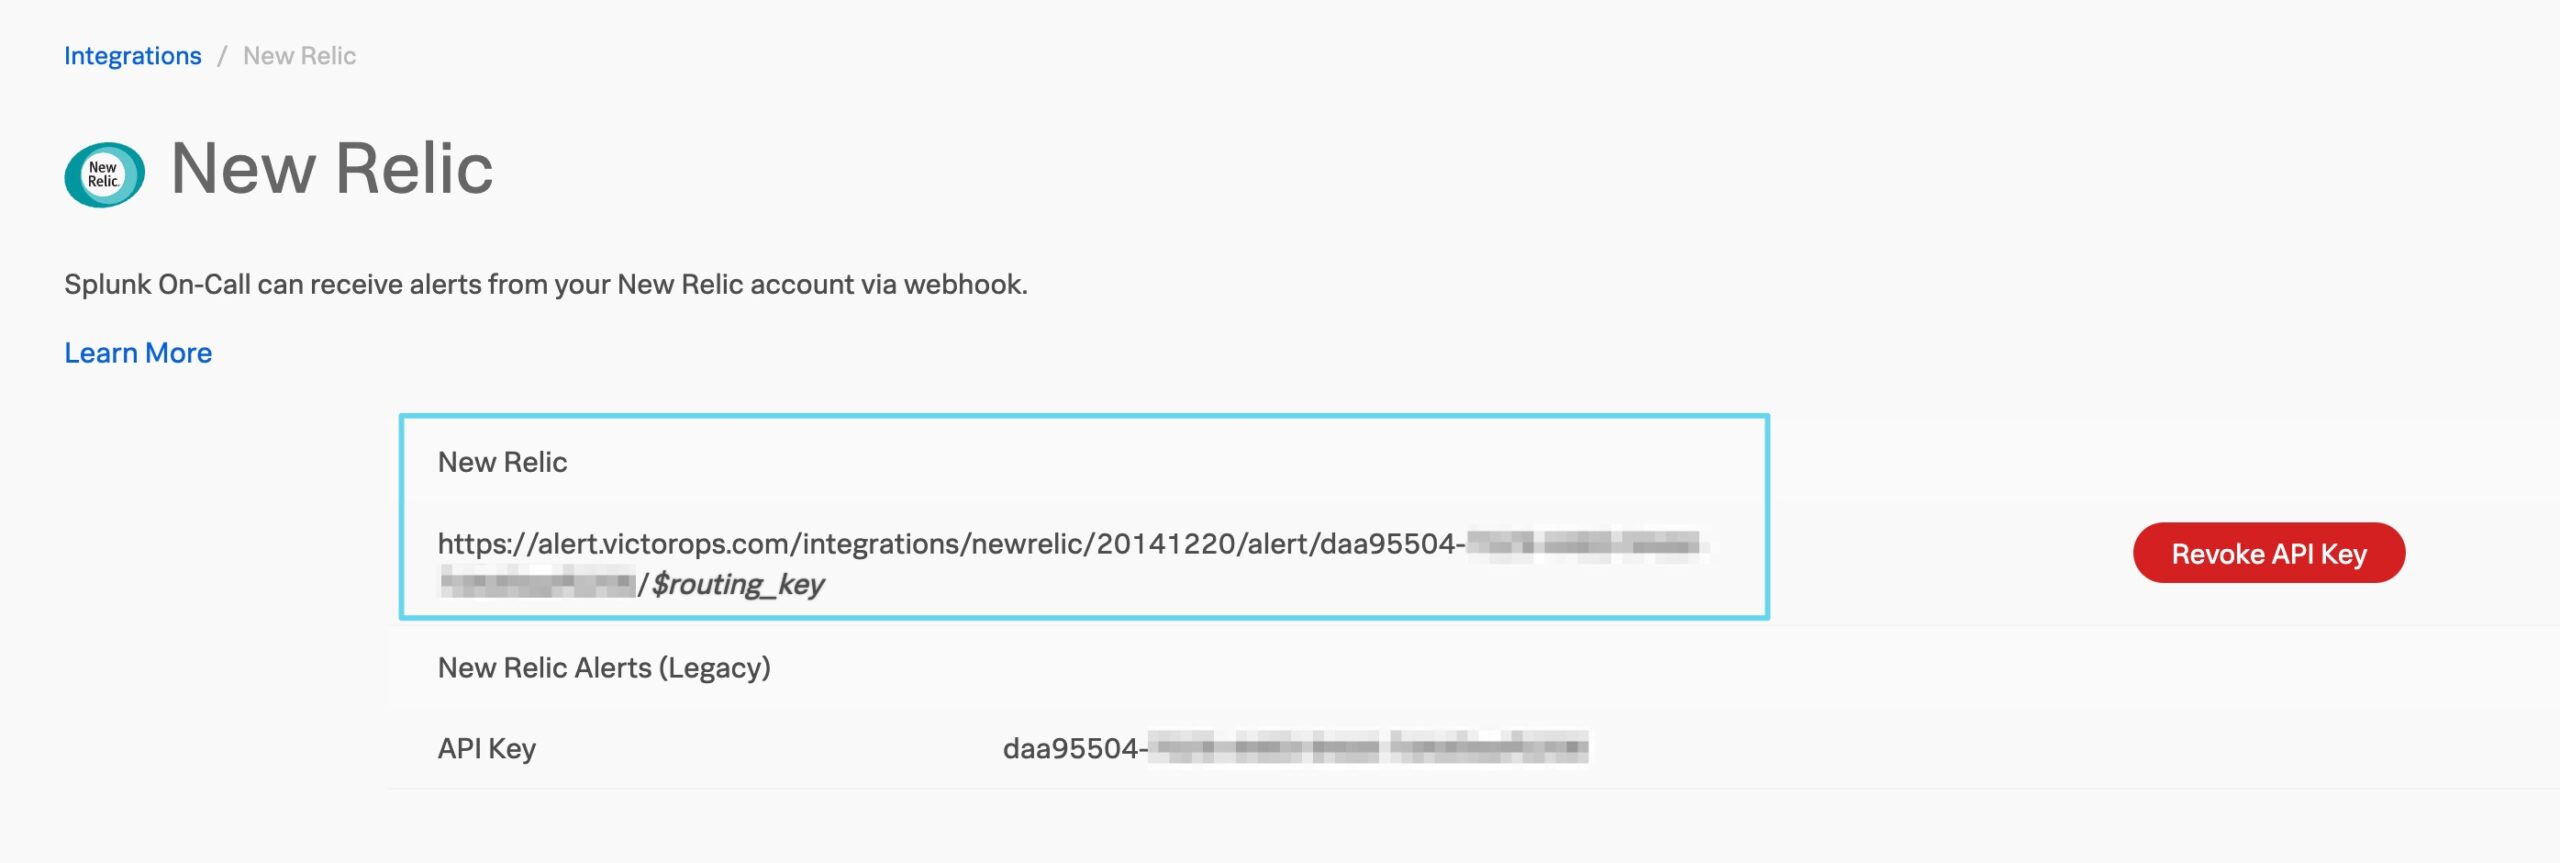
 If the integration hasn’t yet been enabled, click on the Enable Integration button to generate your API Keys. Copy the top full URL to your clipboard for use later in New Relic.
Link Splunk On-Call with New Relic
Bring up the New Relic Alerts & AI interface and click into the Workflows section. Add a new workflow.
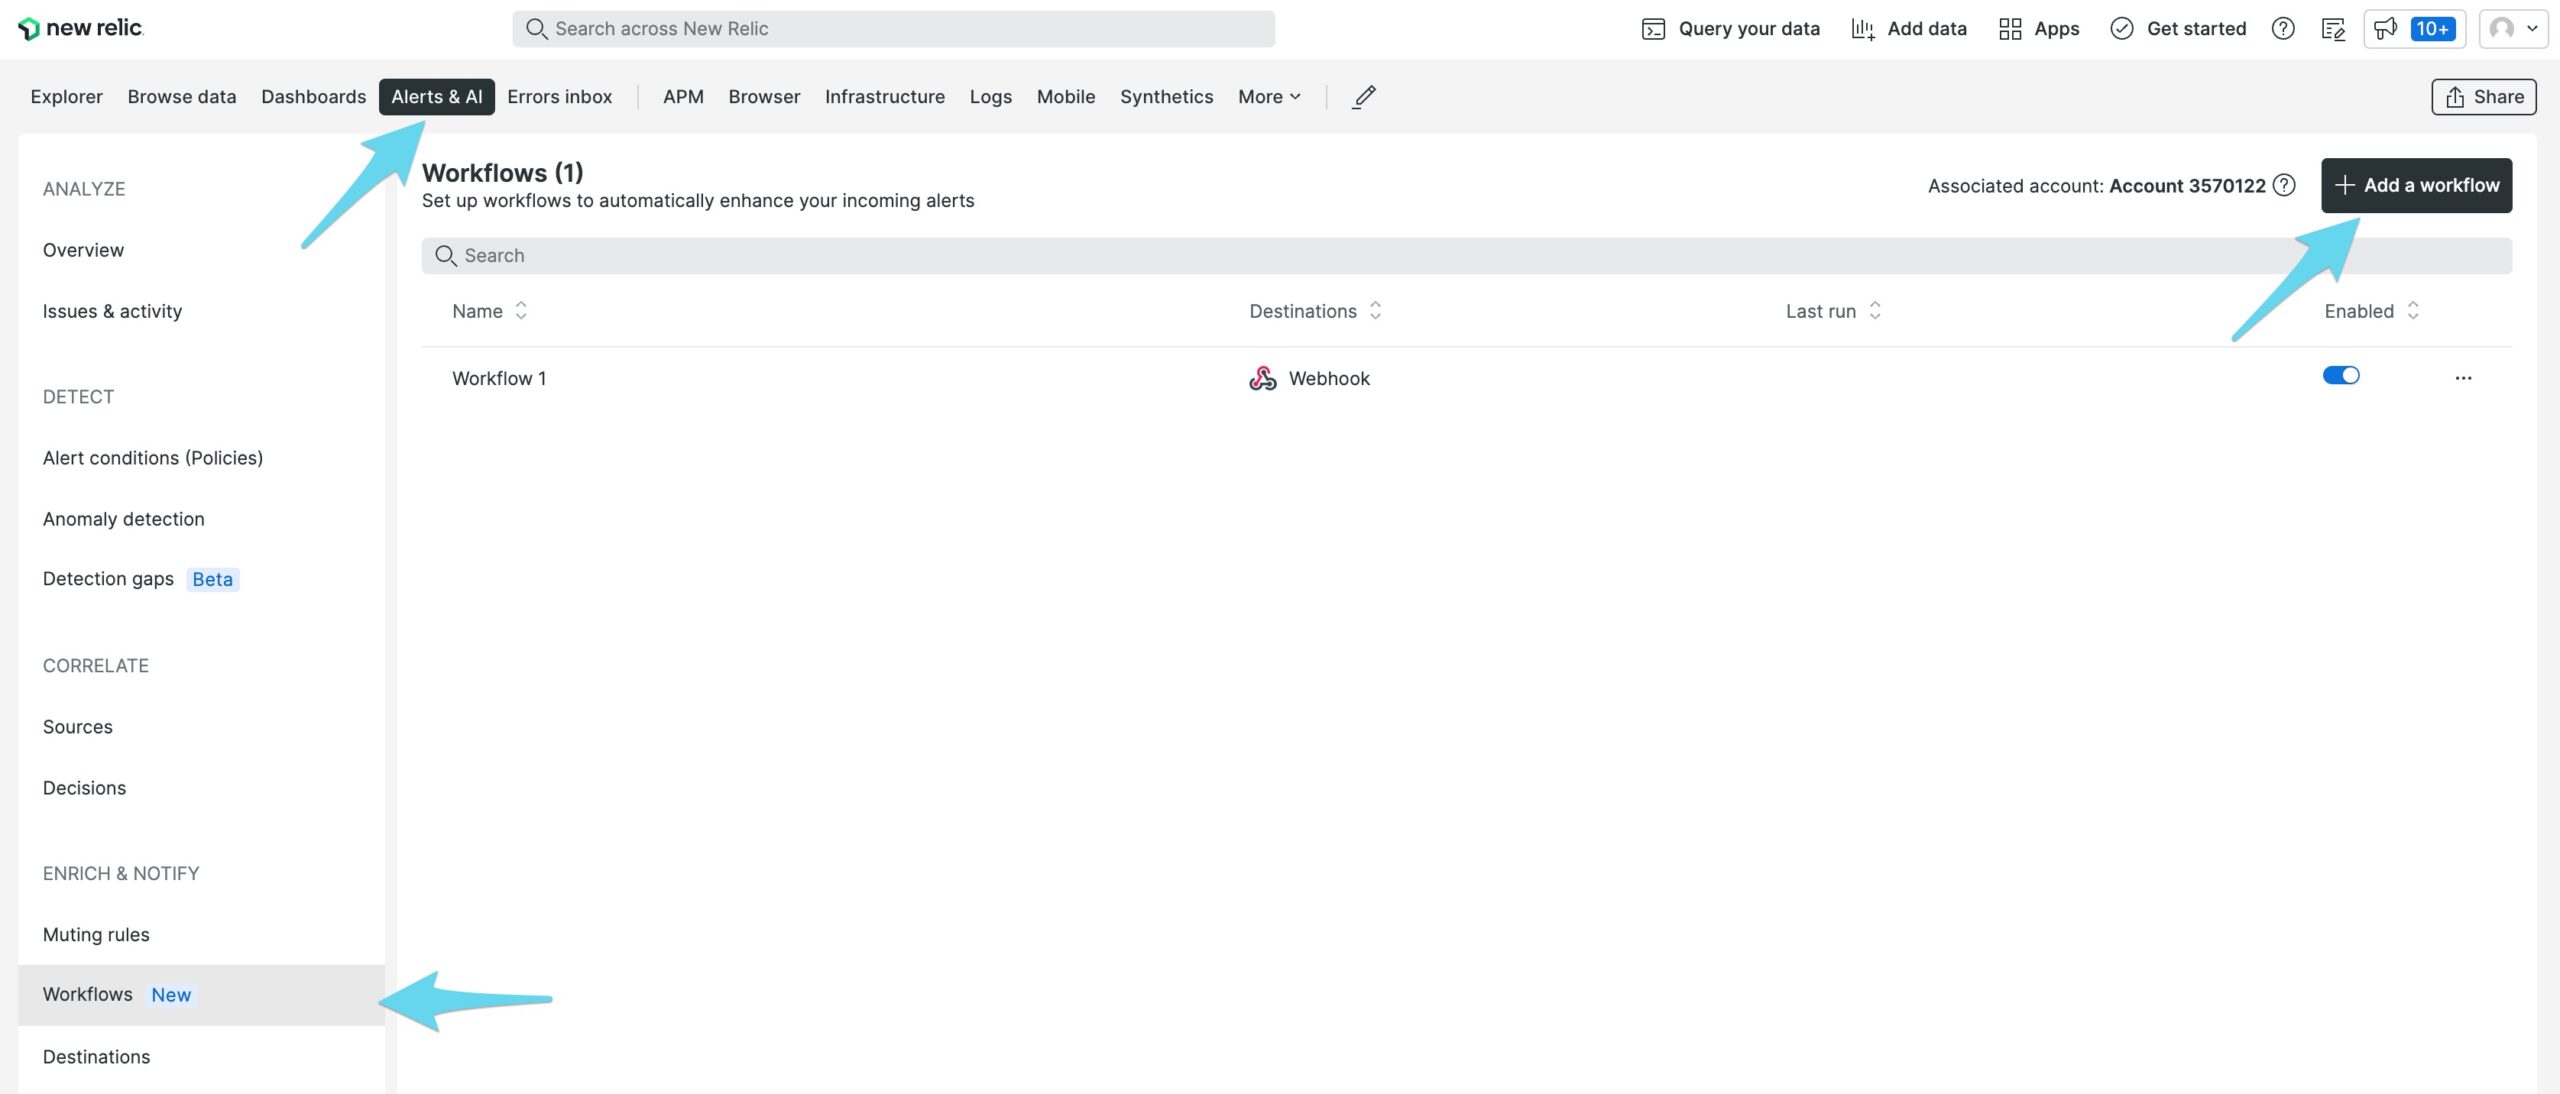
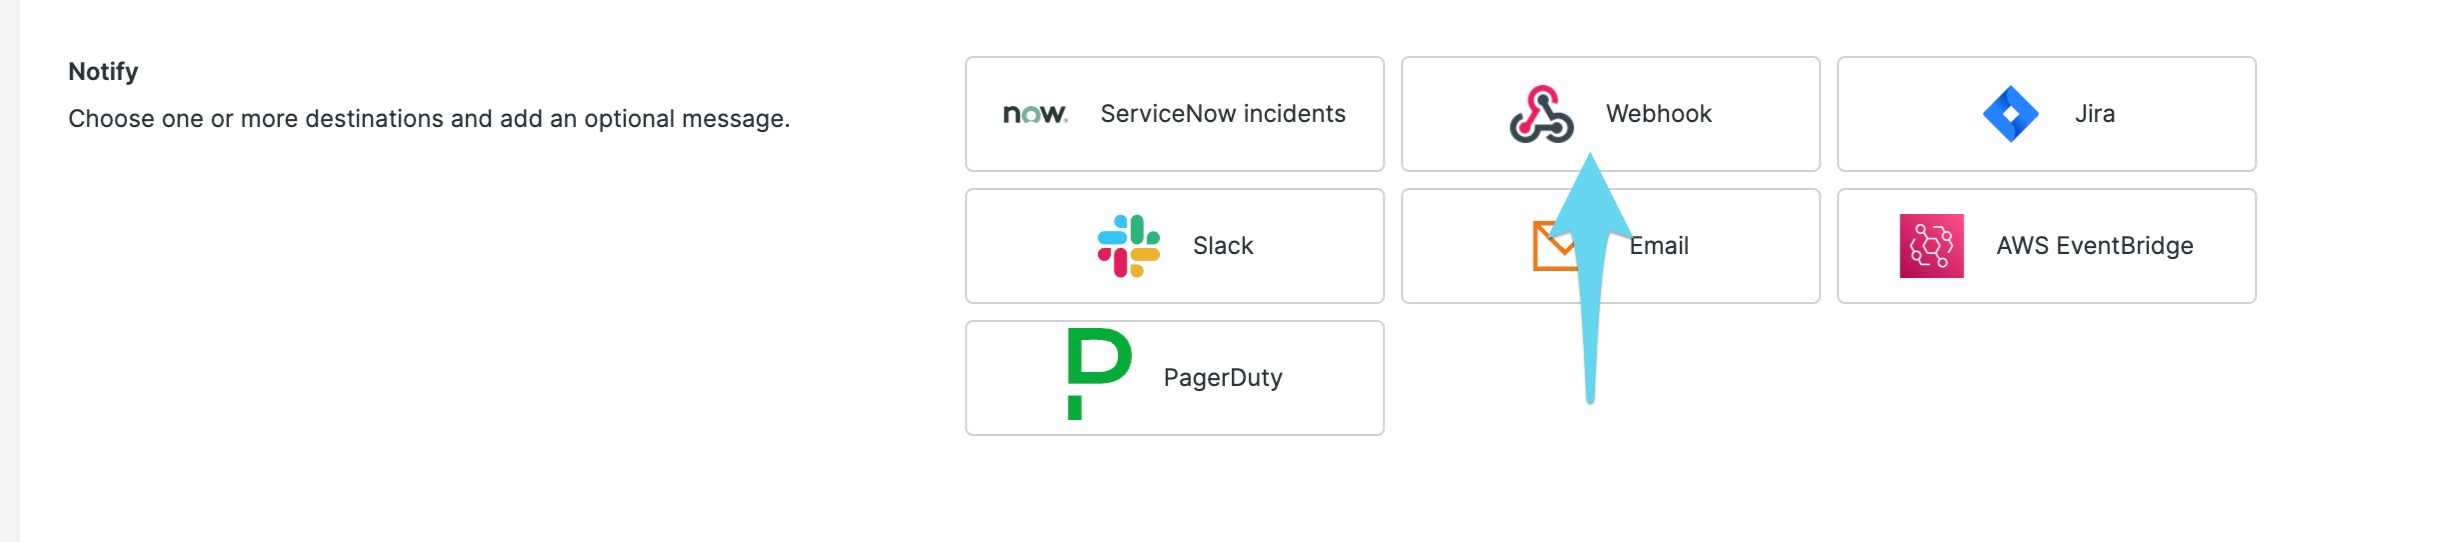
Provide a name for the workflow, define your filtering and muting sections, then choose Webhook under Notify.
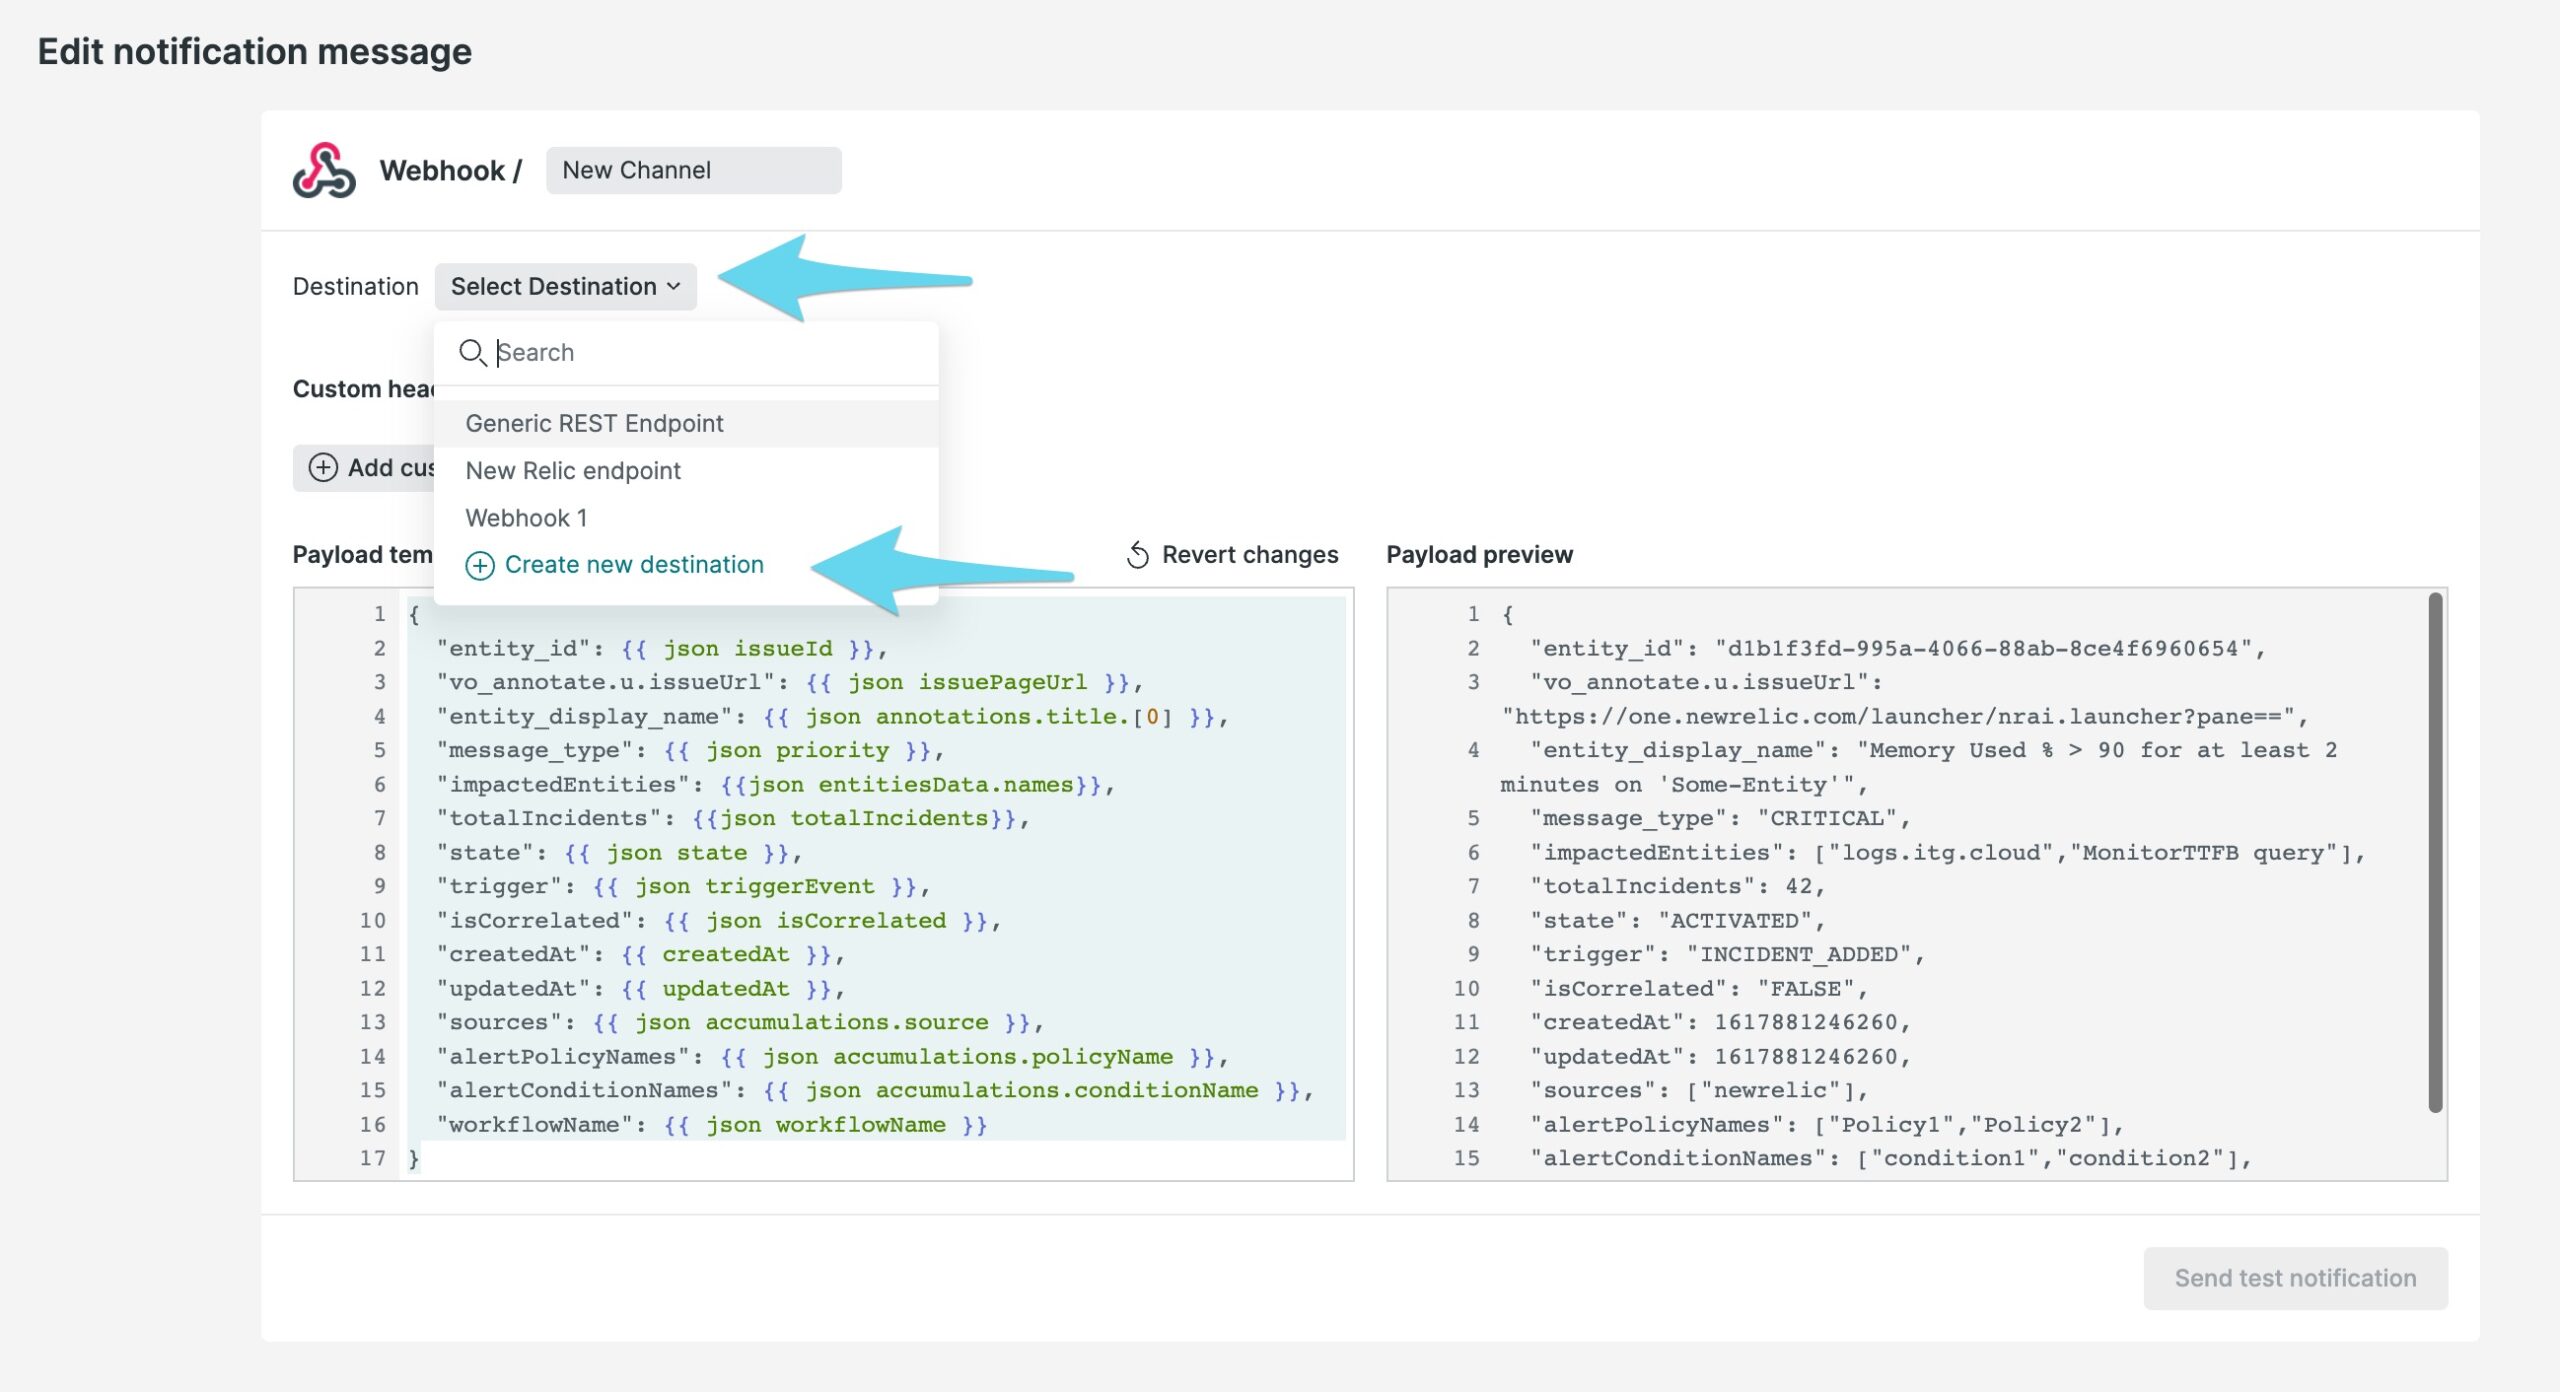
Choose Select Destination, then Create new destination
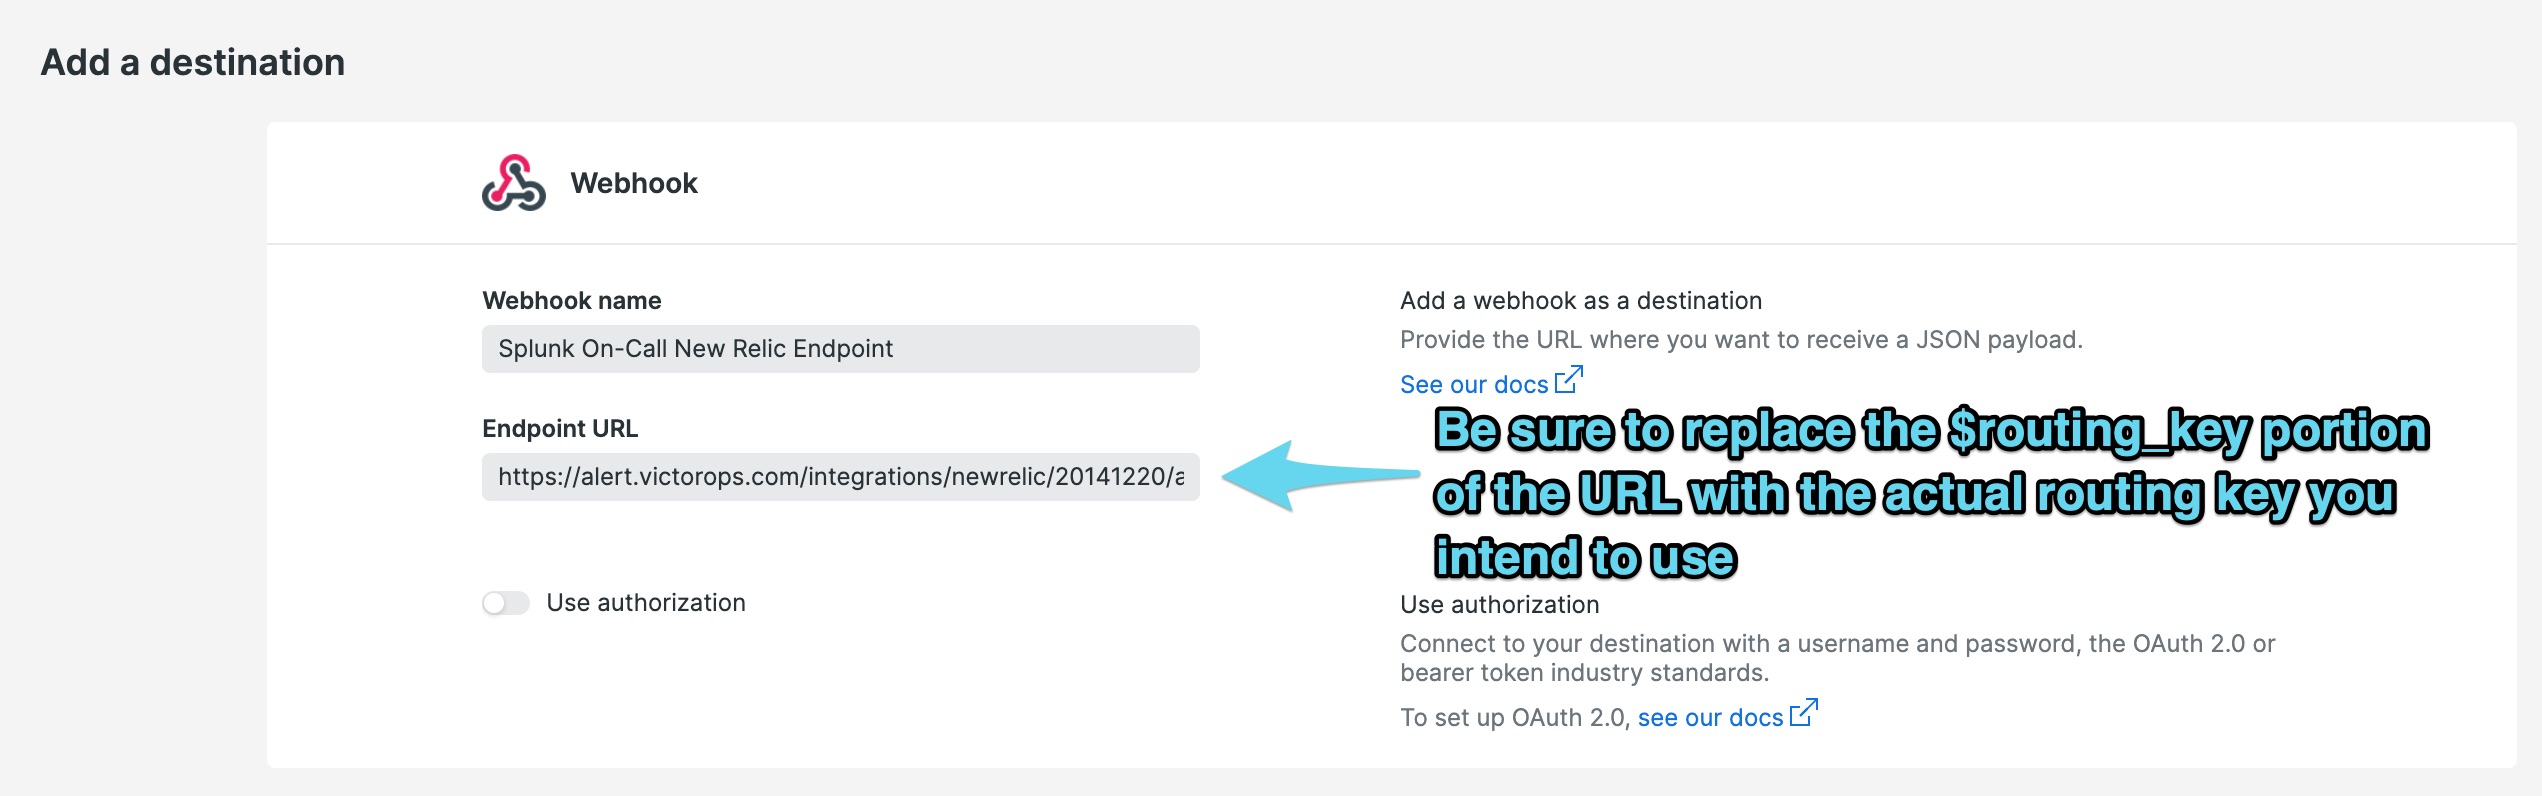
Paste in the New Relic endpoint address you copied earlier into the Endpoint URL section. Be sure to replace the trailing $routing_key with the actual routing key you intend to use for the alert. For more info on routing keys, please see this article.
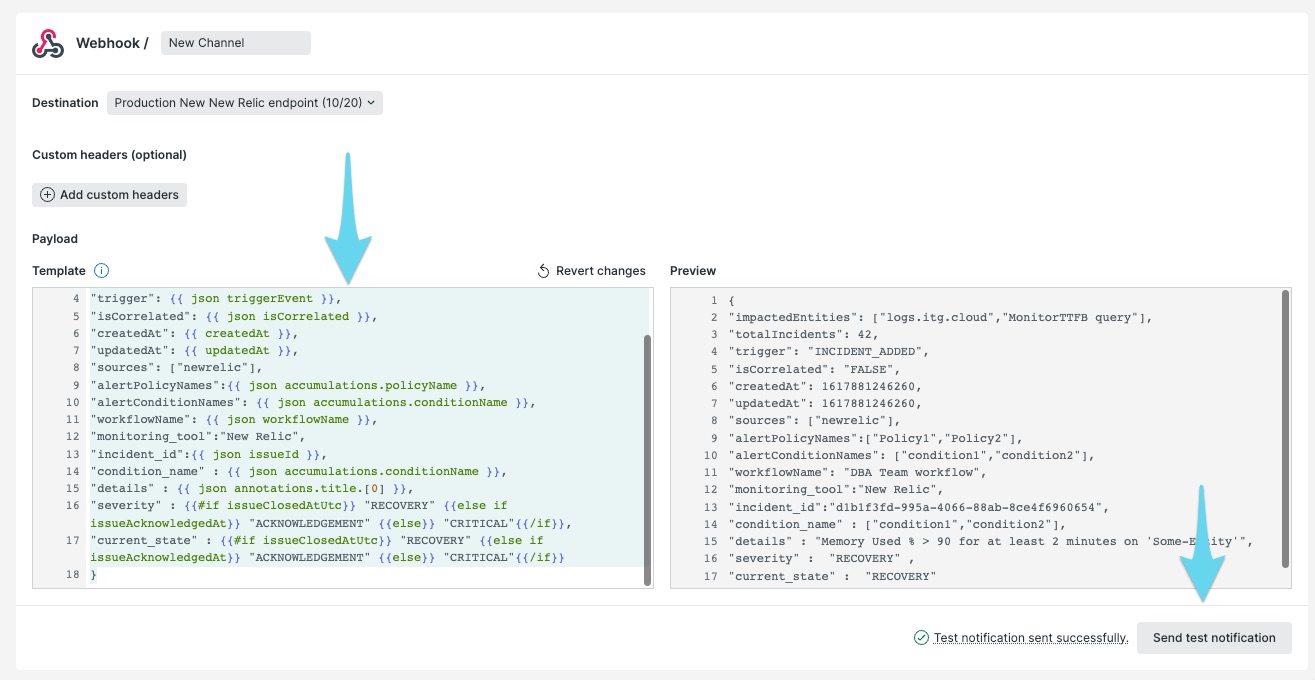
After saving the destination, update the payload provided for the webhook. Below is our recommended payload, though you’re welcome to make any customizations so long as the JSON formatting is retained. Click Send test notification when done with adjustments to ensure the notification can hit your Splunk On-Call account.
 Lastly, click Update Message, then Activate Workflow to save your changes.
Sample Payload:
{
"impactedEntities": {{json entitiesData.names}},
"totalIncidents": {{json totalIncidents}},
"trigger": {{ json triggerEvent }},
"isCorrelated": {{ json isCorrelated }},
"createdAt": {{ createdAt }},
"updatedAt": {{ updatedAt }},
"sources": ["newrelic"],
"alertPolicyNames":{{ json accumulations.policyName }},
"alertConditionNames": {{ json accumulations.conditionName }},
"workflowName": {{ json workflowName }},
"monitoring_tool":"New Relic",
"incident_id":{{ json issueId }},
"condition_name" : {{ json accumulations.conditionName }},
"details" : {{ json annotations.title.[0] }},
"severity" : "CRITICAL",
"current_state" : {{#if issueClosedAtUtc}} "CLOSED" {{else if issueAcknowledgedAt}} "ACKNOWLEDGED" {{else}} "OPEN"{{/if}},
"event_type": "INCIDENT"
}
The standard setup is now complete. Repeat as necessary to build new workflows that notify different Webhook Channels, each holding different routing keys. This will allow you to route alerts to the appropriate groups in Splunk On-Call.
Legacy Version of New Relic
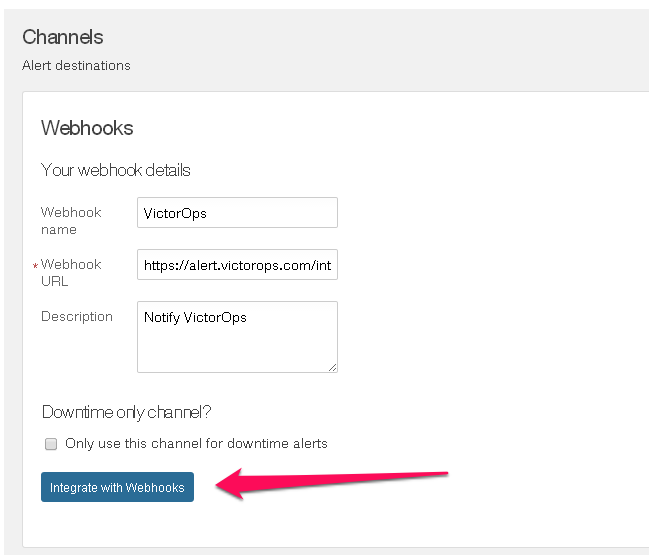
- Add VictorOps as a WebHook in New Relic.
- Click Tools, then Alert policies:
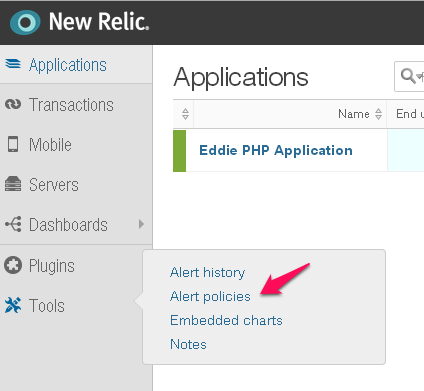
- Click Tools, then Alert policies:
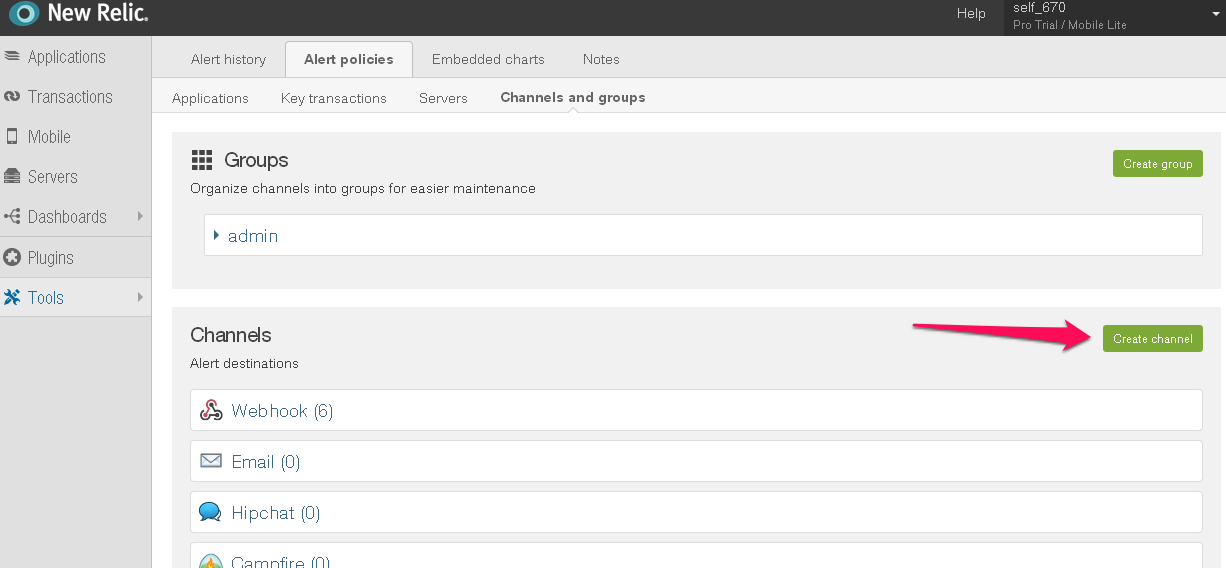
- Click Channels and Groups:

- Select Create Channel, then Webhook:
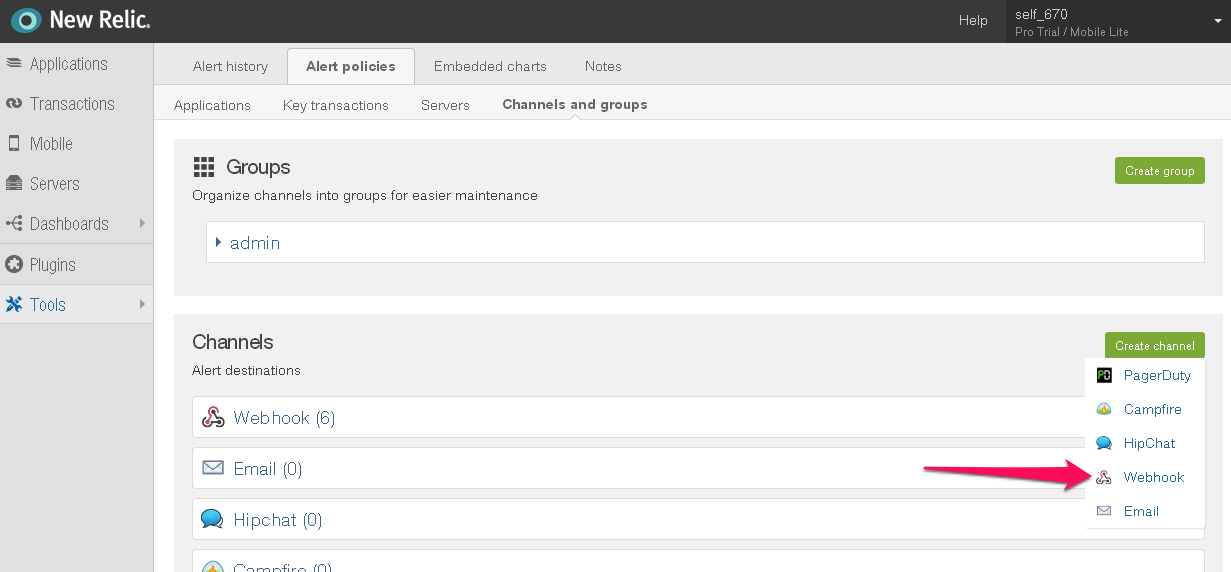
- Enter any name you’d like
- Enter the following for the WebHook URL, make sure to include the correct Key and Route_Key:
https://alert.victorops.com/integrations/newrelic/20140115/alert/--key--/--routing-- - Select Integrate with WebHooks