About AWS Cloudwatch and Splunk On-Call
The Splunk On-Call (formerly VictorOps) and AWS Cloudwatch integration allows you to forward AWS Cloudwatch alerts into Splunk On-Call to notify the correct on-call users. Create on-call schedules, rotations, and escalation policies in Splunk On-Call, then route AWS alerts based on those parameters.
When events meet predetermined monitoring criteria, AWS sends an alert notification. Then, in the Splunk On-Call timeline, users can route and escalate critical alert data to the correct people. With the Splunk On-Call and AWS integration, on-call responders can collaborate in real-time around system data to reduce MTTA/MTTR and resolve incidents faster.
Versions Supported: N/A (SaaS)
VictorOps Version Required: Starter, Growth, or Enterprise
What you need to know: This integration works with Amazon CloudWatch only. SNS messages sent from other Amazon services will fail if sent directly to your CloudWatch endpoint in VictorOps.
Our CloudWatch integration allows you to send alerts from Amazon’s CloudWatch into your Splunk On-Call timeline. This guide assumes that you’ve already set up CloudWatch to send alarms to a queue in SNS and that you’re receiving them through some other means, such as email. If you need more information on how to create a new alarm please consult Amazon’s documentation.
NOTE: SNS Messages sent from other Amazon services will fail if sent directly to the Cloudwatch endpoint in Splunk On-Call.
Enable AWS Cloudwatch in Splunk On-Call
In Splunk On-Call, select Integrations >> AWS CloudWatch.
If the integration has not yet been enabled, click the Enable Integration button to generate your endpoint URL. Be sure to replace the “$routing_key” section of your new endpoint with the actual routing key you intend to use. If no routing key is included as part of the endpoint URL, the subscription will not be confirmed. (To view or configure routing keys in VictorOps, click Settings >> Routing Keys)
Multiple SNS subscriptions should be pointed towards the same AWS CloudWatch endpoint in VictorOps. The subscription will not be confirmed if it hits a different endpoint.
Linking Splunk On-Call in AWS Simple Notification Service (SNS)
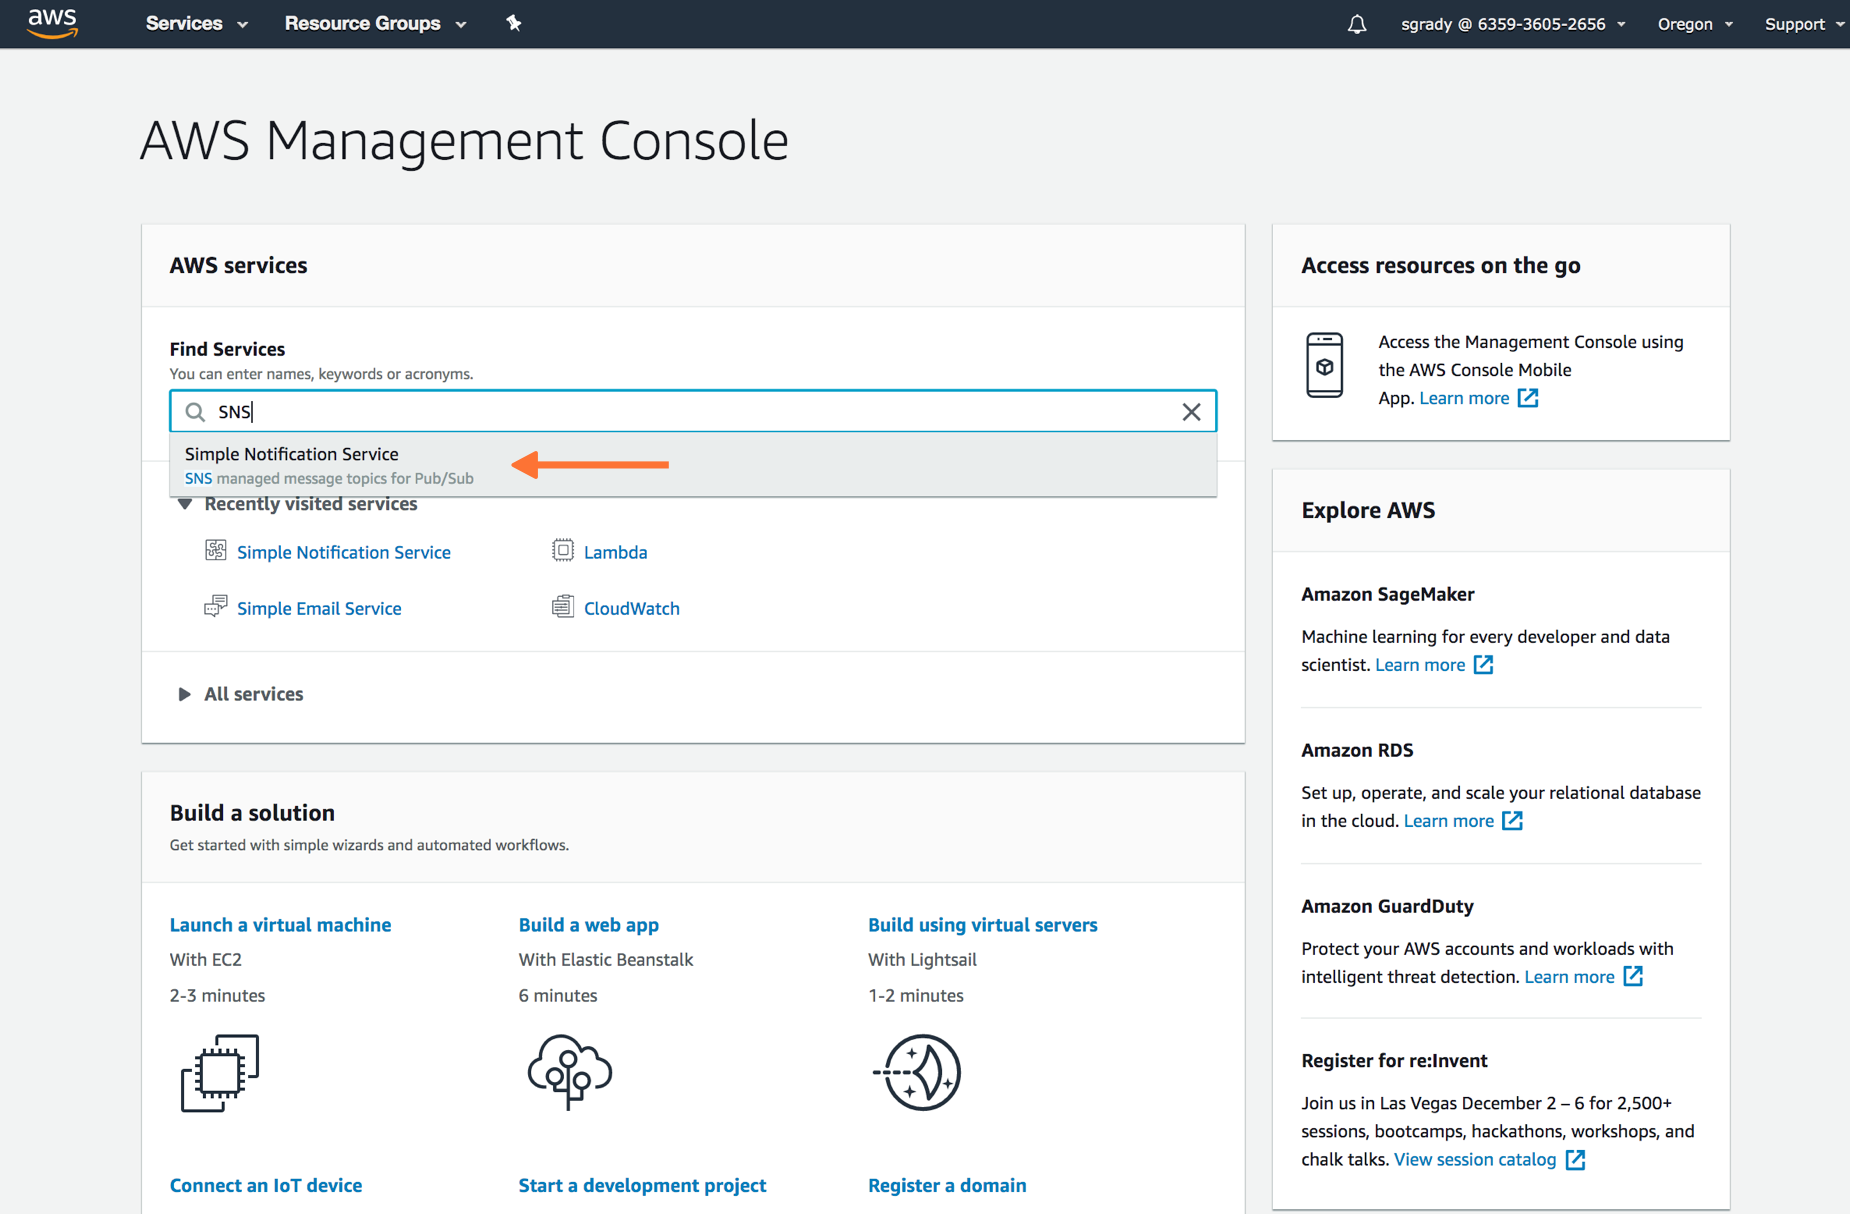
From the main AWS Management Console, navigate to your SNS control panel by searching for “SNS“, in the main search bar.
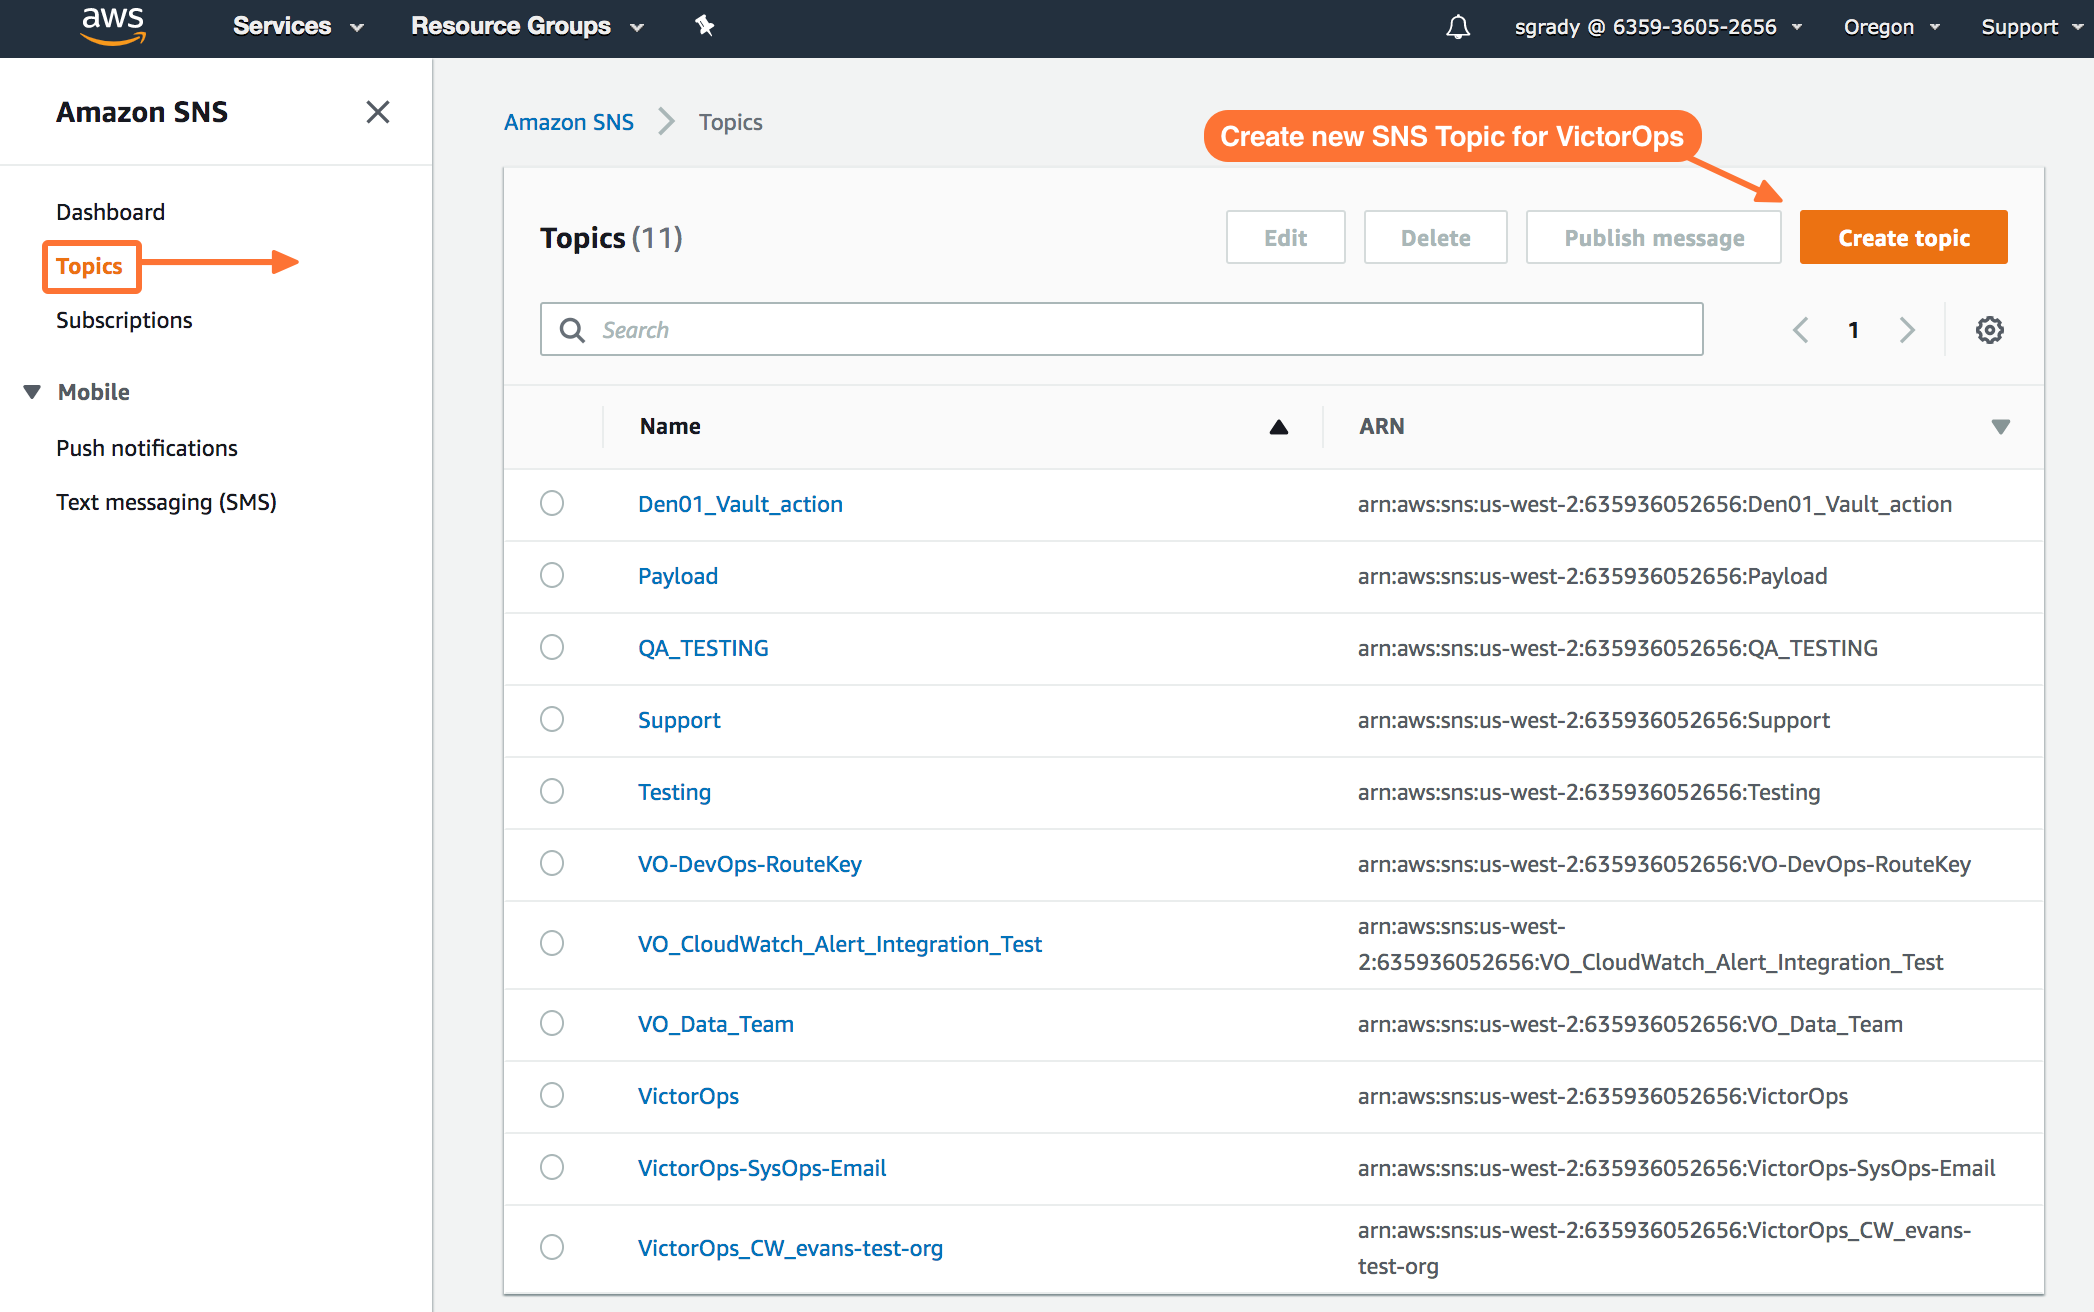
From the SNS dashboard, choose Topics and then select Create topic.
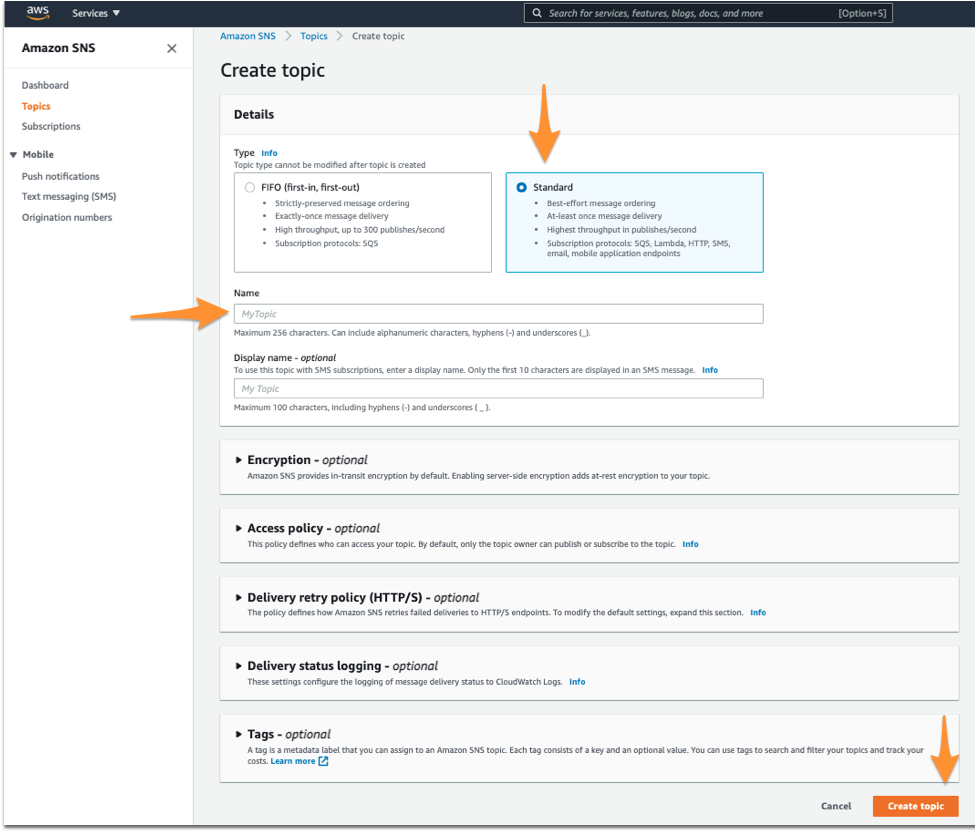
Select Standard for Type. Name your Topic. Then, hit Create Topic at the bottom.
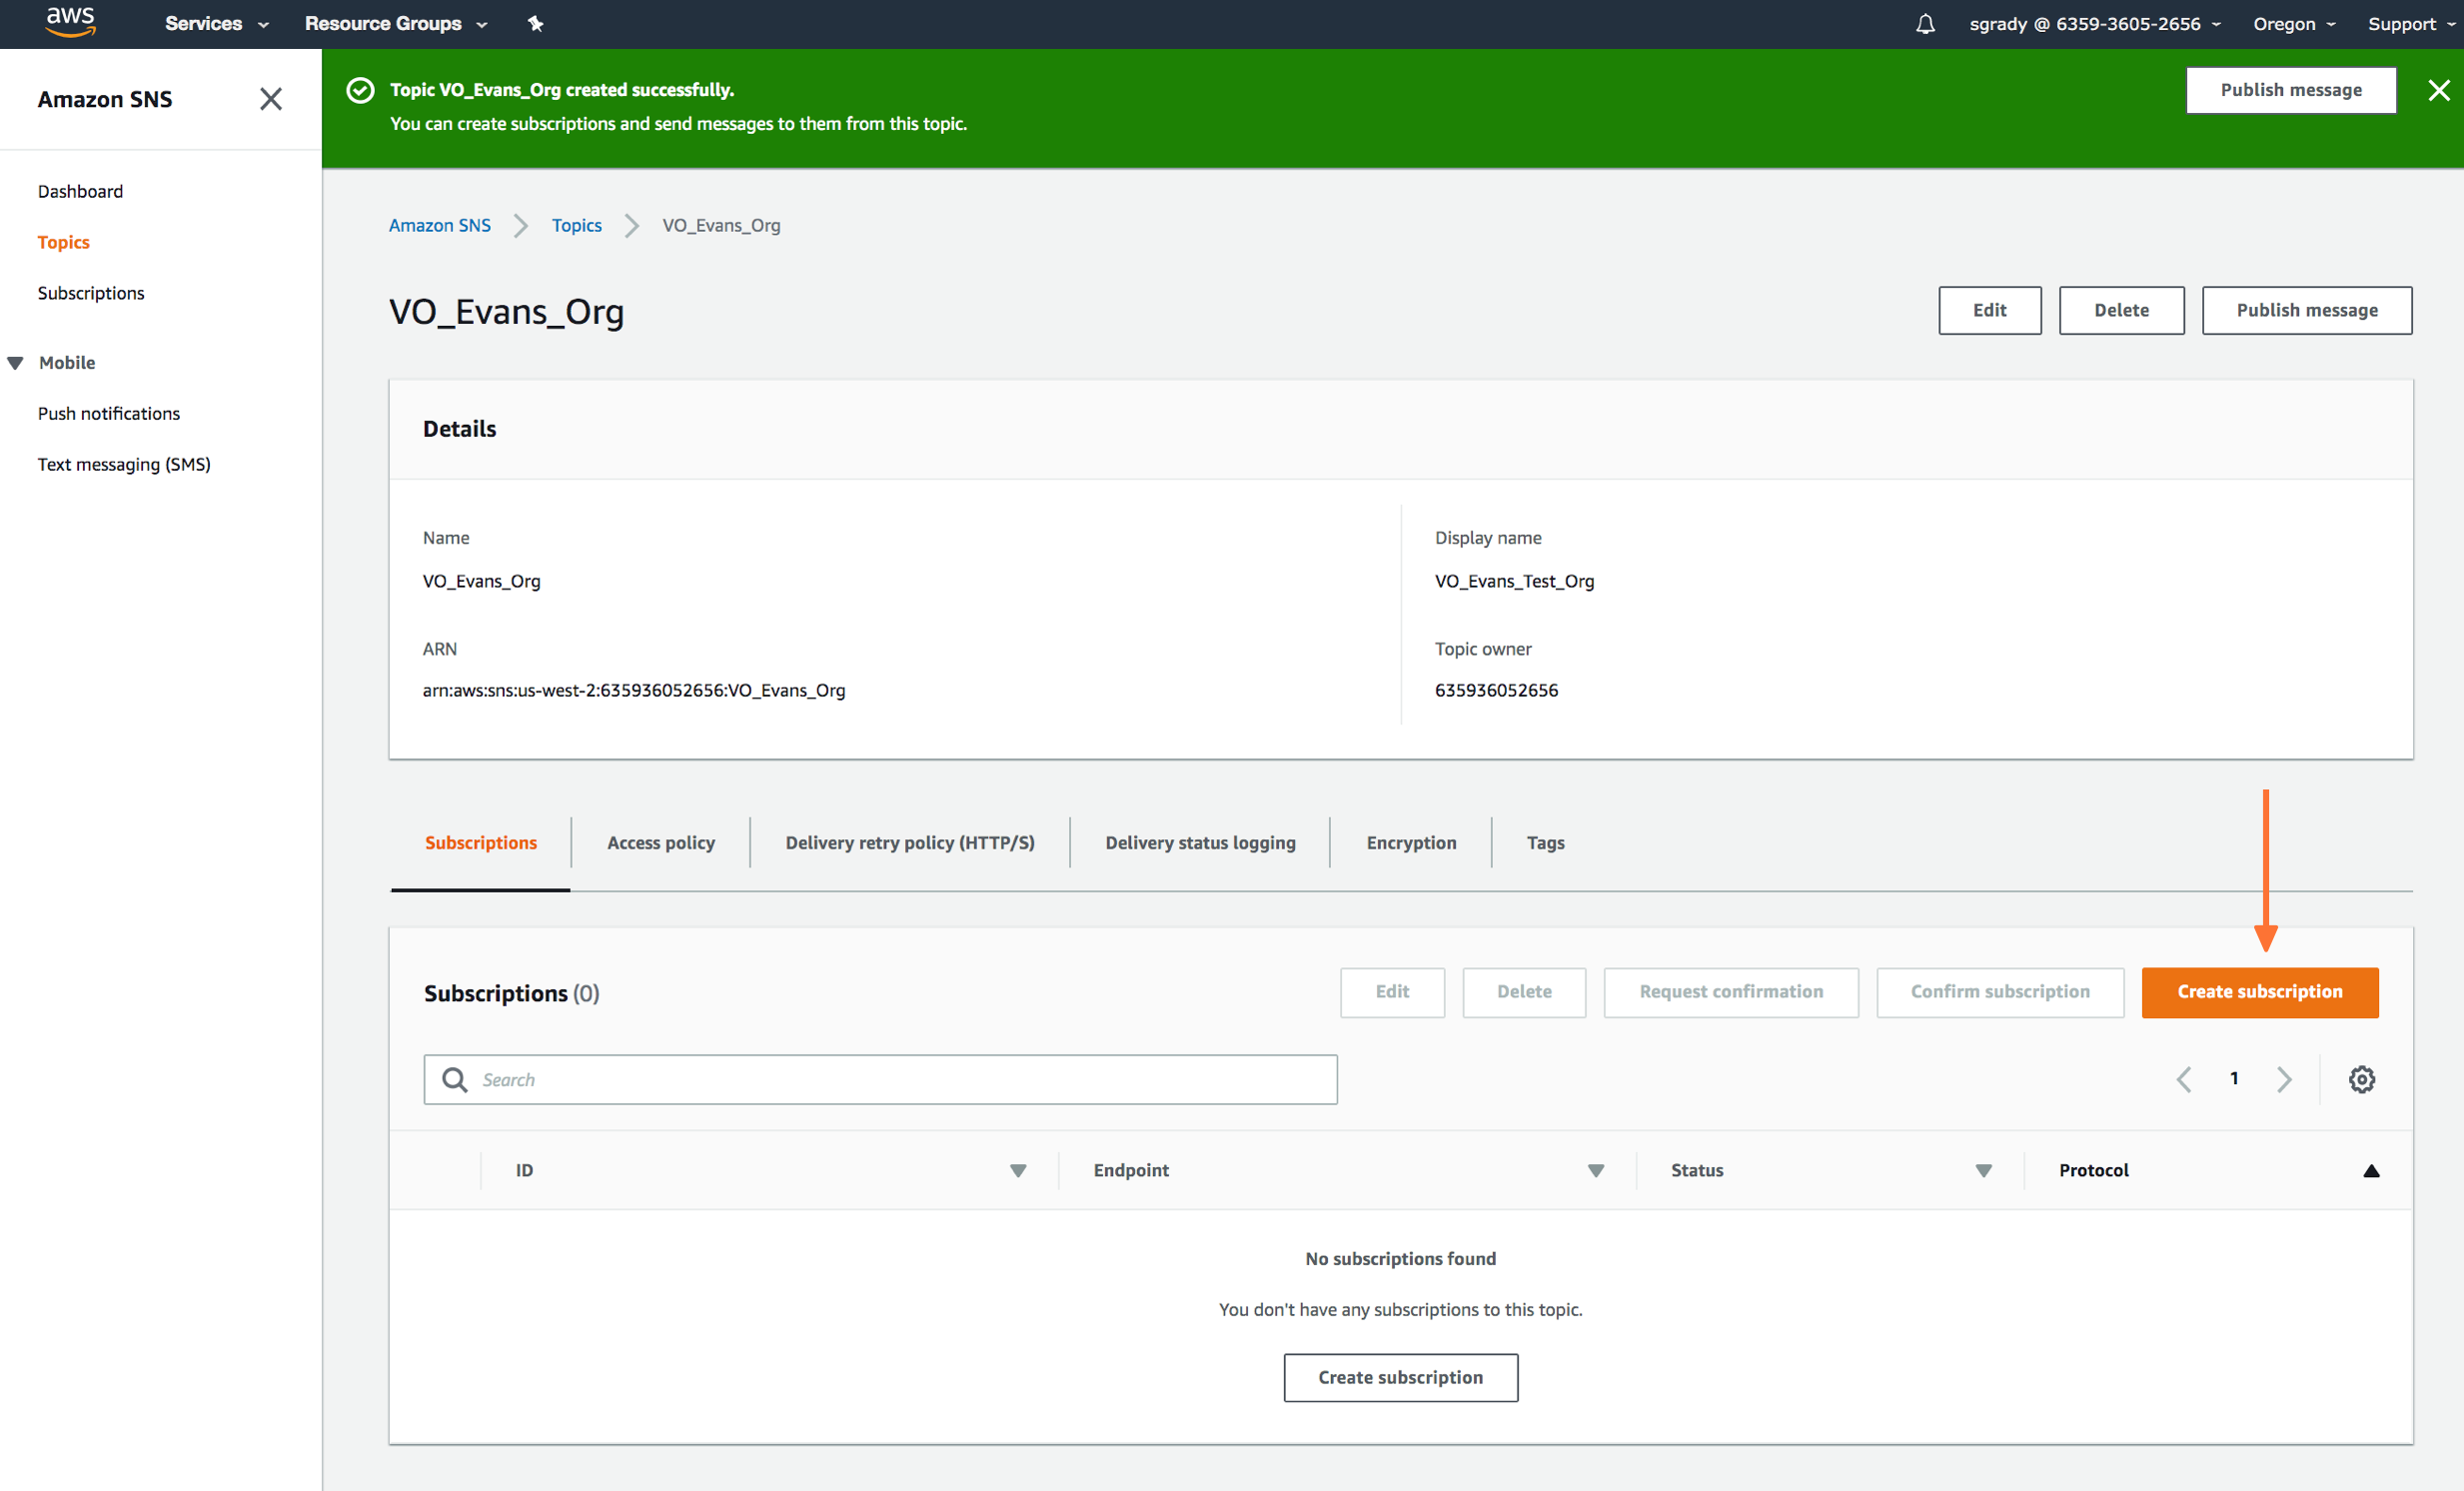
Once you’ve created your Splunk On-Call related Topic, you’ll be required to create a Subscription to the new Topic you created.
Here you’ll define the protocol type as HTTPS, paste in the custom endpoint with the desired routing key.
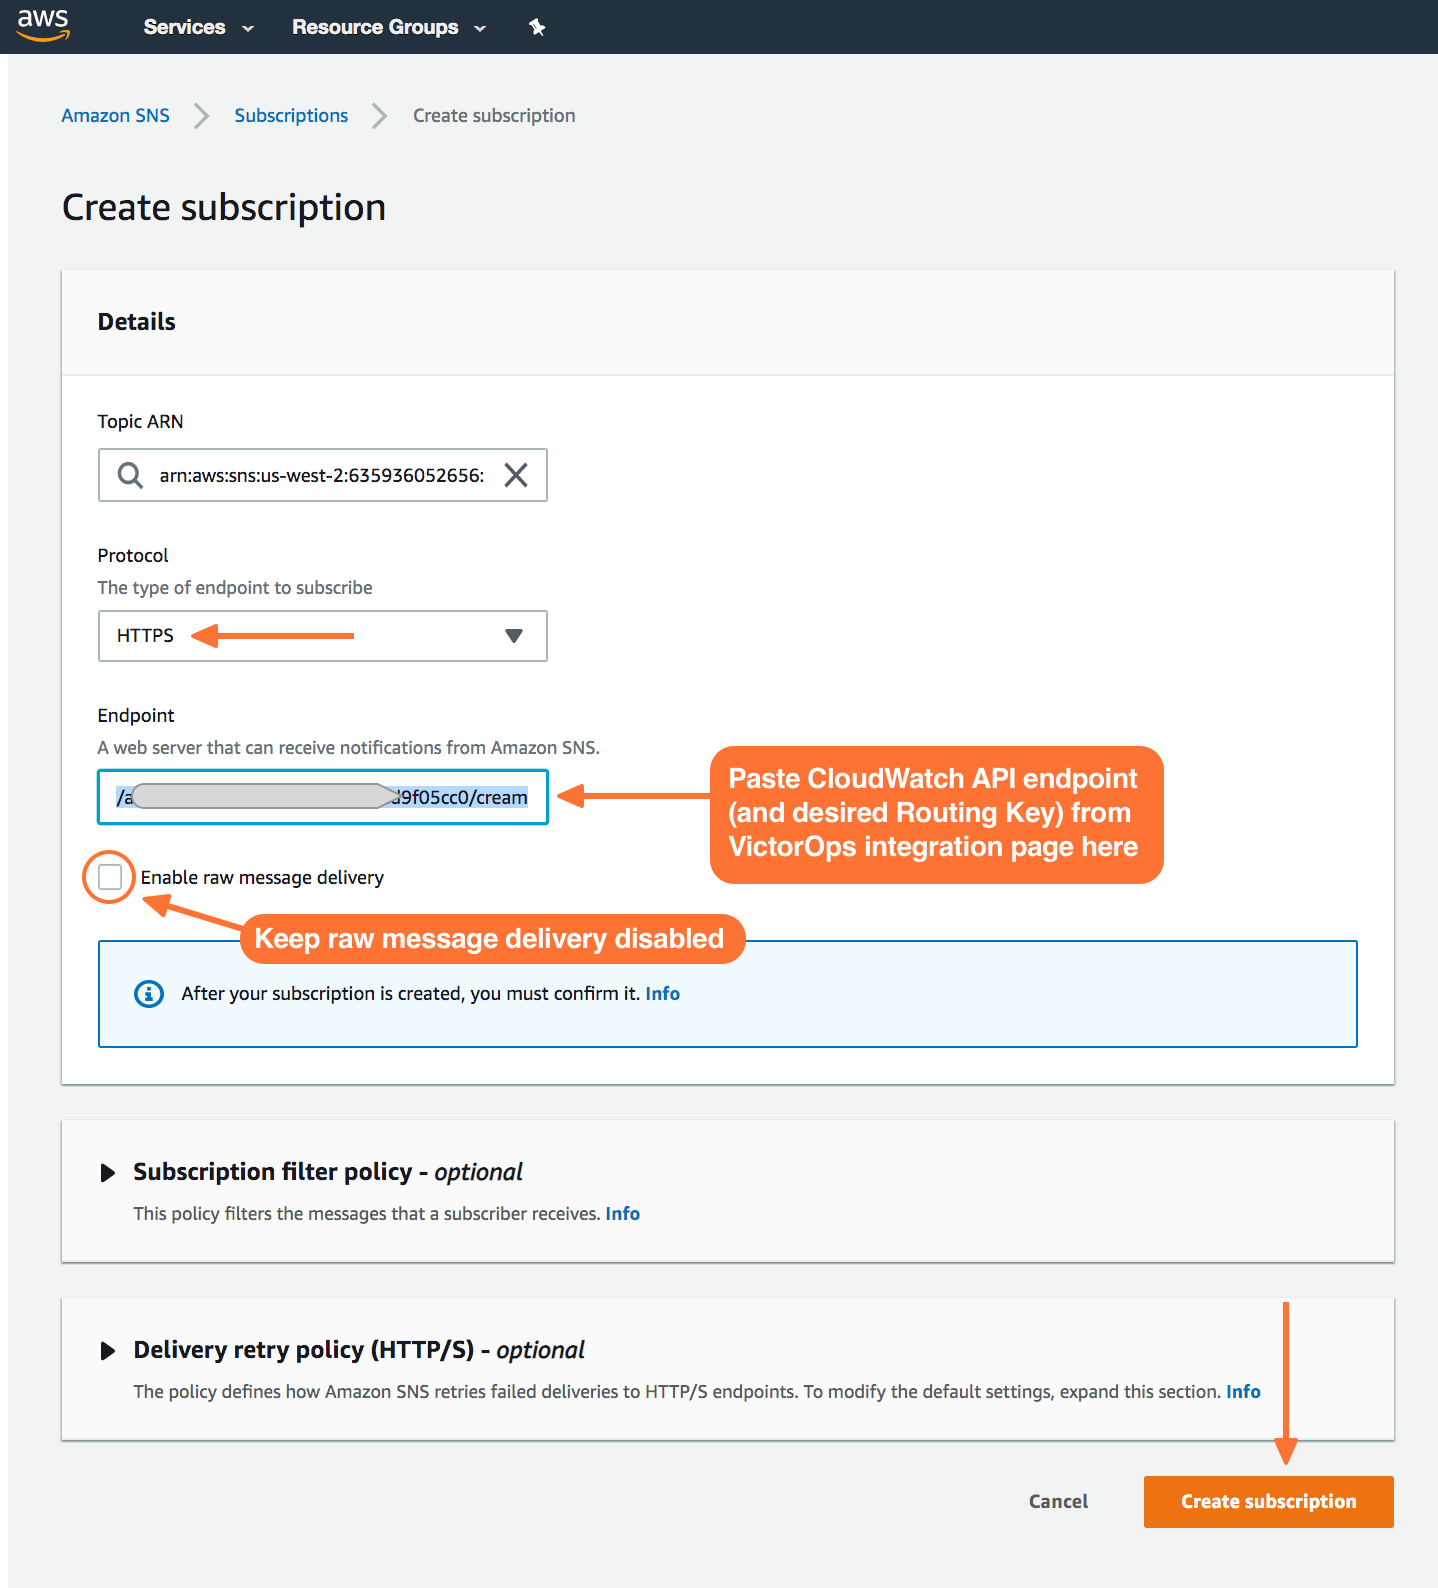
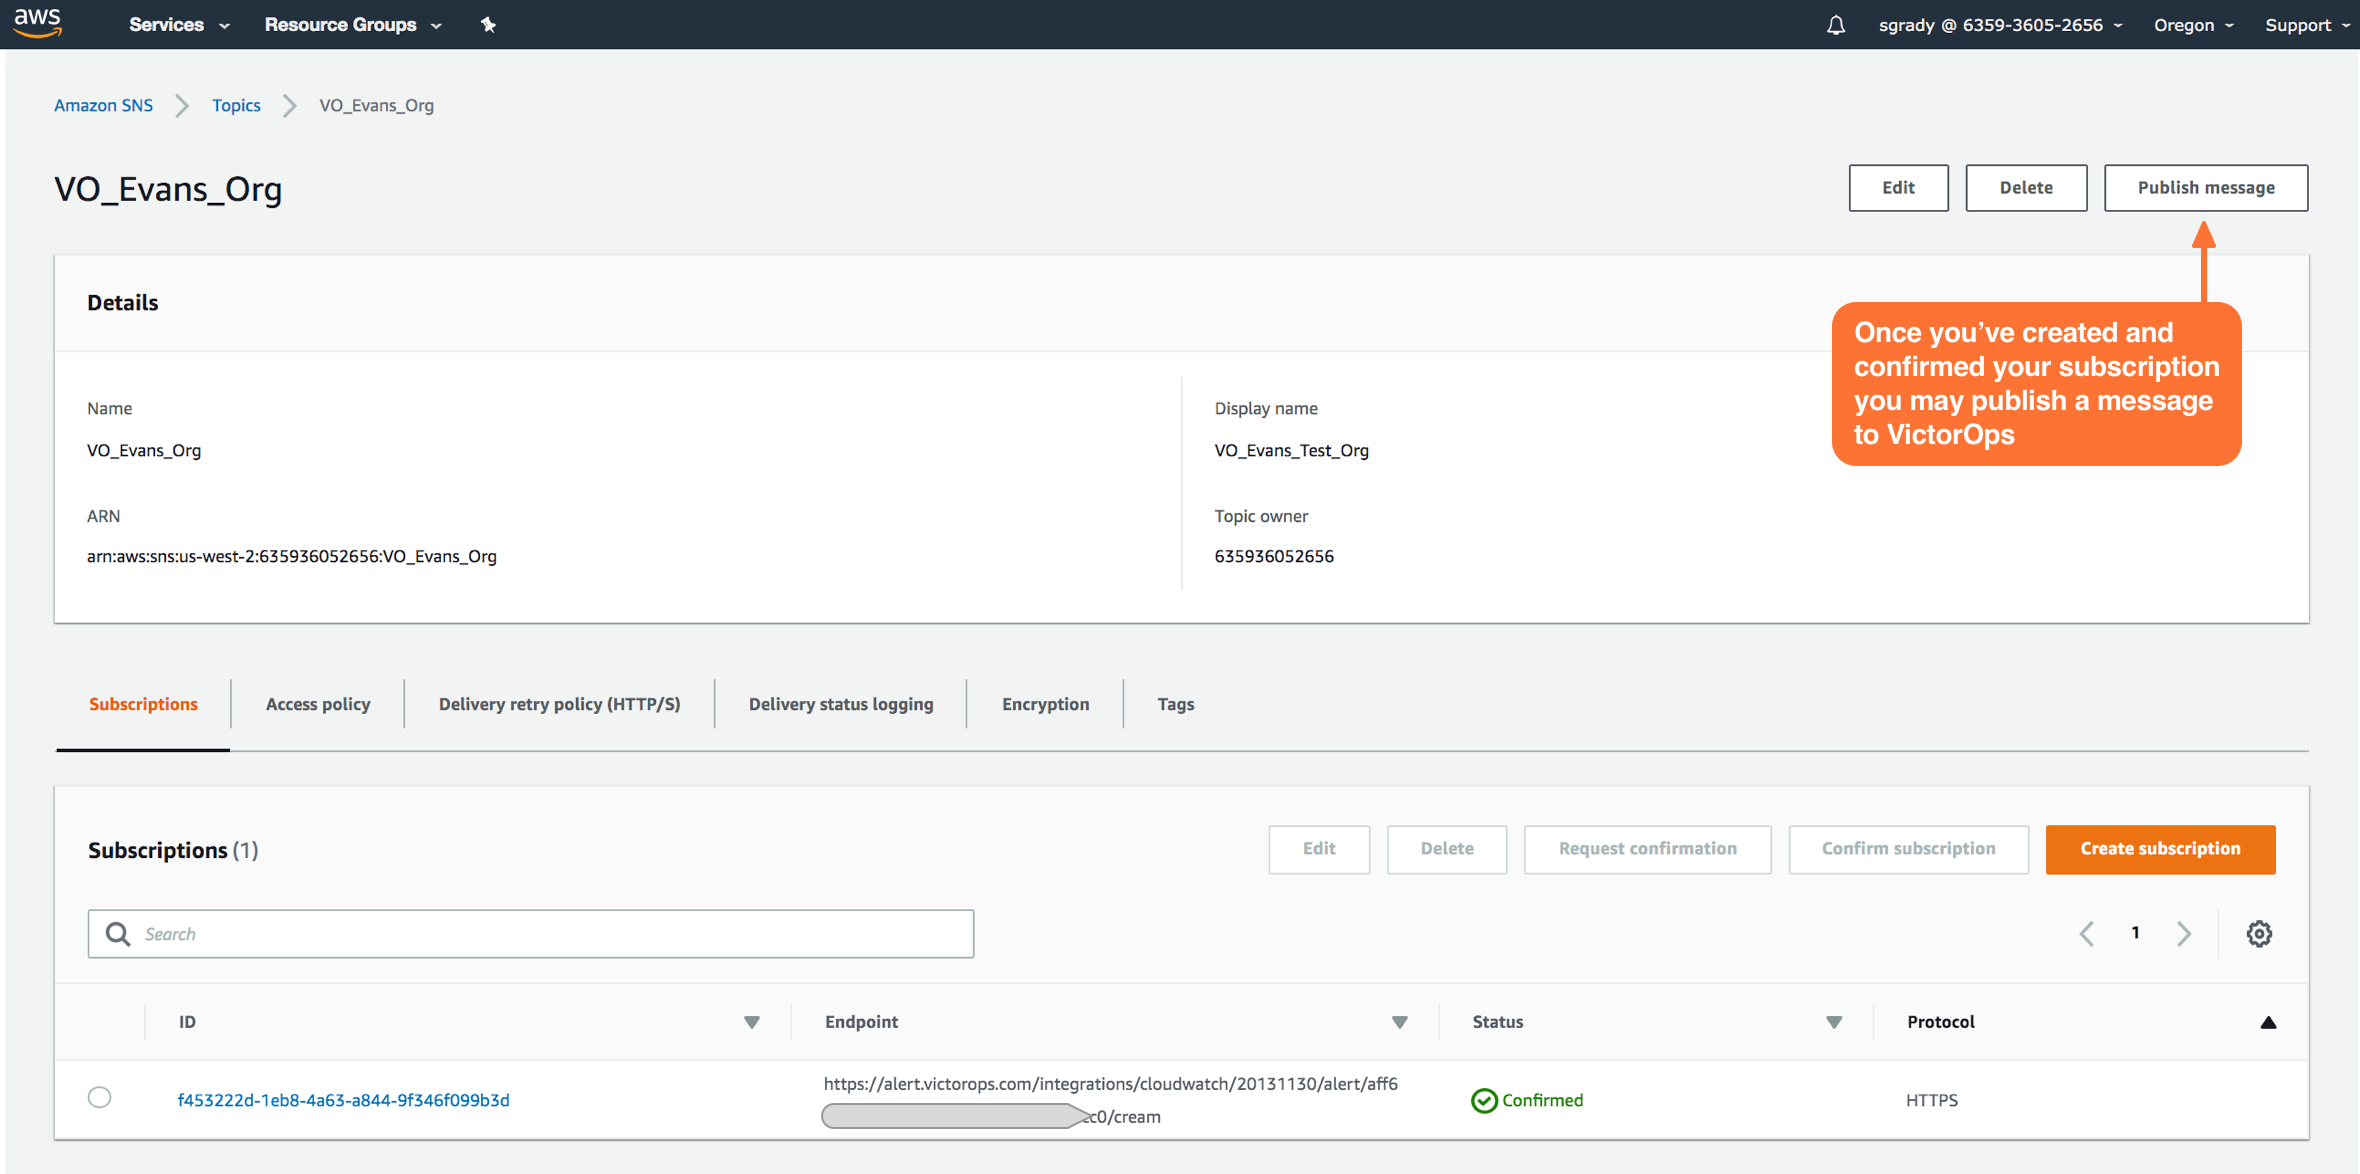
Once your subscription is confirmed, select Publish Message. In the following steps, you’ll be able to send a test incident to Splunk On-Call.
Testing the Integration
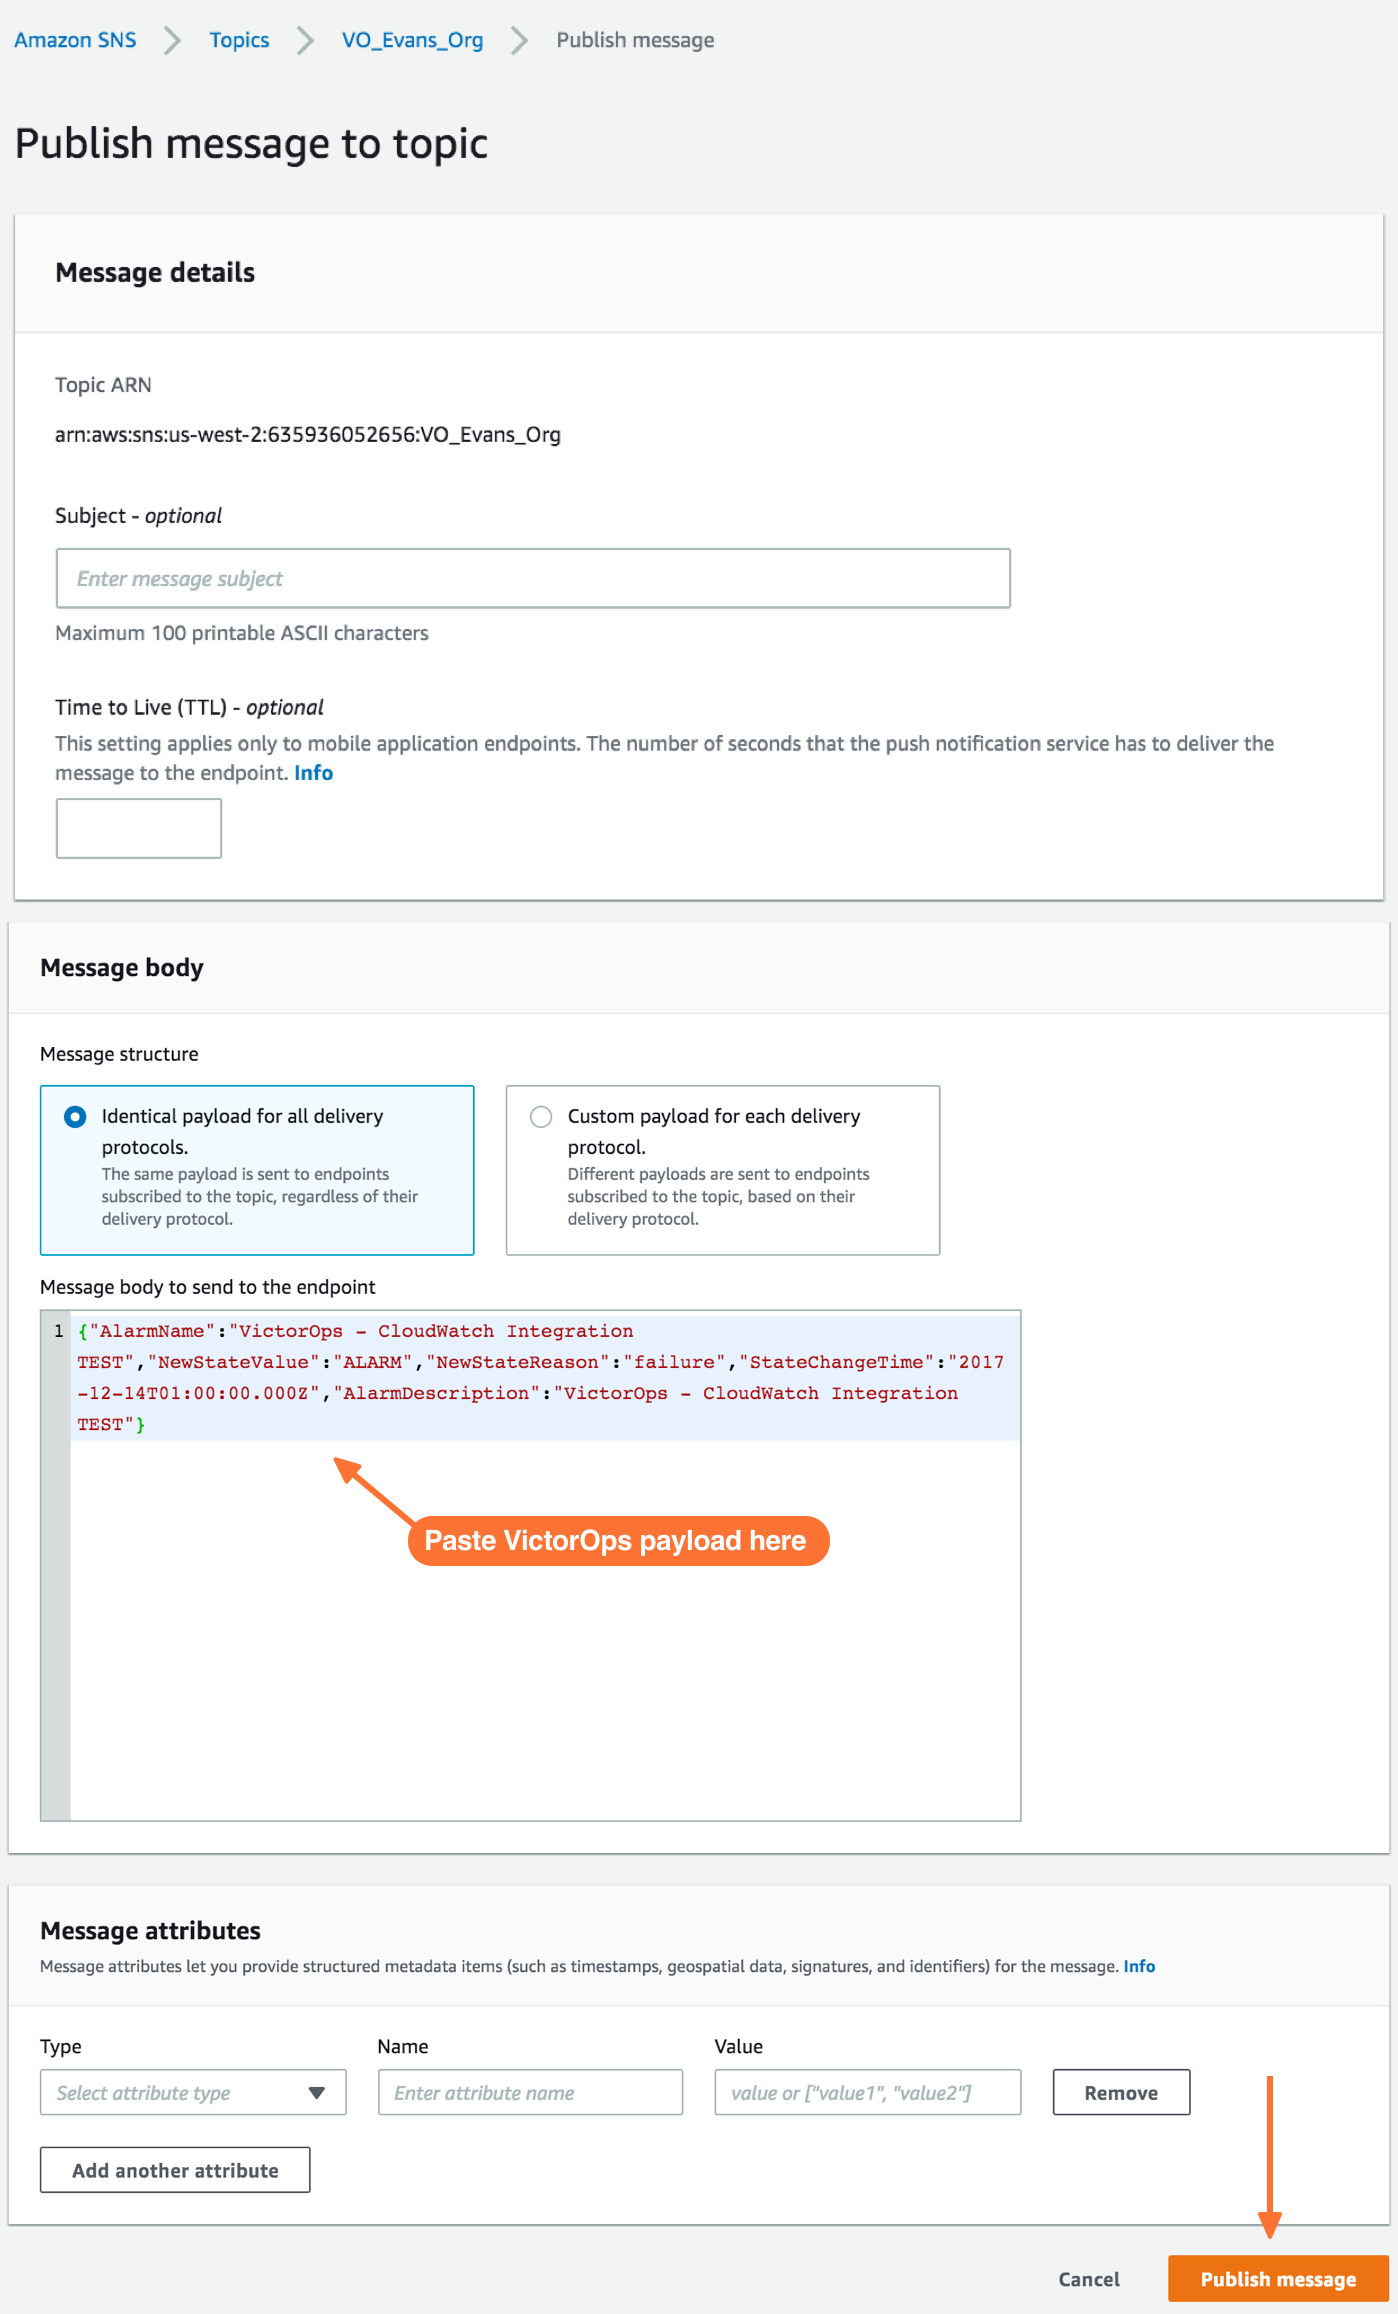
In the Publish message page, add the following payload to the Message box. Do not change the formatting. Changes here, including changes to the granularity of StateChangeTime to microseconds/nanoseconds, will result in failure of Cloudwatch incident delivery to Splunk On-Call.
Custom Payload
{"AlarmName":"VictorOps - CloudWatch Integration TEST","NewStateValue":"ALARM","NewStateReason":"failure","StateChangeTime":"2017-12-14T01:00:00.000Z","AlarmDescription":"VictorOps - CloudWatch Integration TEST"}
Once you’ve published a message to a topic with the required Splunk On-Call payload, you should see a green bar display a success message in CloudWatch.
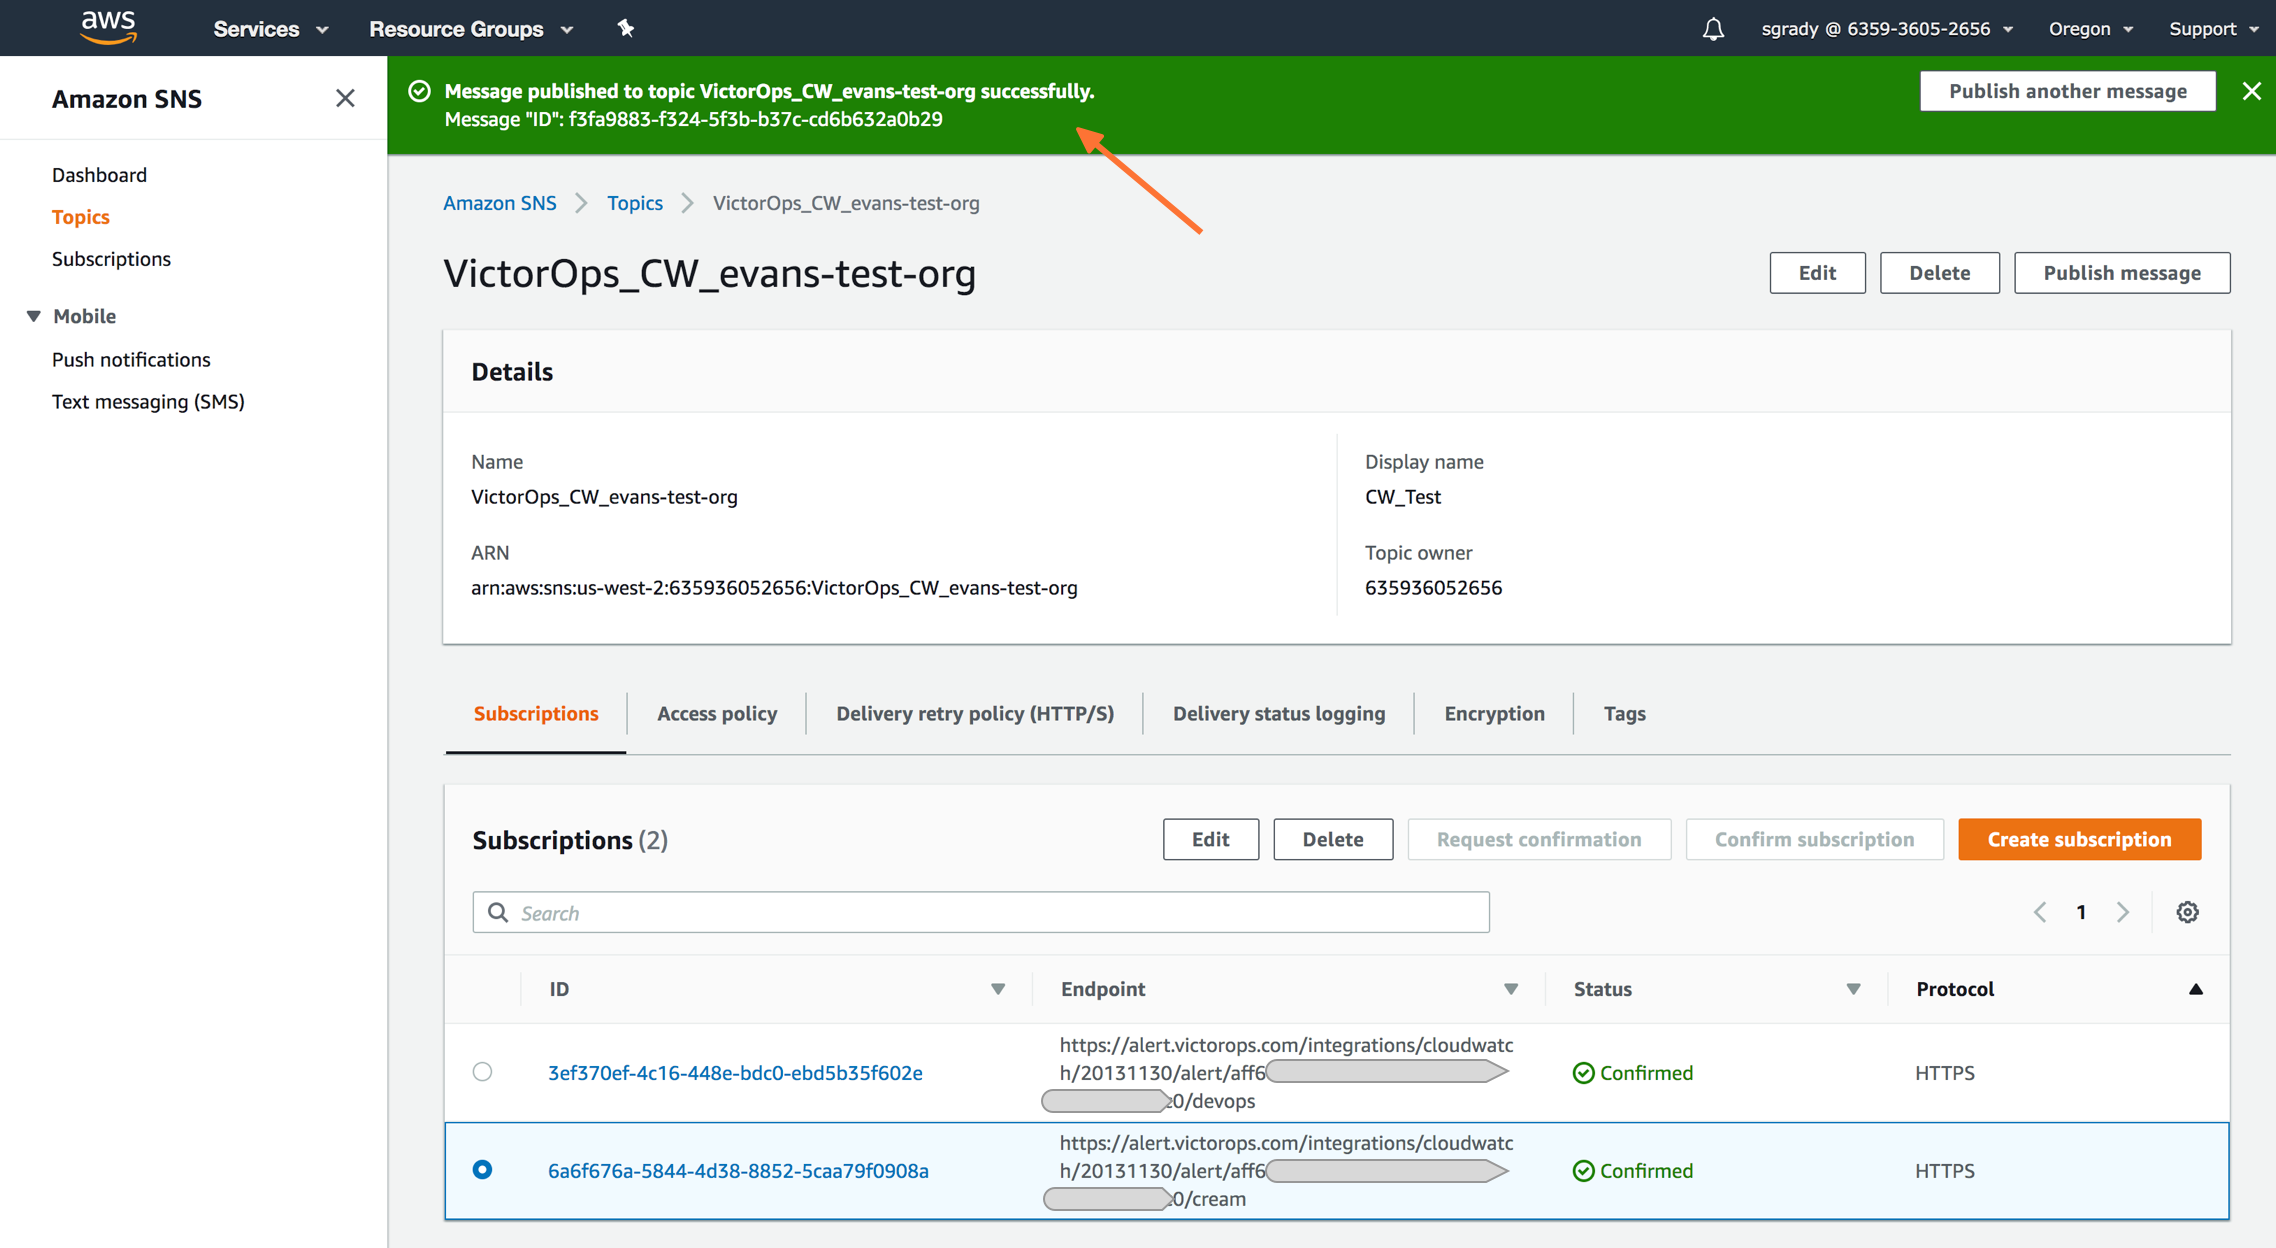
Navigate back to Splunk On-Call and you should see a new incident created.

To send in a RECOVERY to Splunk On-Call simply replace the “Alarm” variable in the field “NewStateValue” to “OK” in the provided payload and publish the message again:
"NewStateValue":"OK"
Auto-Recovery Alarms from CloudWatch
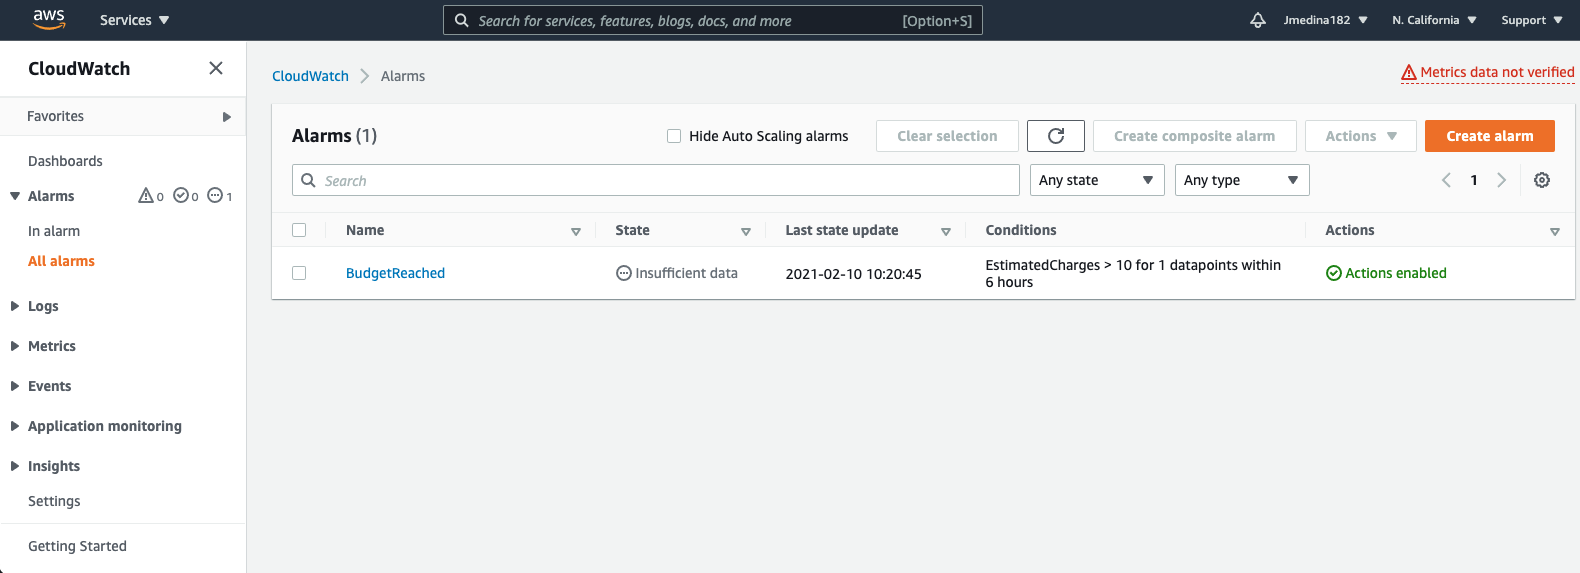
Cloudwatch is where you set the alerts that triggers the event that sends Splunk On-Call an incident.
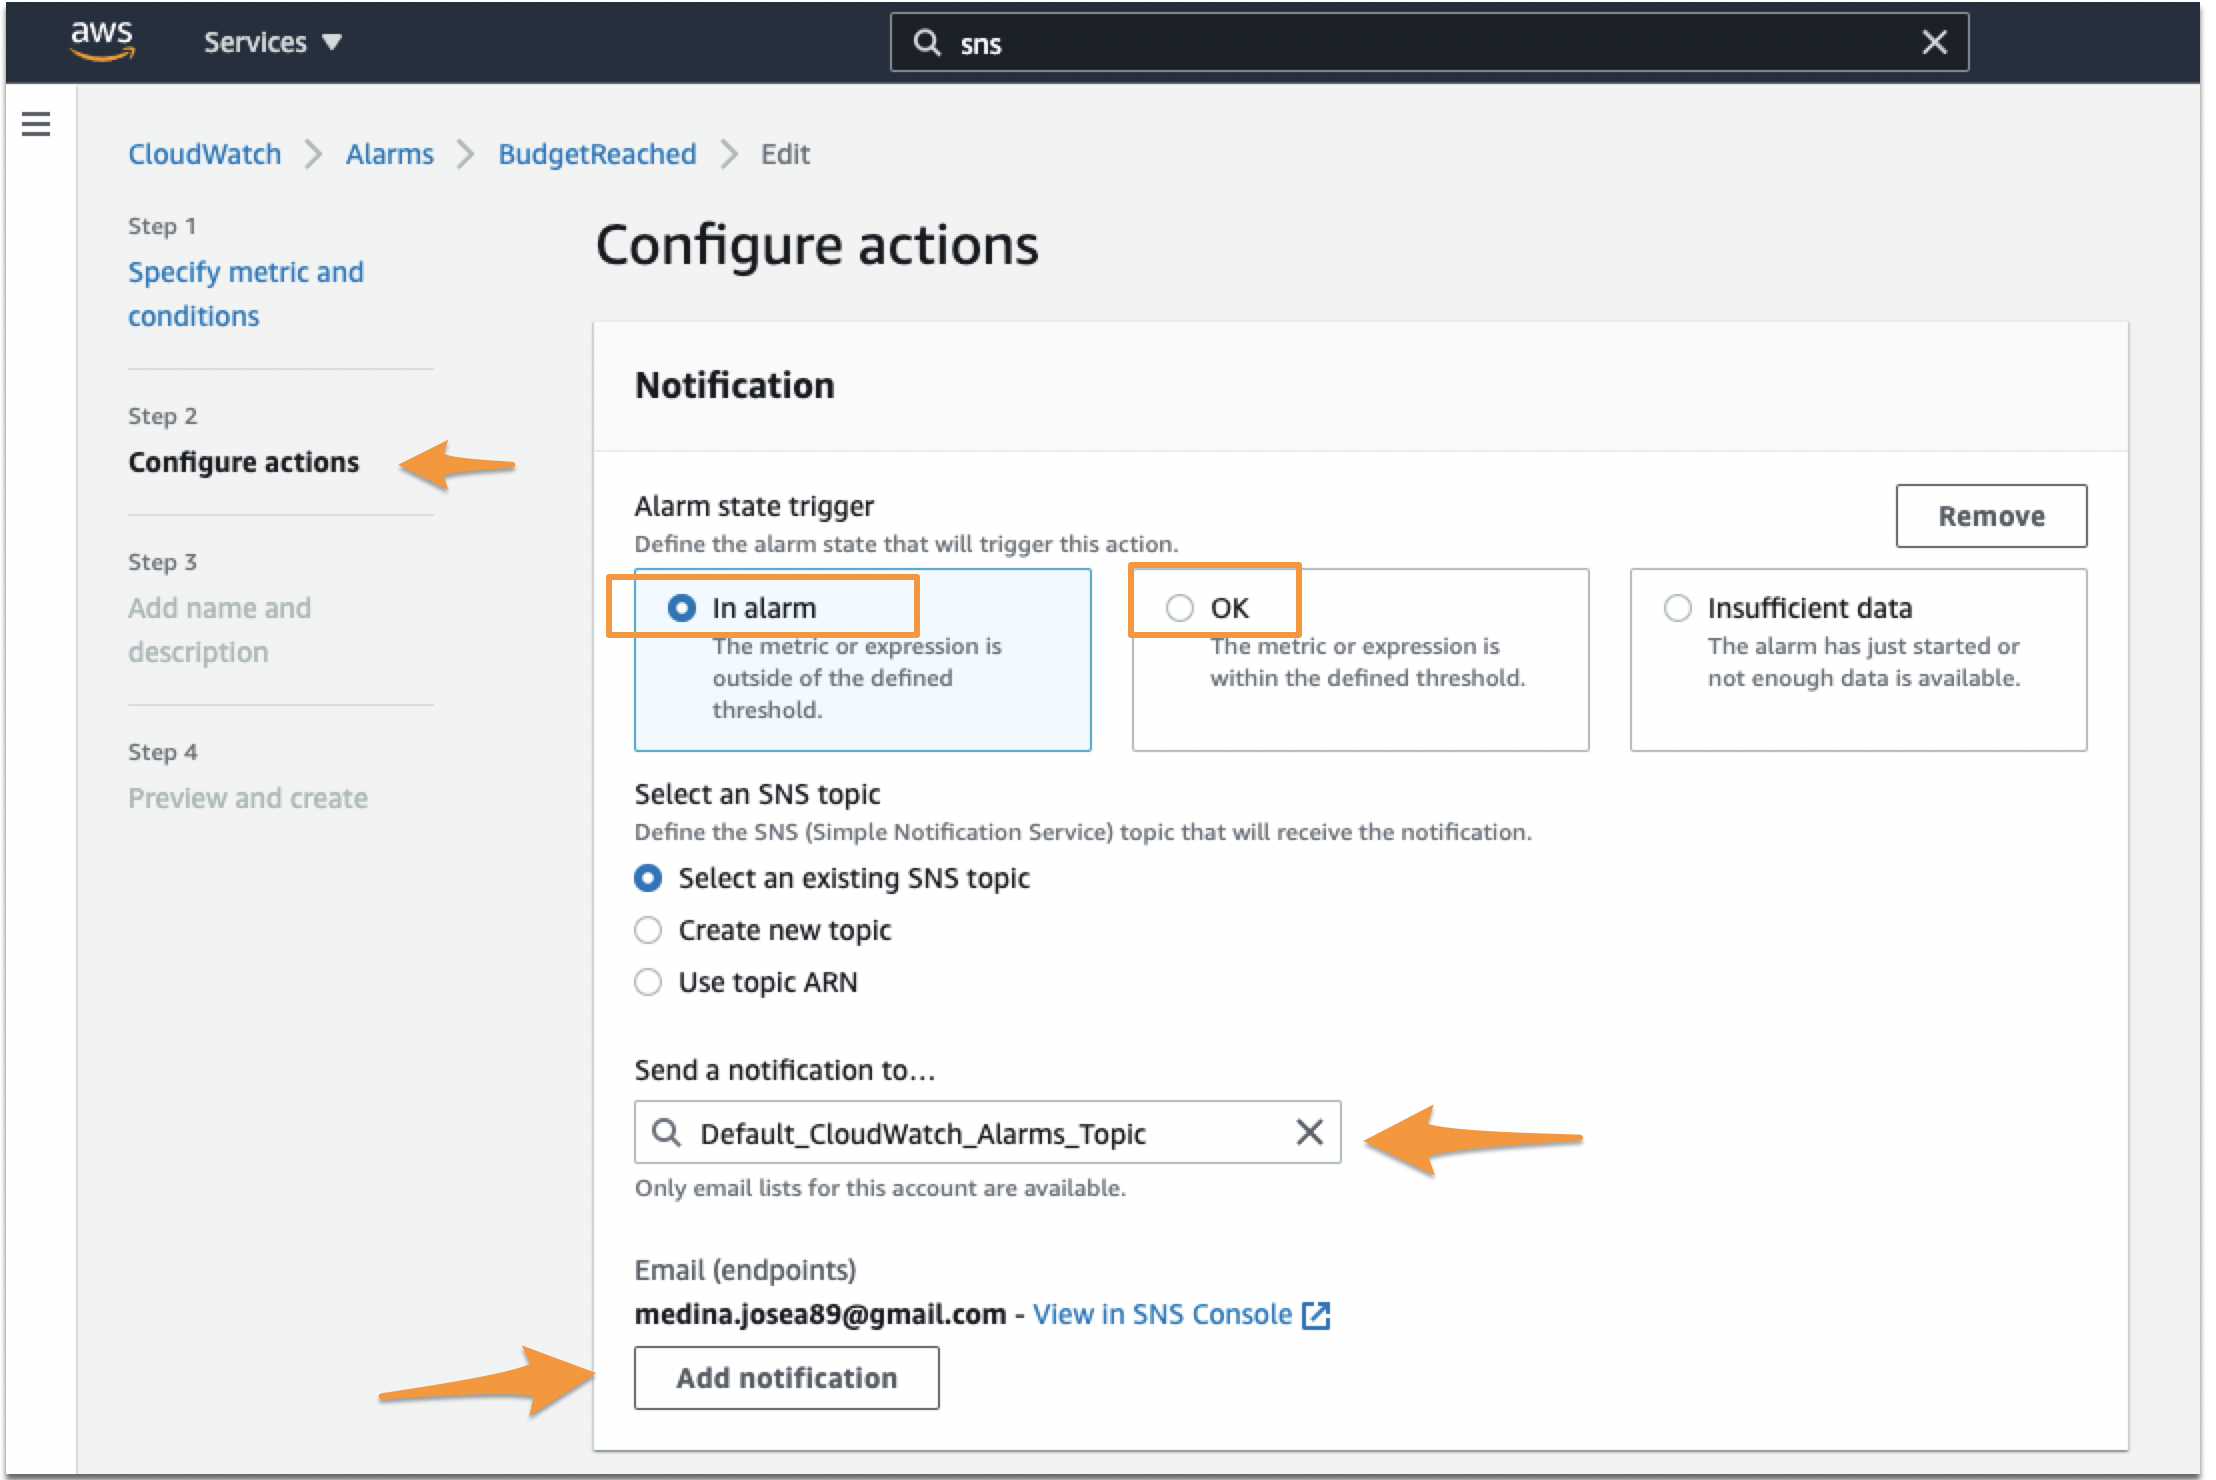
When setting up the Alarm (or if you are editing one that you have already), the second step is to configure the actions for the notifications. In here, you want to make sure you set two different trigger notifications, one for ‘In Alarm’ and another for ‘OK’.
Set the first notification as In Alarm. Then make sure you tie this notification to the Topic you just created in SNS. Click Add Notification after that.
Set the second notification as OK. Make sure again you set the right Topic. Click Next or Update Alarm at the end of the page.
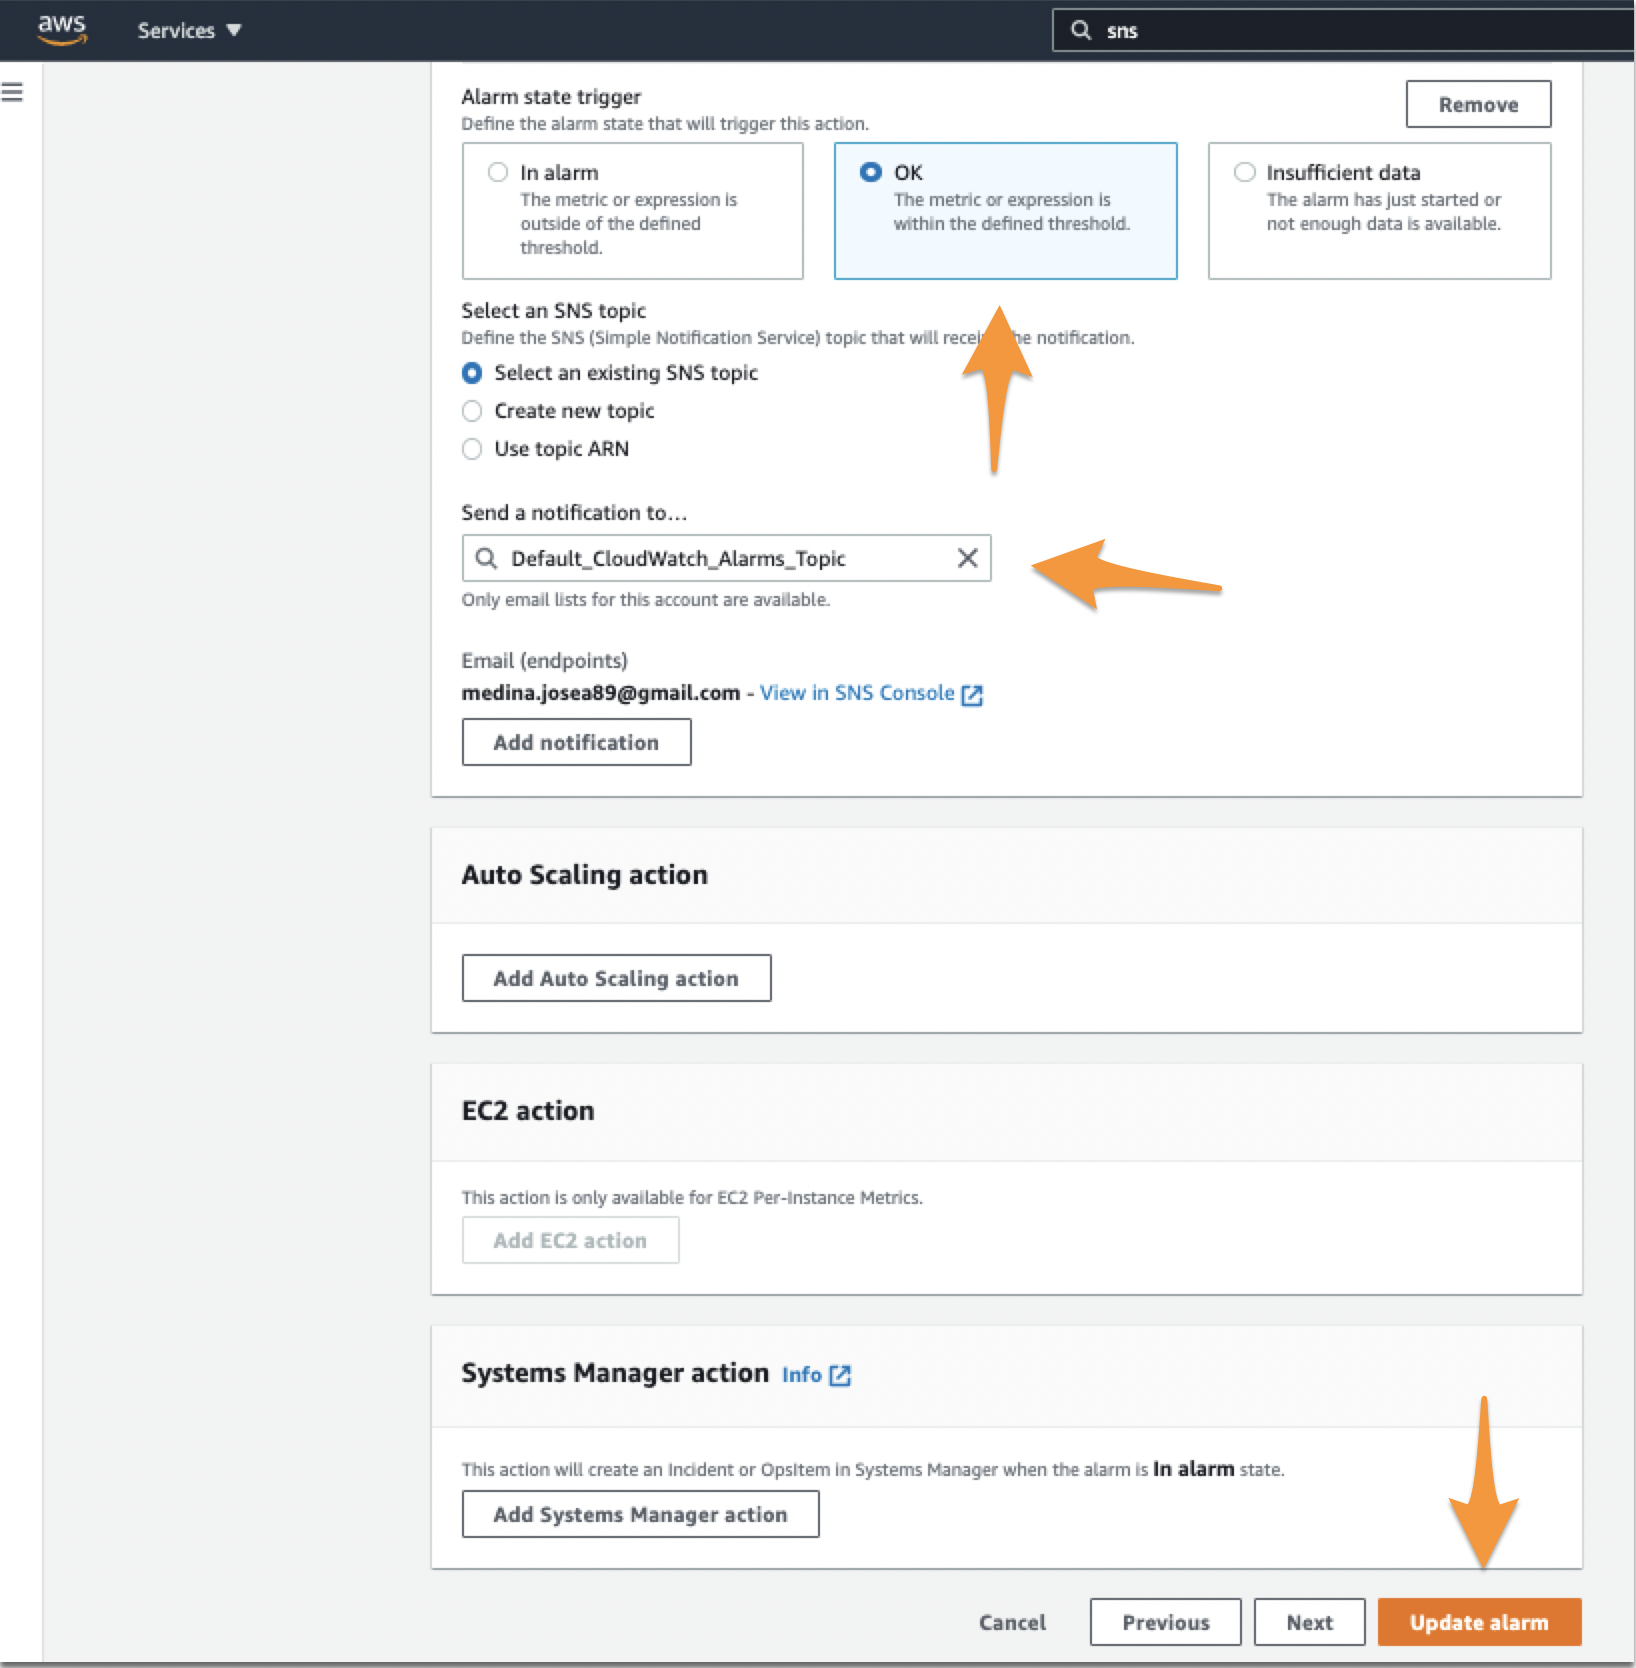
When you make sure you add that second notification, if the event ‘In-Alert’ event that triggered in AWS resolves itself, it will send an OK (or Recovery) alert to Splunk On-Call, resolving the incident on SpOC’s end.
Required and Custom Fields
For advanced users looking to tailor their Cloudwatch integration, there are a few mandates which must be considered. Alerts reaching the Cloudwatch alerting endpoint do need to have a basic form. There are three fields which must be present within the message sent from CloudWatch:
- AlarmName – This field can be any string and will map to the entity_id. Since the entity_id is the field used to link different alerts together, it is important to maintain a consistent naming convention for each incident.
- NewStateValue – This field, populated by Cloudwatch, should be either “ALARM”, triggering a critical incident; or “OK” resolving an incident.
- StateChangeTime – This field, also populated by Cloudwatch, will map to the timestamp used in Splunk On-Call.
Additionally, custom fields can be added to any message payload so long as the required three fields are present and valid.