AlertSite by SMARTBEAR provides advanced synthetic monitoring platform for APIs, mobile and web applications. The VictorOps integration with AlertSite allows you to send alerts into the VictorOps timeline by using the generic email endpoint. The following guide will walk you through this integration.
In VictorOps
First of all, you need to enable the AlertSite integration in VictorOps to be able to trigger and resolve incidents via email. To do that:
- In VictorOps, go to Settings > Alert Behavior > Integrations, and select AlertSite.
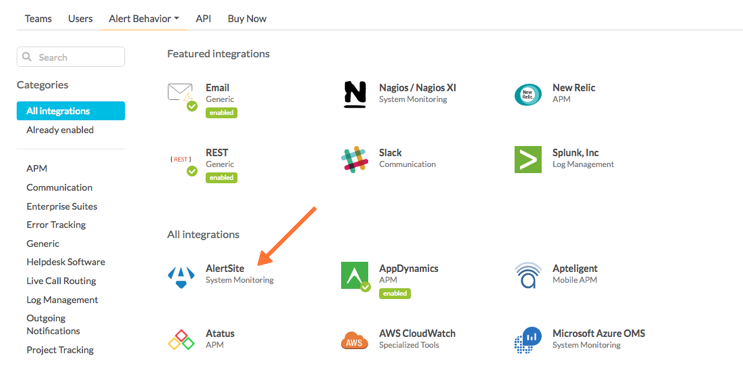
- If it is not already enabled, click Enable Integration.
- This will generate an email address to which you can send email alerts. Note down this address – you will need to specify it in AlertSite.
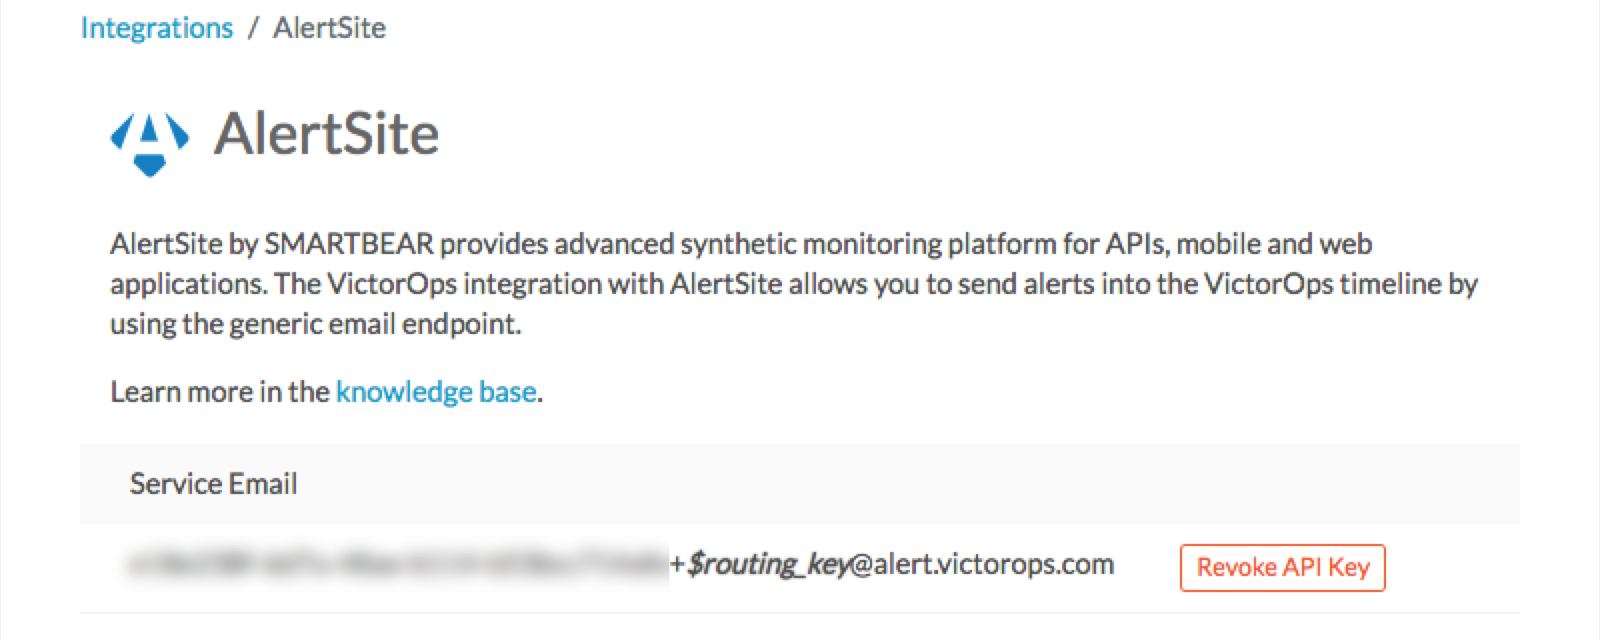
The $routing_key should be replaced with the key of a team to which you want to route the alerts. For example:
db212e48-……8669+databaseteam@alert.victorops.com
Team routing keys are configured at the bottom of the Settings > Integrations page. For details, see Routing Keys in the VictorOps knowledge base.
If you do not use routing, remove the +$routing_key part (including the plus sign) so that the email looks like this:
db212e48-……8669@alert.victorops.com
Configuring AlertSite
Customizing Email Templates
When using the VictorOps email endpoint, the email subject must include specific keywords – CRITICAL or PROBLEM to open a new incident, and RESOLVED or OK to resolve an incident. You can customize AlertSite email alerts to include these keywords.
Note: The email subject line must be the same in both the “error” and “clear” templates (apart from the CRITICAL/PROBLEM and RESOLVED/OK words). This is needed for VictorOps to recognize that the “clear” email is related to the incident opened by the “error” email. For example, do not use the $STATUS variable in the subject line, because the status code will be different in the “error” and “clear” alerts, and, in this case, VictorOps will not be able to match these alerts.
To create custom alert templates for VictorOps:
- In AlertSite UXM, go to Alerts > Template Editor.
- To configure the error template:
- Filter the template list to show only Alert Type: Site Error.
- On the list, select the AlertSite Template for Site Error with the delivery method
 Text.
Text.
- Click the template text in the editor to activate the edit mode.
- Enter the following:
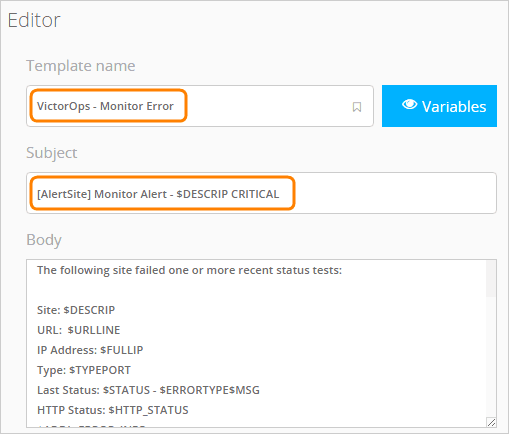
- Template name: VictorOps – Monitor Error (or similar)
- Subject: [AlertSite] Monitor Alert – $DESCRIP CRITICAL
Note: You can use another subject, but make sure it includes the word CRITICAL and does not include the $STATUS variable.
- Click Save As to save the changes as a new template.
- To configure the ”all clear“ template:
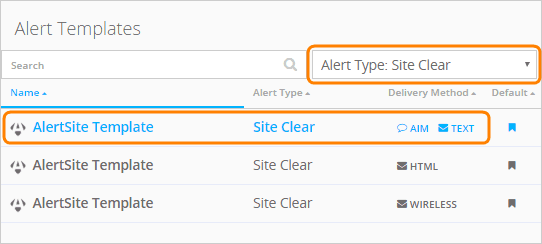
- Filter the template list to show only Alert Type: Site Clear.
- Select the AlertSite Template for Site Clear with the delivery method Text.
- Click the template text in the editor to activate the edit mode.
- Enter the following:
- Template name: VictorOps – Monitor Clear (or similar).
- Subject: [AlertSite] Monitor Alert – $DESCRIP OK
Important: The subject must be exactly the same as in the error template, but with the OK word instead of CRITICAL.

- Click Save As to save the changes as a new template.
- You can see the created templates on the template list:
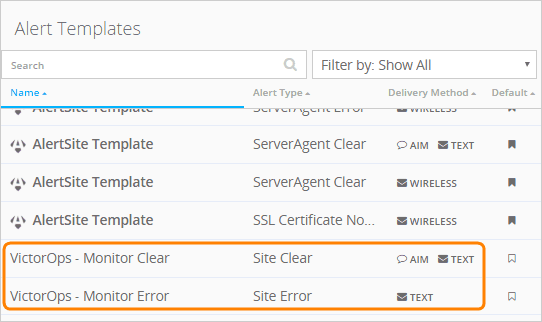
Adding VictorOps to Alert Recipients
Next, you need to add the VictorOps email endpoint that you generated earlier as an alert recipient in AlertSite:
- In AlertSite UXM, go to Alerts > Alert Recipients.
- Click + New Recipient.
- In the dialog that appears, enter the following:
- Name – any name, for example, VictorOps
- Recipient – the email address you generated in VictorOps
- Mode – E-mail (text format)
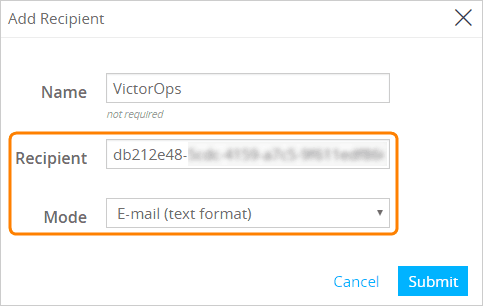
- Click Submit.
- Select the created recipient and click Edit Recipient.
- On the Availability Alerts tab, set the option to Alert whenever an error clears. This is needed to automatically resolve incidents in VictorOps when an error clears in AlertSite.
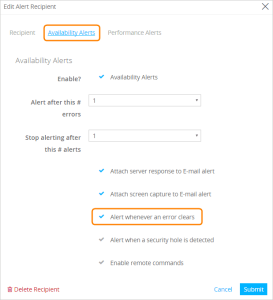
- Configure other options as needed. For a description of available options, see Recipient Properties – Availability Alerts.
- Click Submit.
Assigning Custom Templates to VictorOps Email Alerts
Now, you need to assign your custom alert templates to the VictorOps alert recipient. To do this, you need to create a recipient group that contains the VictorOps recipient, the custom templates, and the monitor whose alerts you want to send to VictorOps:
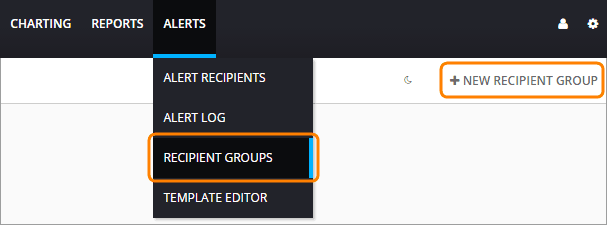
- In AlertSite UXM, go to Alerts > Recipient Groups.
- Click + New Recipient Group.
- Enter a name for the group.
- Under Monitors, add the monitors that should send alerts to VictorOps.
- Under Recipients, add the VictorOps recipient.
- Under Custom Templates, add the VictorOps “error” and “clear” templates that you created earlier.
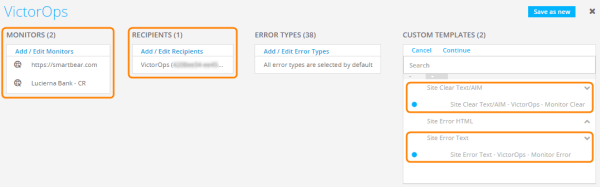
- (Optional) Under Error Types, select specific error codes that should be reported to VictorOps. The default value is all errors.
- Click Save as new.
Now, the specified monitors will send alerts to VictorOps.
Viewing Alerts in VictorOps
You can view AlertSite alerts in the VictorOps Timeline and Incidents tabs:

Click More info to view the alert contents, including the description of the error occurred:

The team members can then acknowledge the incidents and take action to resolve them. The incidents will also be resolved automatically when a “clear” notification arrives from AlertSite.
If you have any questions please contact VictorOps support.