Versions Supported: Zenoss 5.x
VictorOps Version Required: Getting Started, Essentials, or Full-Stack
What you need to know: Zenoss is a free and open-source application, server, and network management platform. The VictorOps Zenoss plugin is a set of scripts that queue event triggers/notifications and forward them to VictorOps servers for processing. Queuing of notifications is done in-band as Zenoss runs the notification command, and forwarding is done out-of-band by a long-running process.
The forwarding process can retry sending the notification, and if the send fails for any reason, for an extended period of time (1 minute by default), it will fall back to sending an email to a configured address.
The package is available as an RPM, DEB or tarball, and can be installed via yum or apt-get by adding VictorOps to your package sources.
Python is required on the server, which is also a requirement of the Zenoss server, and should have already been installed by Zenoss.
curl is also required on the server.
Zenoss Plugin
Note: This plugin is only supported for Zenoss 5. For more information please contact support@victorops.com.
Layout:
The main package files are installed to /opt/victorops/zenoss_plugin.
Notifications are queued in /var/victorops/zenoss-alerts.
Logging is written in /var/log/victorops.
Symbolic links are created in the Zenoss libexec (/opt/zenoss/libexec) for some of the files in /opt/victorops/zenoss_plugin/bin.
Installing:
Depending on your system you may need to use sudo with these commands.
deb install
- Execute
wget https://github.com/victorops/monitoring_tool_releases/releases/download/victorops-zenoss-0.22.44/victorops-zenoss_0.22.44_all.deb
- Execute
dpkg -i <path_to_file>
If you don’t want to use dpkg you can also use
sudo apt install <path_to_file>
rpm install
- Execute
wget https://github.com/victorops/monitoring_tool_releases/releases/download/victorops-zenoss-0.22.44/victorops-zenoss-0.22.44-1.noarch.rpm
- Execute
rpm -i <path_to_file>
Configuration:
If you install from the DEB or RPM packages, the installer will put the plugin files in their location in /opt/victorops/zenoss_plugin. Additionally, two directories will be created, /var/victorops/zenoss-alerts and /var/log/victorops, for notification queuing and logging, respectively.
Once installed, the package will need configuration by running the /opt/victorops/zenoss_plugin/bin/configure.sh script. The configure script will connect to the Zenoss server, so to use it you will need to provide a Zenoss admin user ID and password. The script will prompt you for these.
Additionally, you will need to provide your organization “slug” and Zenoss alert key to the configure.sh script. These are found on your Zenoss integration page at https://portal.victorops.com/.
You may also provide an email address as the fallback contact in the unlikely event that sending a notification to VictorOps fails. To do so you will need to edit the /opt/victorops/zenoss_plugin/conf/local.zenoss.conf file and add your email after “export FAILSAFE_EMAIL_TO“.
Configuration Elements:
The configure script connects to the Zenoss server and, using the Zenoss API, adds several elements required to forward notifications to VictorOps. These are:
- Two Zenoss “Triggers”
- A Zenoss “Notification” that contains both a “Command” and “Clear Command”. These commands construct the message that will be sent to VictorOps
Escalation Routing:
Any incidents created by notifications sent to VictorOps will be processed on the default route. To change the routing, you modify the “Notification Commands” for the “VictorOpsNotify Notification” and put your VictorOps routing key after VO_ROUTING_KEY= . For further instruction see the following screenshots:
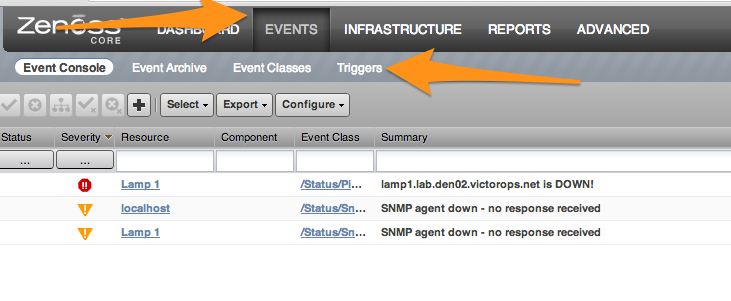
Select “Events” and then “Triggers”
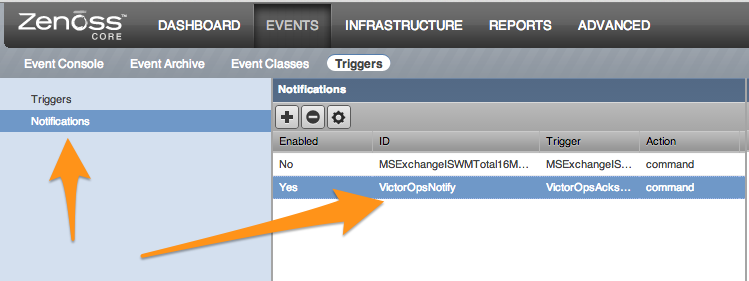
Select Notification and then “VictorOpsNotify”
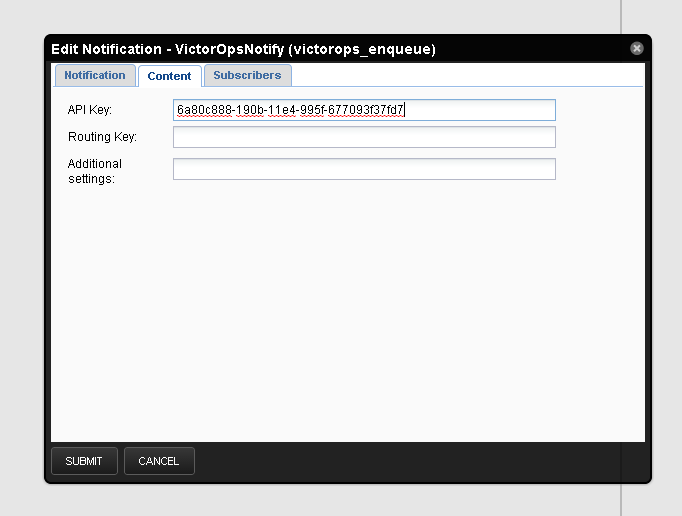
Select Content and then put the desired Routing Key after VO_ROUTING_KEY=
How Notifications are Handled:
The action to notify VictorOps saves the notification details to a file on disk. Within a couple seconds, the forwarder process will send the details to VictorOps, where the normal alert processing will be performed.
If forwarding the details is unsuccessful, the timestamp of the details is checked, and if the details are old (1 minute by default), the details are instead sent to the backup email address you provided at configuration time.