Desk.com is an online customer service software and support ticket help desk application for small business and fast-growing companies. The following documentation will walk you through the steps to create a custom Splunk On-Call application within Desk.com.
In Splunk On-Call
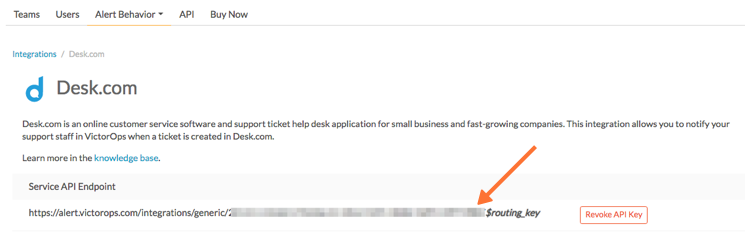
In Splunk On-Call, select Integrations >> Desk.com
If the integration has not yet been enabled, click the “Enable Integration” button to generate your endpoint URL as seen below. Be sure to replace the “$routing_key” section with the actual routing key you intend to use. (To view or configure route keys in Splunk On-Call, click Settings>> Routing Keys)
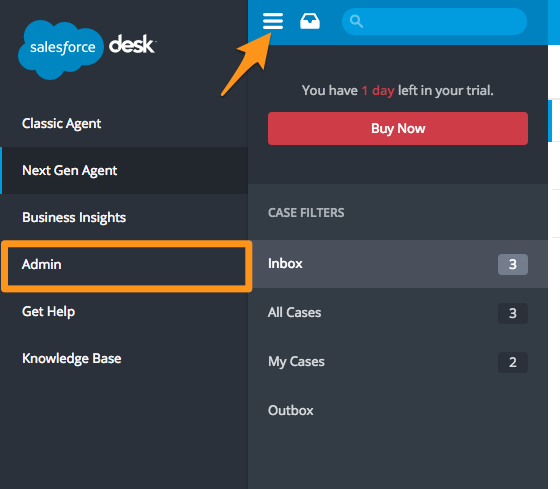
In Desk.com
In the top left corner select the menu icon and then Admin.
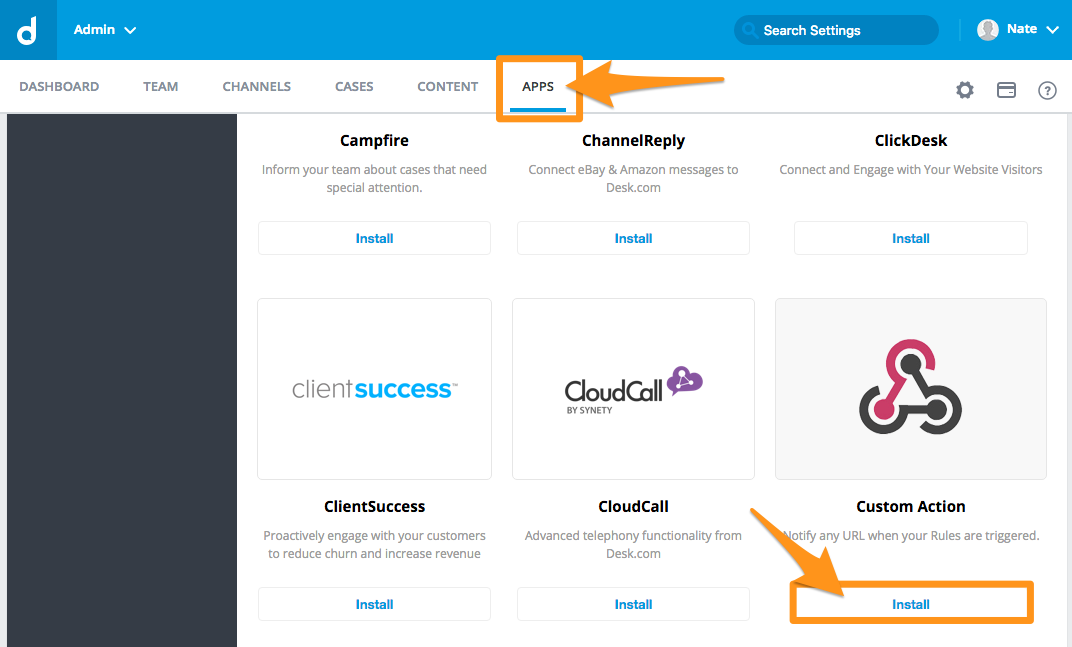
On the admin page select APPS then find “Custom Action” and select Install.
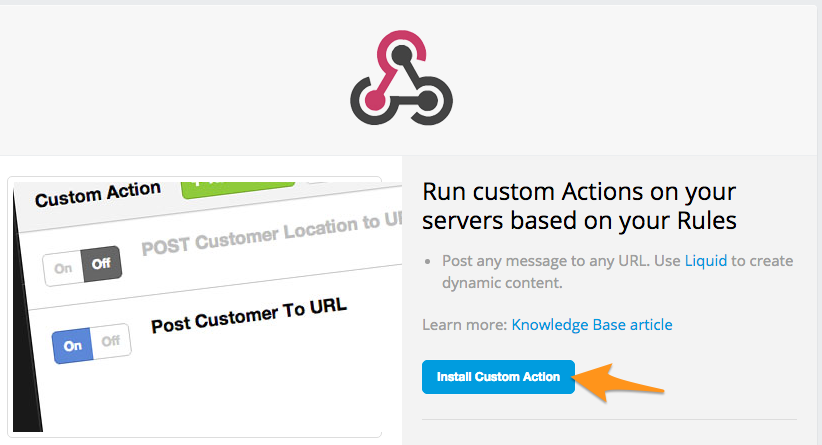
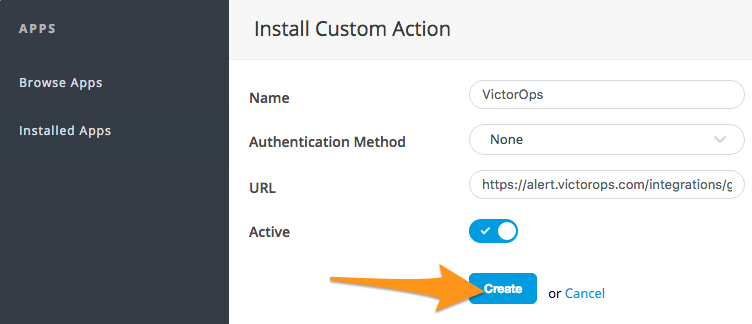
Next select Install Custom Action.
Accept the terms, then give the action a Name, set the authentication method to none, paste in your Post URL that you copied from Splunk On-Call in the first step, then make sure the Action is set to active and then hit create.
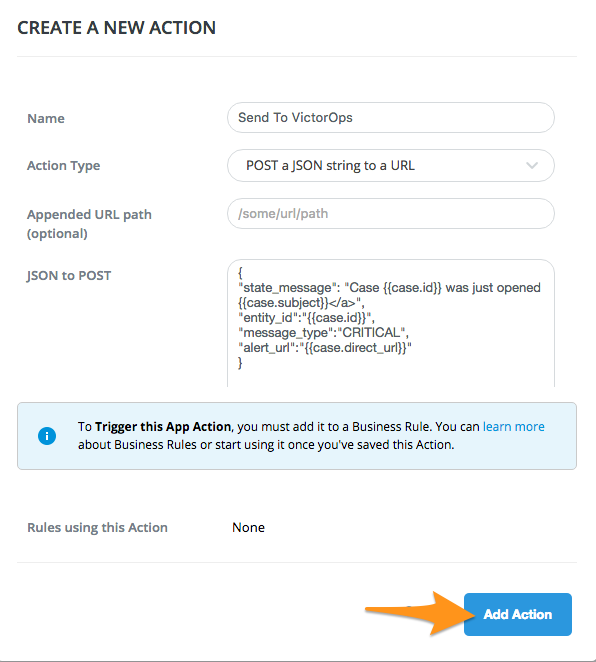
On the next screen select Add Action.

Give the action a name. For the “Action Type” select “POST a JSON string to a URL”. In the JSON to POST box paste in the following:
{

"entity_id":"{{case.id}}",

"message_type":"CRITICAL",

"state_message":"New Case: {{case.id}} about {{case.subject}}",

"Case Description":"{{case.description}}",

"Case Priority":"{{case.priority}}",

"Customer":"{{case.customer}}",

"Case Email":"{{case.emails}}",

"alert_url":"{{case.direct_url}}"

}
Then select Add Action.
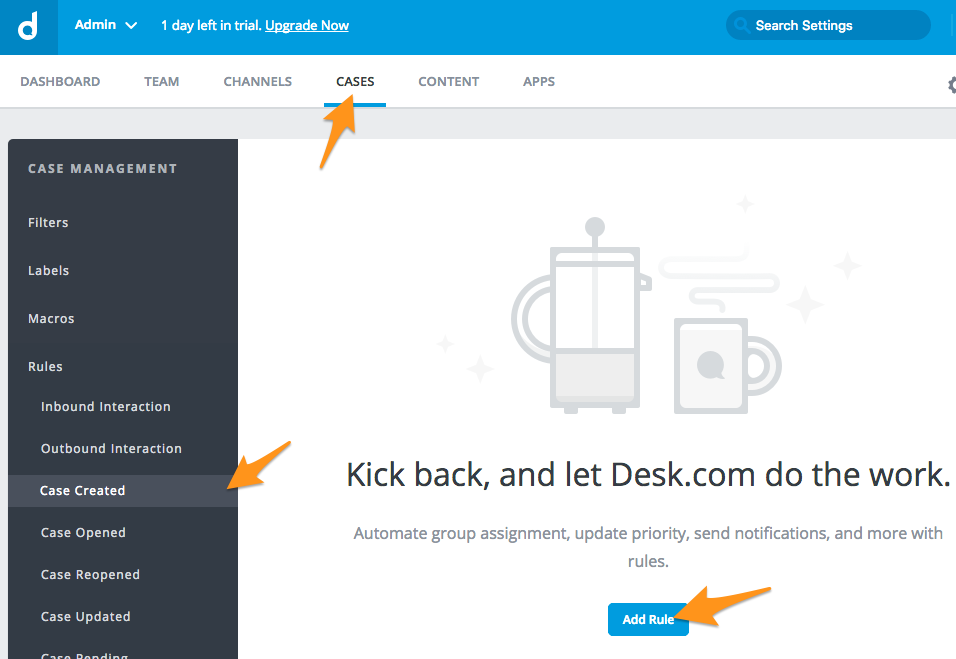
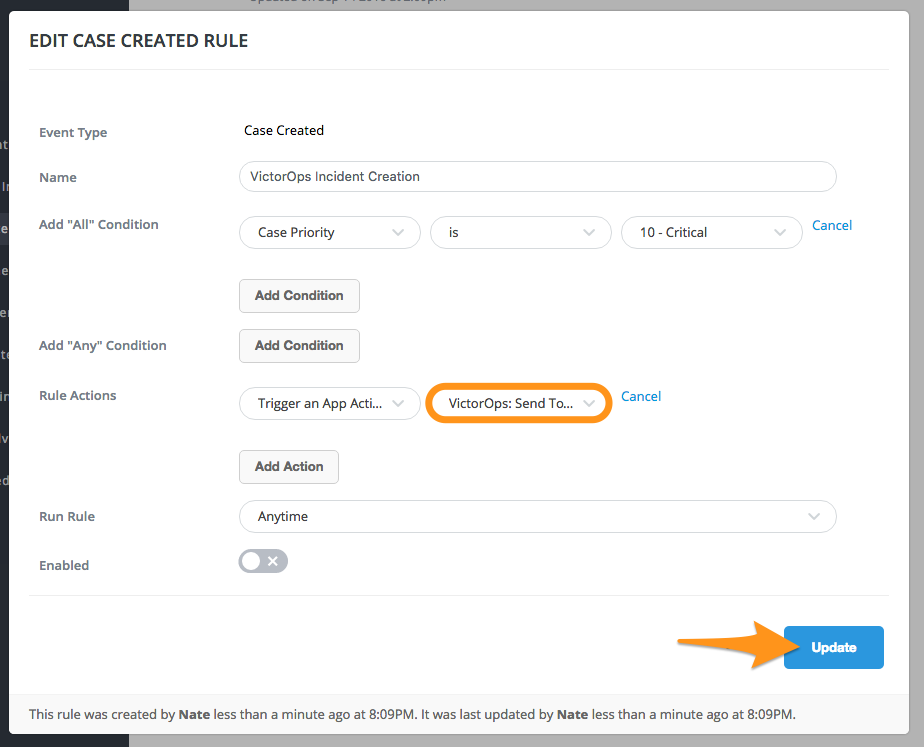
Next you must add the action to a “Case Created” rule. To do this select Cases then under “Rules” select Case Created then Add Rule
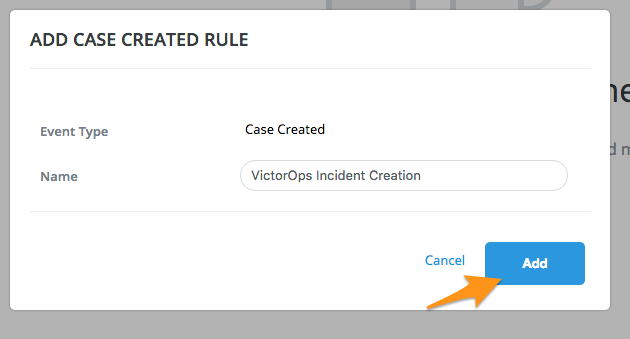
Give the rule a name then hit Add.
Add any Condition you might want, then for the “Rule Actions” set it to Trigger an App Action and then choose the Splunk On-Call action you previously created. Finally hit Update and you are done.
If you want to create an action and rule for when the Case is Closed/Resolved, follow the previous steps and use the following for the JSON:
{

"entity_id":"{{case.id}}",

"message_type":"RECOVERY",

"state_message":"New Case: {{case.id}} about {{case.subject}}",

"Case Description":"{{case.description}}",

"Case Priority":"{{case.priority}}",

"Customer":"{{case.customer}}",

"Case Email":"{{case.emails}}",

"alert_url":"{{case.direct_url}}"

}
If you have any questions please contact Splunk On-Call Support.