Versions Supported: Checkmk Raw, Checkmk Enterprise
VictorOps Version Required: Starter, Growth, or Enterprise
What you need to know: The Splunk On-Call plugin for CheckMK is only compatible with the legacy Nagios Core CheckMK. The plugin is not compatible with the new CheckMK Micro Core (CMC).
The following guide will walk you through the integration between Checkmk and Splunk On-Call. For more information on Checkmk, please visit https://checkmk.com/
Integrating with CheckMK
Configuration in Splunk On-Call
- In Splunk On-Call, under the Integrations tab, select the Generic REST endpoint.
- Copy the REST endpoint URL on the resulting page
Configuration in CheckMK
- Create a notification in CheckMK
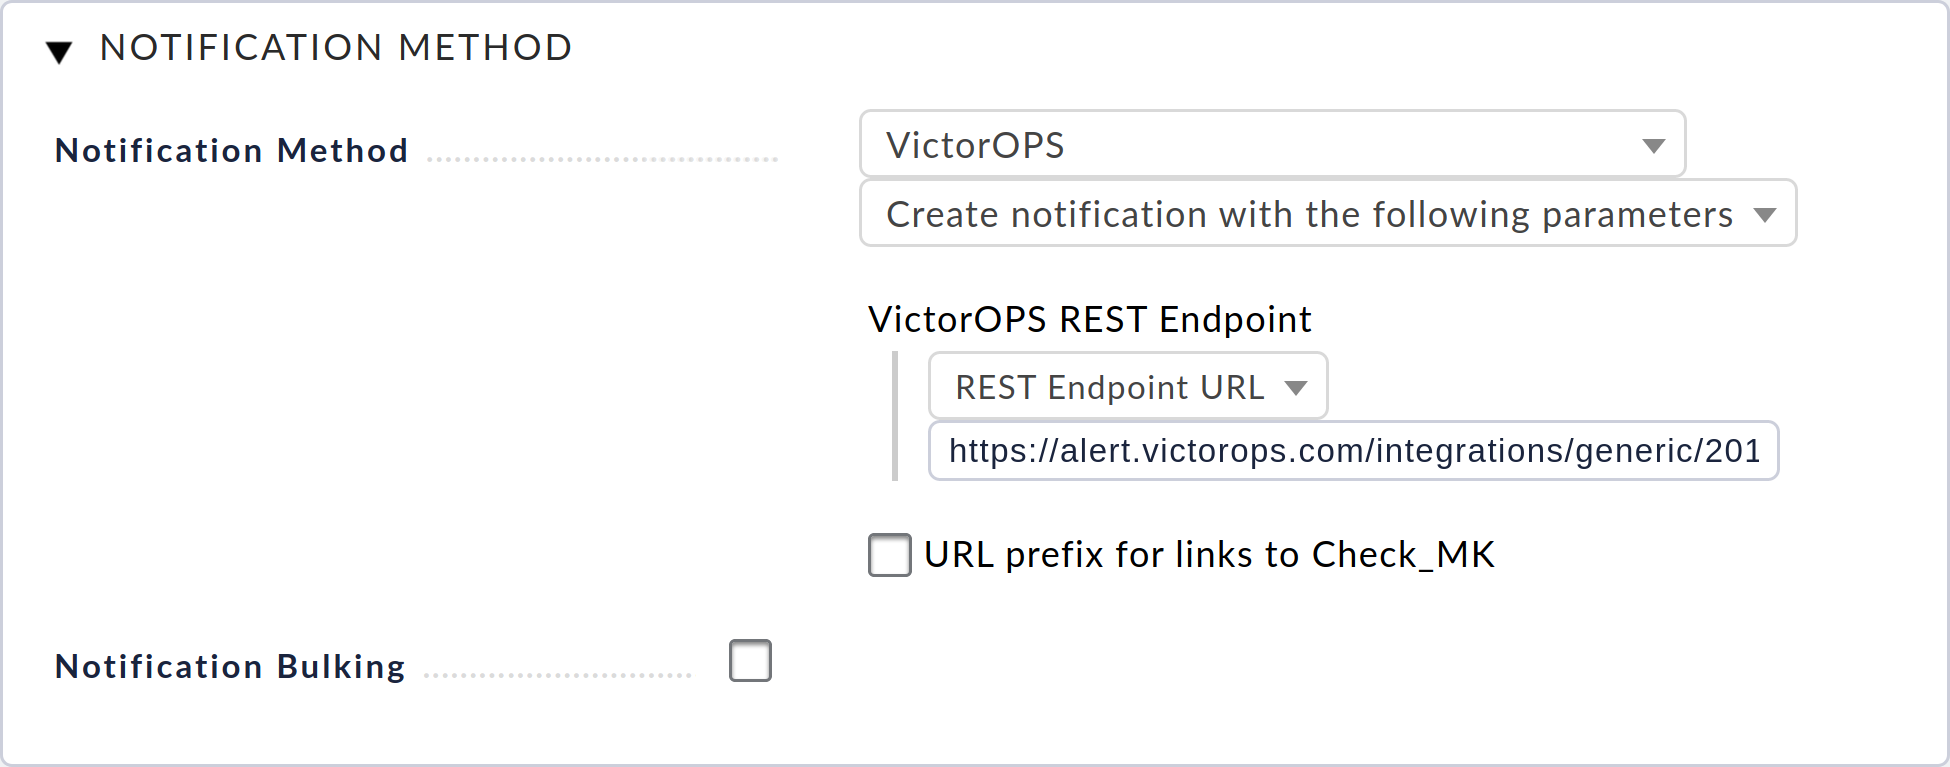
- For the Notification Method select the VictorOps option.
- Input the REST endpoint URL from Splunk On-Call in the VictorOPS REST URL textbox (with REST Endpoint URL selected in the dropdown
Visit CheckMK’s documentation for more information on integrating and testing.
Legacy CheckMK (Nagios Core) Plugin Installation
Installation
Depending on your system you may need to use sudo with these commands.
deb install
- Execute
wget https://github.com/victorops/monitoring_tool_releases/releases/download/victorops-nagios-1.4.20/victorops-nagios_1.4.20_all.deb
- Execute
dpkg -i <path_to_file>
If you don’t want to use dpkg you can also use
sudo apt install <path_to_file>
rpm install
- Execute
wget https://github.com/victorops/monitoring_tool_releases/releases/download/victorops-nagios-1.4.20/victorops-nagios-1.4.20-1.noarch.rpm
- Execute
rpm -i <path_to_file>
In Checkmk
Assuming “mysite” is your omd site name:
Run /opt/victorops/nagios_plugin/omd_check_mk/install.sh <omd site name>. I.e.
1 | /opt/victorops/nagios_plugin/omd_check_mk/install.sh mysite |
This command will create copies of Nagios and environment configuration files and create symlinks to them in the site Nagios directory.
Edit /opt/victorops/nagios_plugin/conf/env.<omd site name>.sh. I.e.
1 | vi /opt/victorops/nagios_plugin/conf/env.mysite.sh |
Update the file, setting the appropriate values for your organization id and key, as well as failsafe email and monitor name. To get the organization ID, you will need the slugified version of your organization name (org slug). When you are logged into the main Splunk On-Call timeline, your org slug is located at the end of the URL. (Ex. if the URL is https://portal.victorops.com/client/my-company, then the org slug, in this case, is “my-company”)
Your organization key can be found by selecting the Nagios integration in the Splunk On-Call web portal. From the main timeline select Integrations then select the Nagios/Nagios XI integration from the resulting list of integrations.
The API Key needed is located under Service API Key. (Please note: you may need to enable the integration if you do not see Service API Key)
As always with the Nagios plugin, if your localhost is not configured as “localhost” in the Nagios instance, you will need to edit /opt/victorops/nagios_plugin/nagios_conf/victorops.<omd site name>.cfg to change the service hostname on or about line 52. I.e.
1 | vi /opt/victorops/nagios_plugin/nagios_conf/victorops.mysite.cfg |
Verify the Nagios configuration
1 | /omd/sites/;/bin/nagios -v /omd/sites/<omd site name>/tmp/nagios/nagios.cfg |
Once you have taken all necessary configuration steps, you can restart your omd instance. The usual VictorOps services will appear on your Nagios host dashboard. They will also appear on the Checkmk service status for the host. You can look for logs in /var/log/victorops.
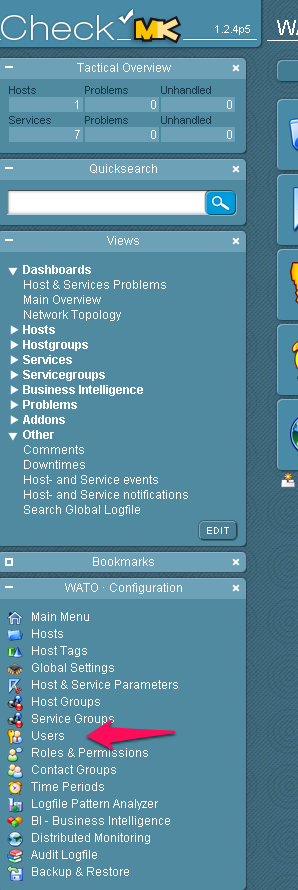
Next, you will need to configure the contact settings from the Checkmk console. Start by selecting Users.
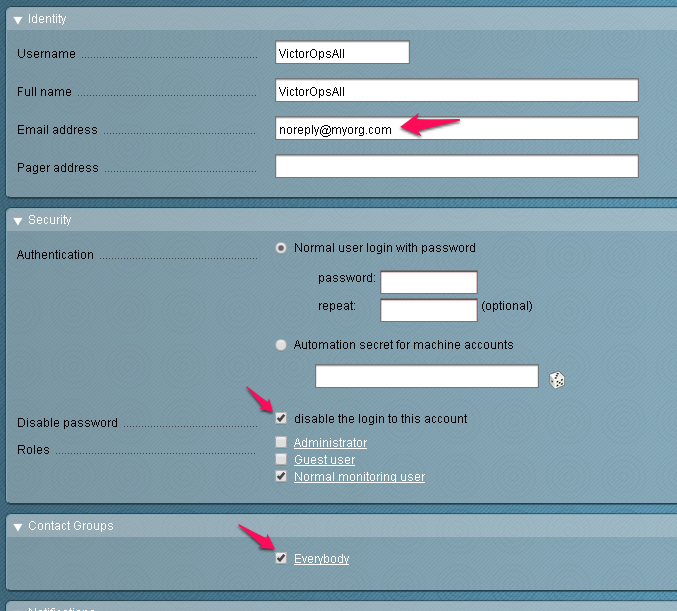
Make a New User.

Configure the user. Email is required even though no emails will be sent. Disable logins for this user and add the user to a contact group.
Enable notifications for the user and configure the notification method for “VictorOps” and “Call with the following parameters” as pictured here.

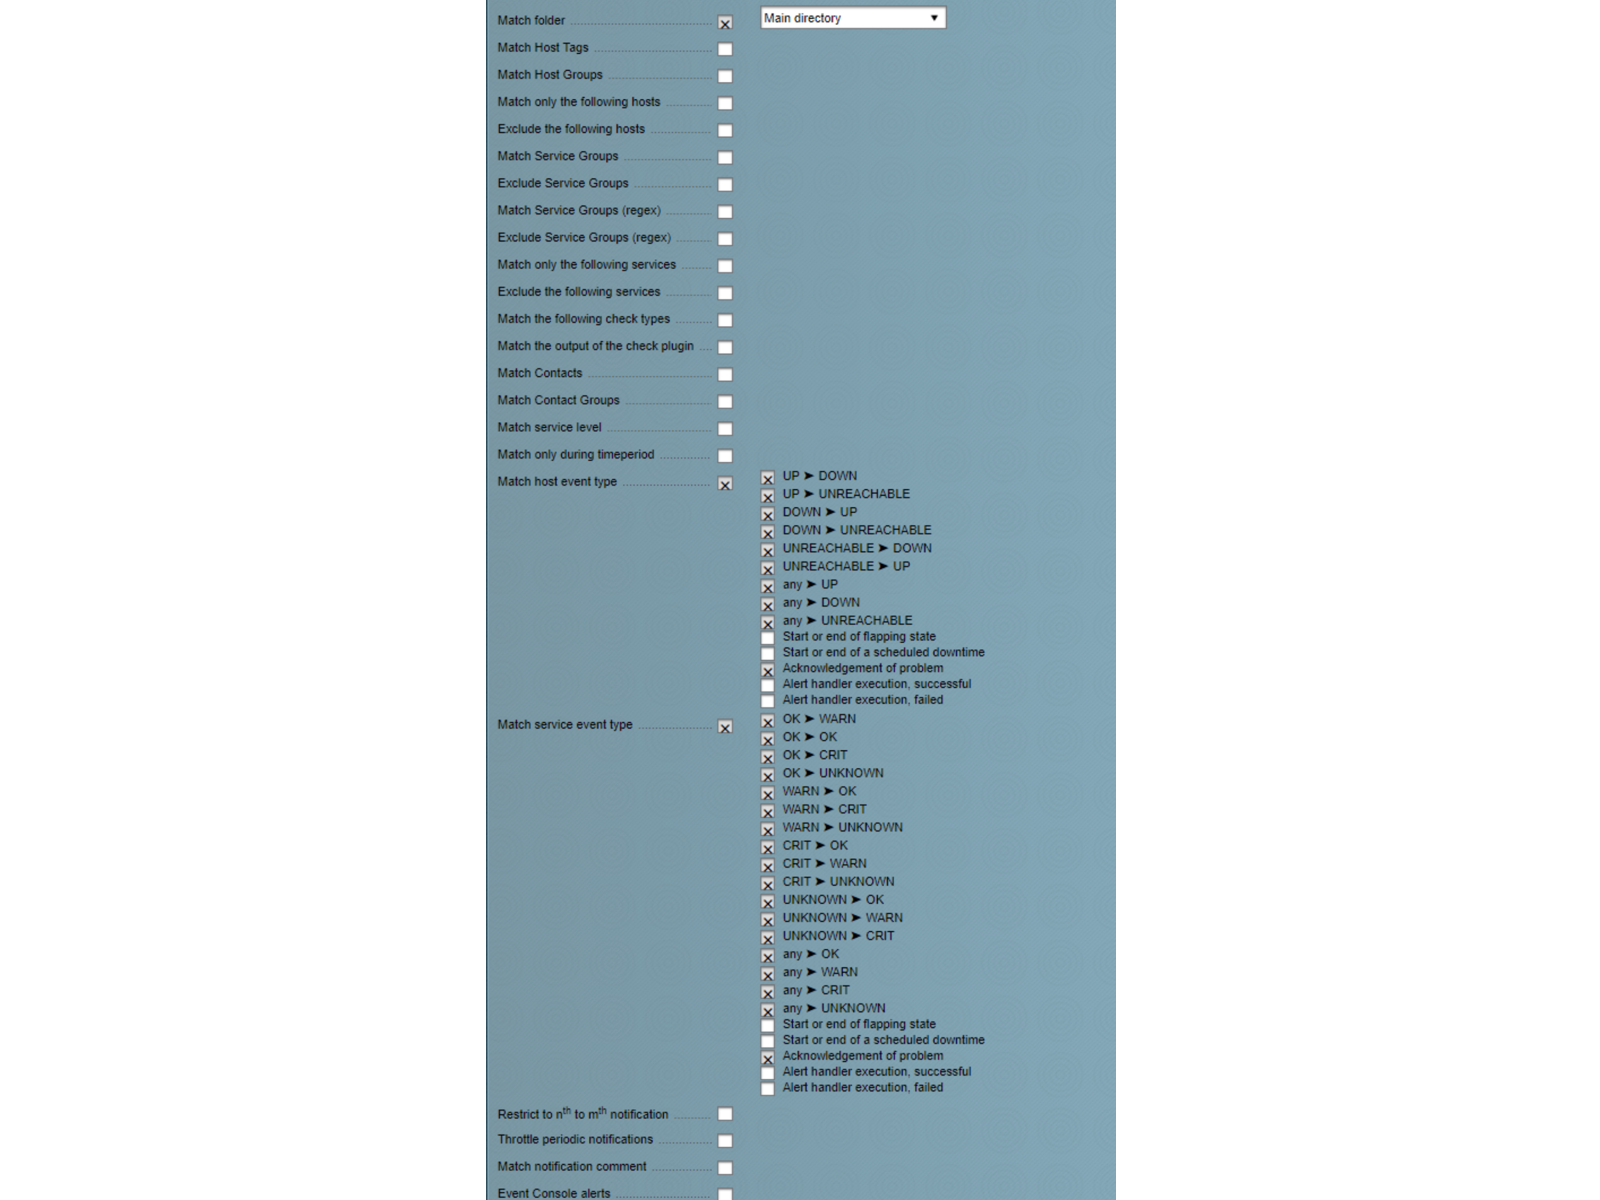
Disable flapping and downtime events for hosts and services, as follows (VictorOps does not currently represent these states):
You should then be able to send a test notification that will reach Splunk On-Call using the “send custom notification” features of either Checkmk or Nagios. The VictorOps Forwarder service does not notify through the usual mechanisms, though, so avoid sending custom notifications with that service.
If you have any questions regarding this integration please contact our support team.