BEFORE YOU BEGIN: Action is required for your existing ServiceNow to Splunk On-Call (formerly VictorOps) Integration.
For the time being and as described in this article, when in the ServiceNow platform, our tool is still called VictorOps. When logging into the Splunk On-Call account and navigating on this side of the set-up, we will call it by the re-branded name.
If you are upgrading from an old XML file to the new VictorOps Bidirectional Integration in the ServiceNow App store, you will need to run the following script or reach out to the support team before installation.
Splunk On-Call ServiceNow Bidirectional Integration
No need to interrupt workflows in order to receive and update tickets. The latest Splunk On-Call to ServiceNow bidirectional integration allows you to spend more time working on incidents and less time moving a ticket through the queue. This way, you can quickly respond to an incident, collaborate in real-time and find resolutions faster.
The Splunk On-Call ServiceNow bidirectional integration maintains incident and ticket history but doesn’t distract you during a firefight. Then, you can leverage this detailed incident history to conduct thorough post-incident reviews and ensure on-call incident management gets better over time. Eliminate context-switching by working in a single application, focusing on the issue at hand and spending less time organizing tickets.
Download the Splunk On-Call application within the ServiceNow app store, and you’ll be up and running within minutes!
Automatically Update ServiceNow Tickets from Splunk On-Call
- Combine real-time incident response functionality with detailed ticket tracking to create a holistic system for on-call incident management
- Focus on real-time response and collaboration during a firefight and reduce MTTA/MTTR over time by automatically updating ServiceNow tickets from Splunk On-Call
- Centralize monitoring data, on-call schedules and alerting to improve visibility into infrastructure health and easily keep cross-functional teams informed during incident response
- Conduct thorough post-incident reviews with complete records of incident history sent from Splunk On-Call to ServiceNow
ServiceNow Versions Supported:
Madrid, New York, Orlando, Paris, Quebec, Rome, San Diego, Tokyo, Utah, Vancouver, Washington DC
- ServiceNow Account: Requires SNOW Administrative Privileges to create the application registry and an Active, “Web Service Access” only user with the ITIL role.
- Splunk On-Call Version Required: Enterprise level of Service
- Need to Know: Currently manual incident creation in Splunk On-Call will not send to SNOW
Enable Splunk On-Call In ServiceNow
Download the Splunk On-Call application within the ServiceNow Store
You will need HI credentials to perform the “GET” from the ServiceNow Store.
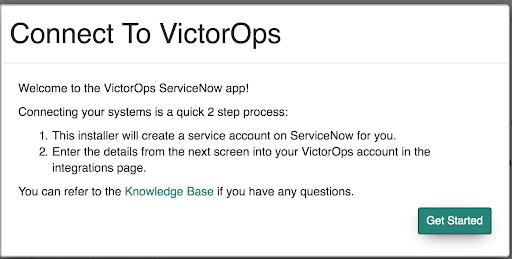
The following prompt will show up within Settings, click “Get Started”
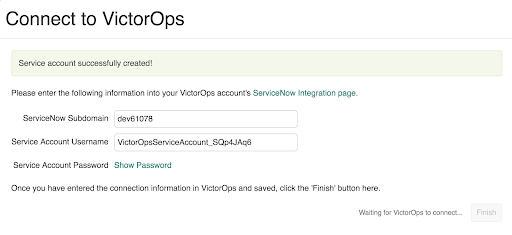
After this, the following modal will appear with the information that you will need to input within Splunk On-Call. The “Finish” button will only appear active after you have entered your credentials within Splunk On-Call
Enable ServiceNow In Splunk On-Call
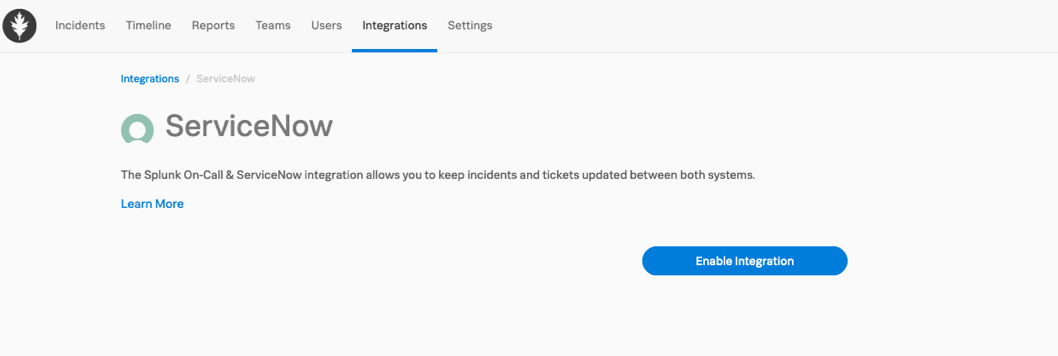
As an admin, navigate to Integrations >> ServiceNow.
Click Enable Integration
After this, you will have the opportunity to enter the credentials from your ServiceNow instance as above.
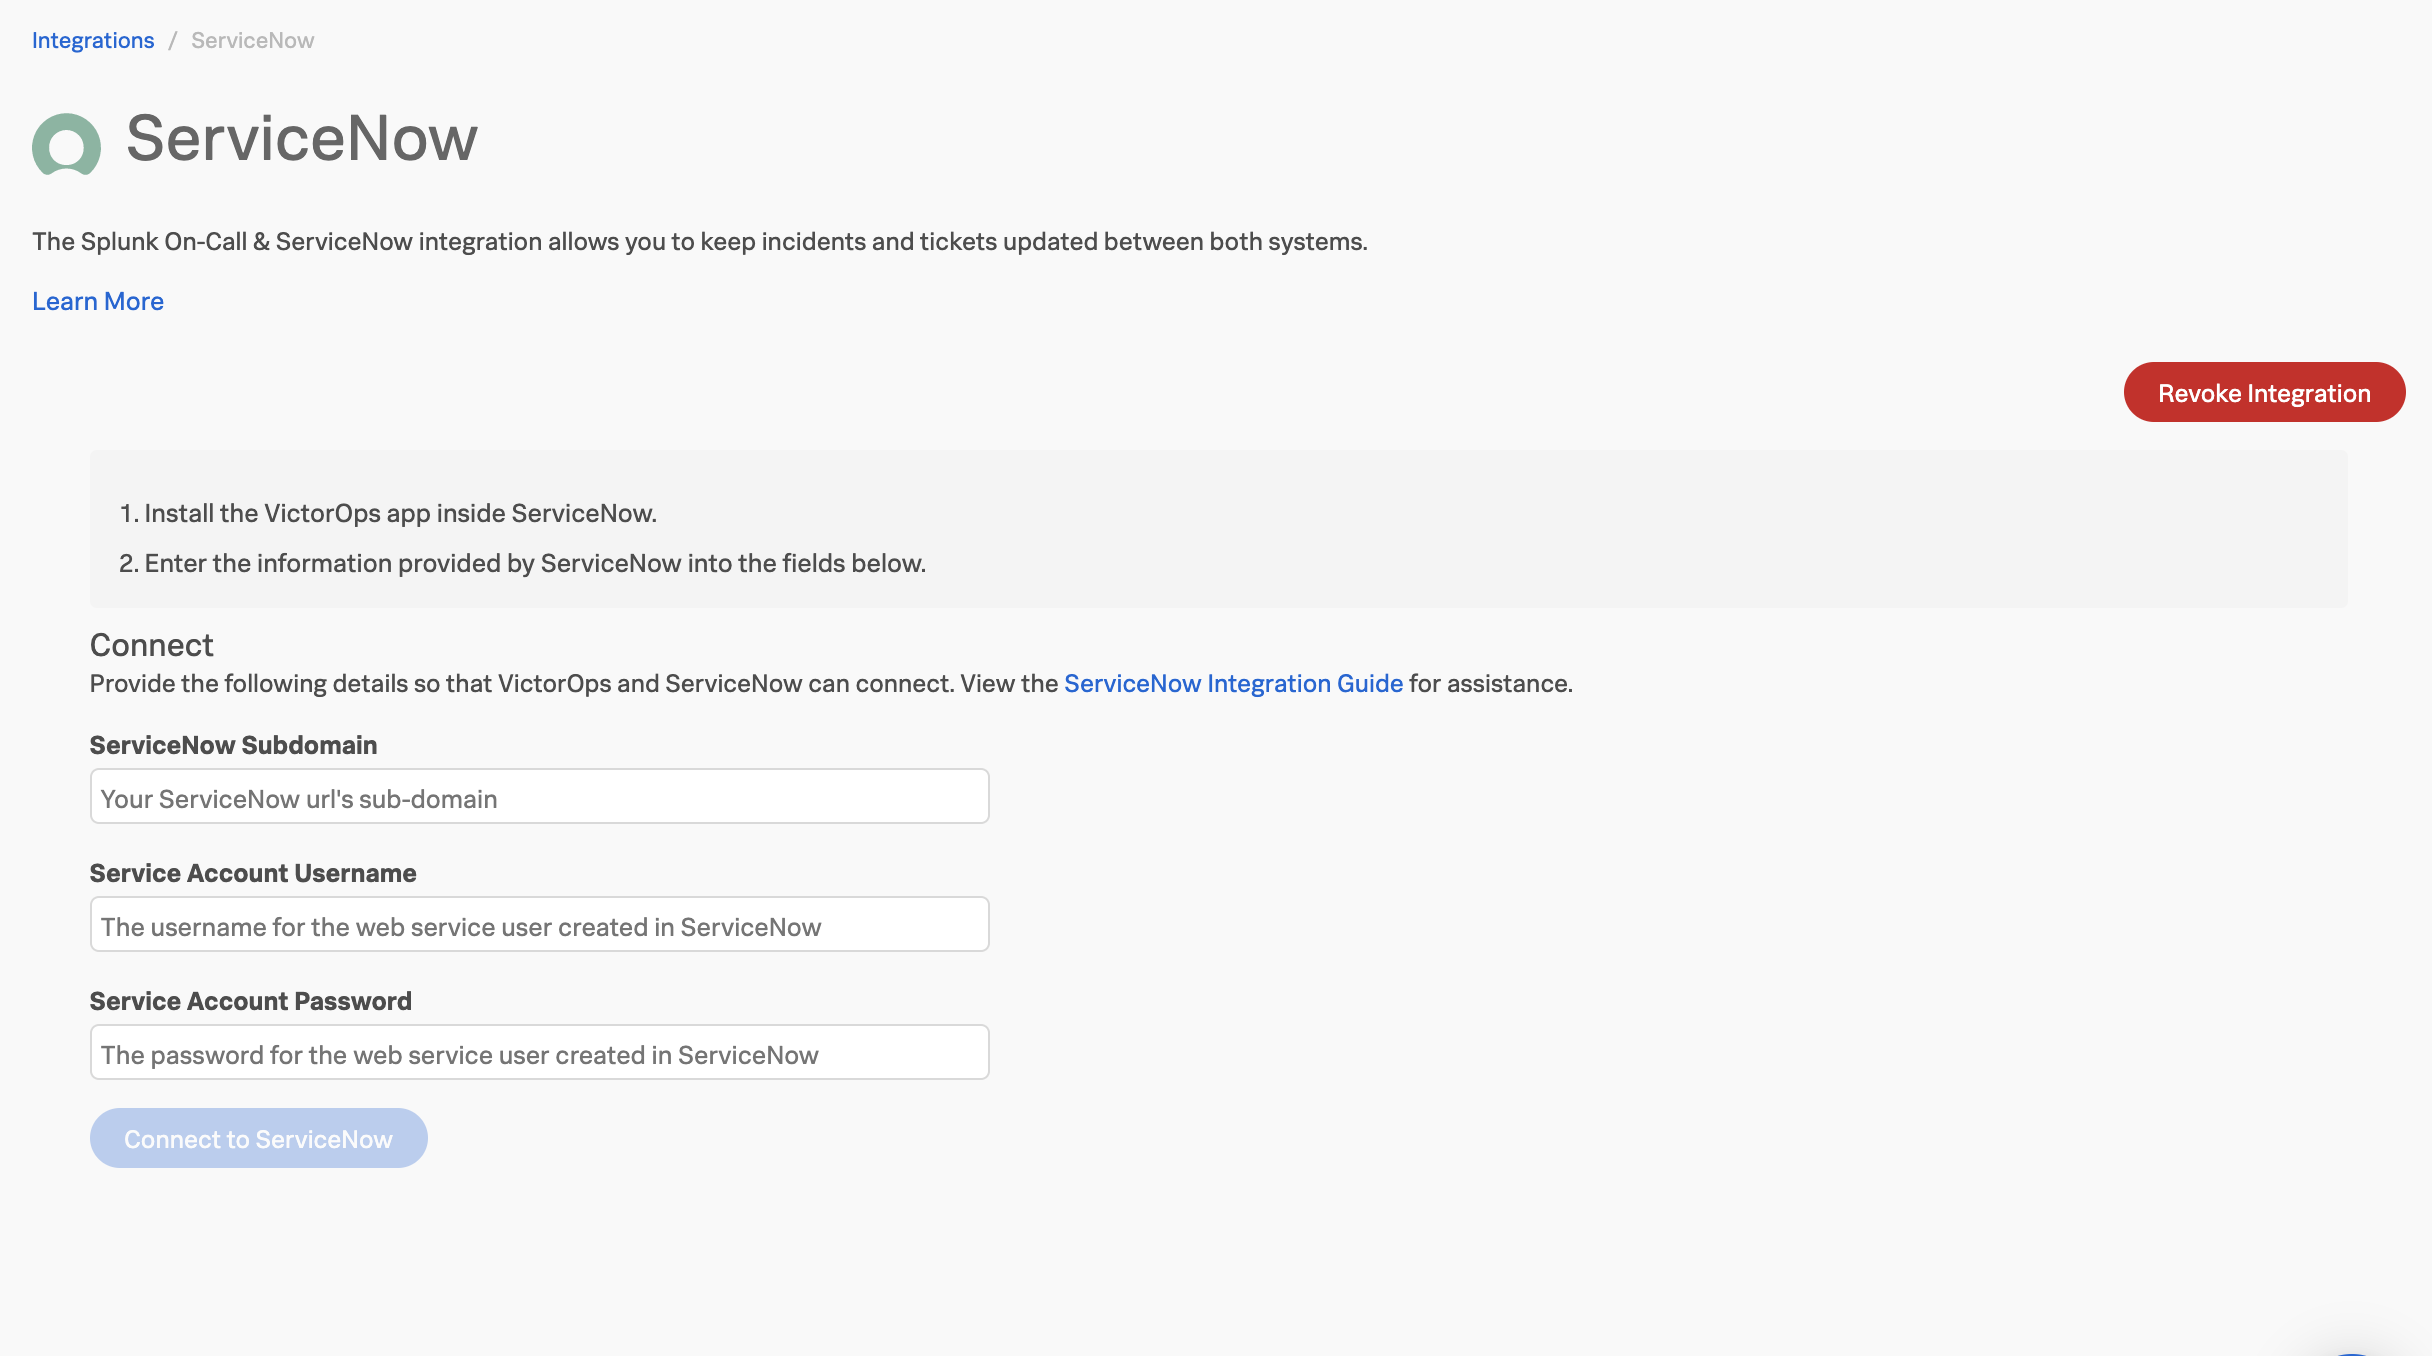
Click Connect to ServiceNow. After the connection has been made, return to ServiceNow and click “Finish” to finalize authentication.
Incident State Mapping
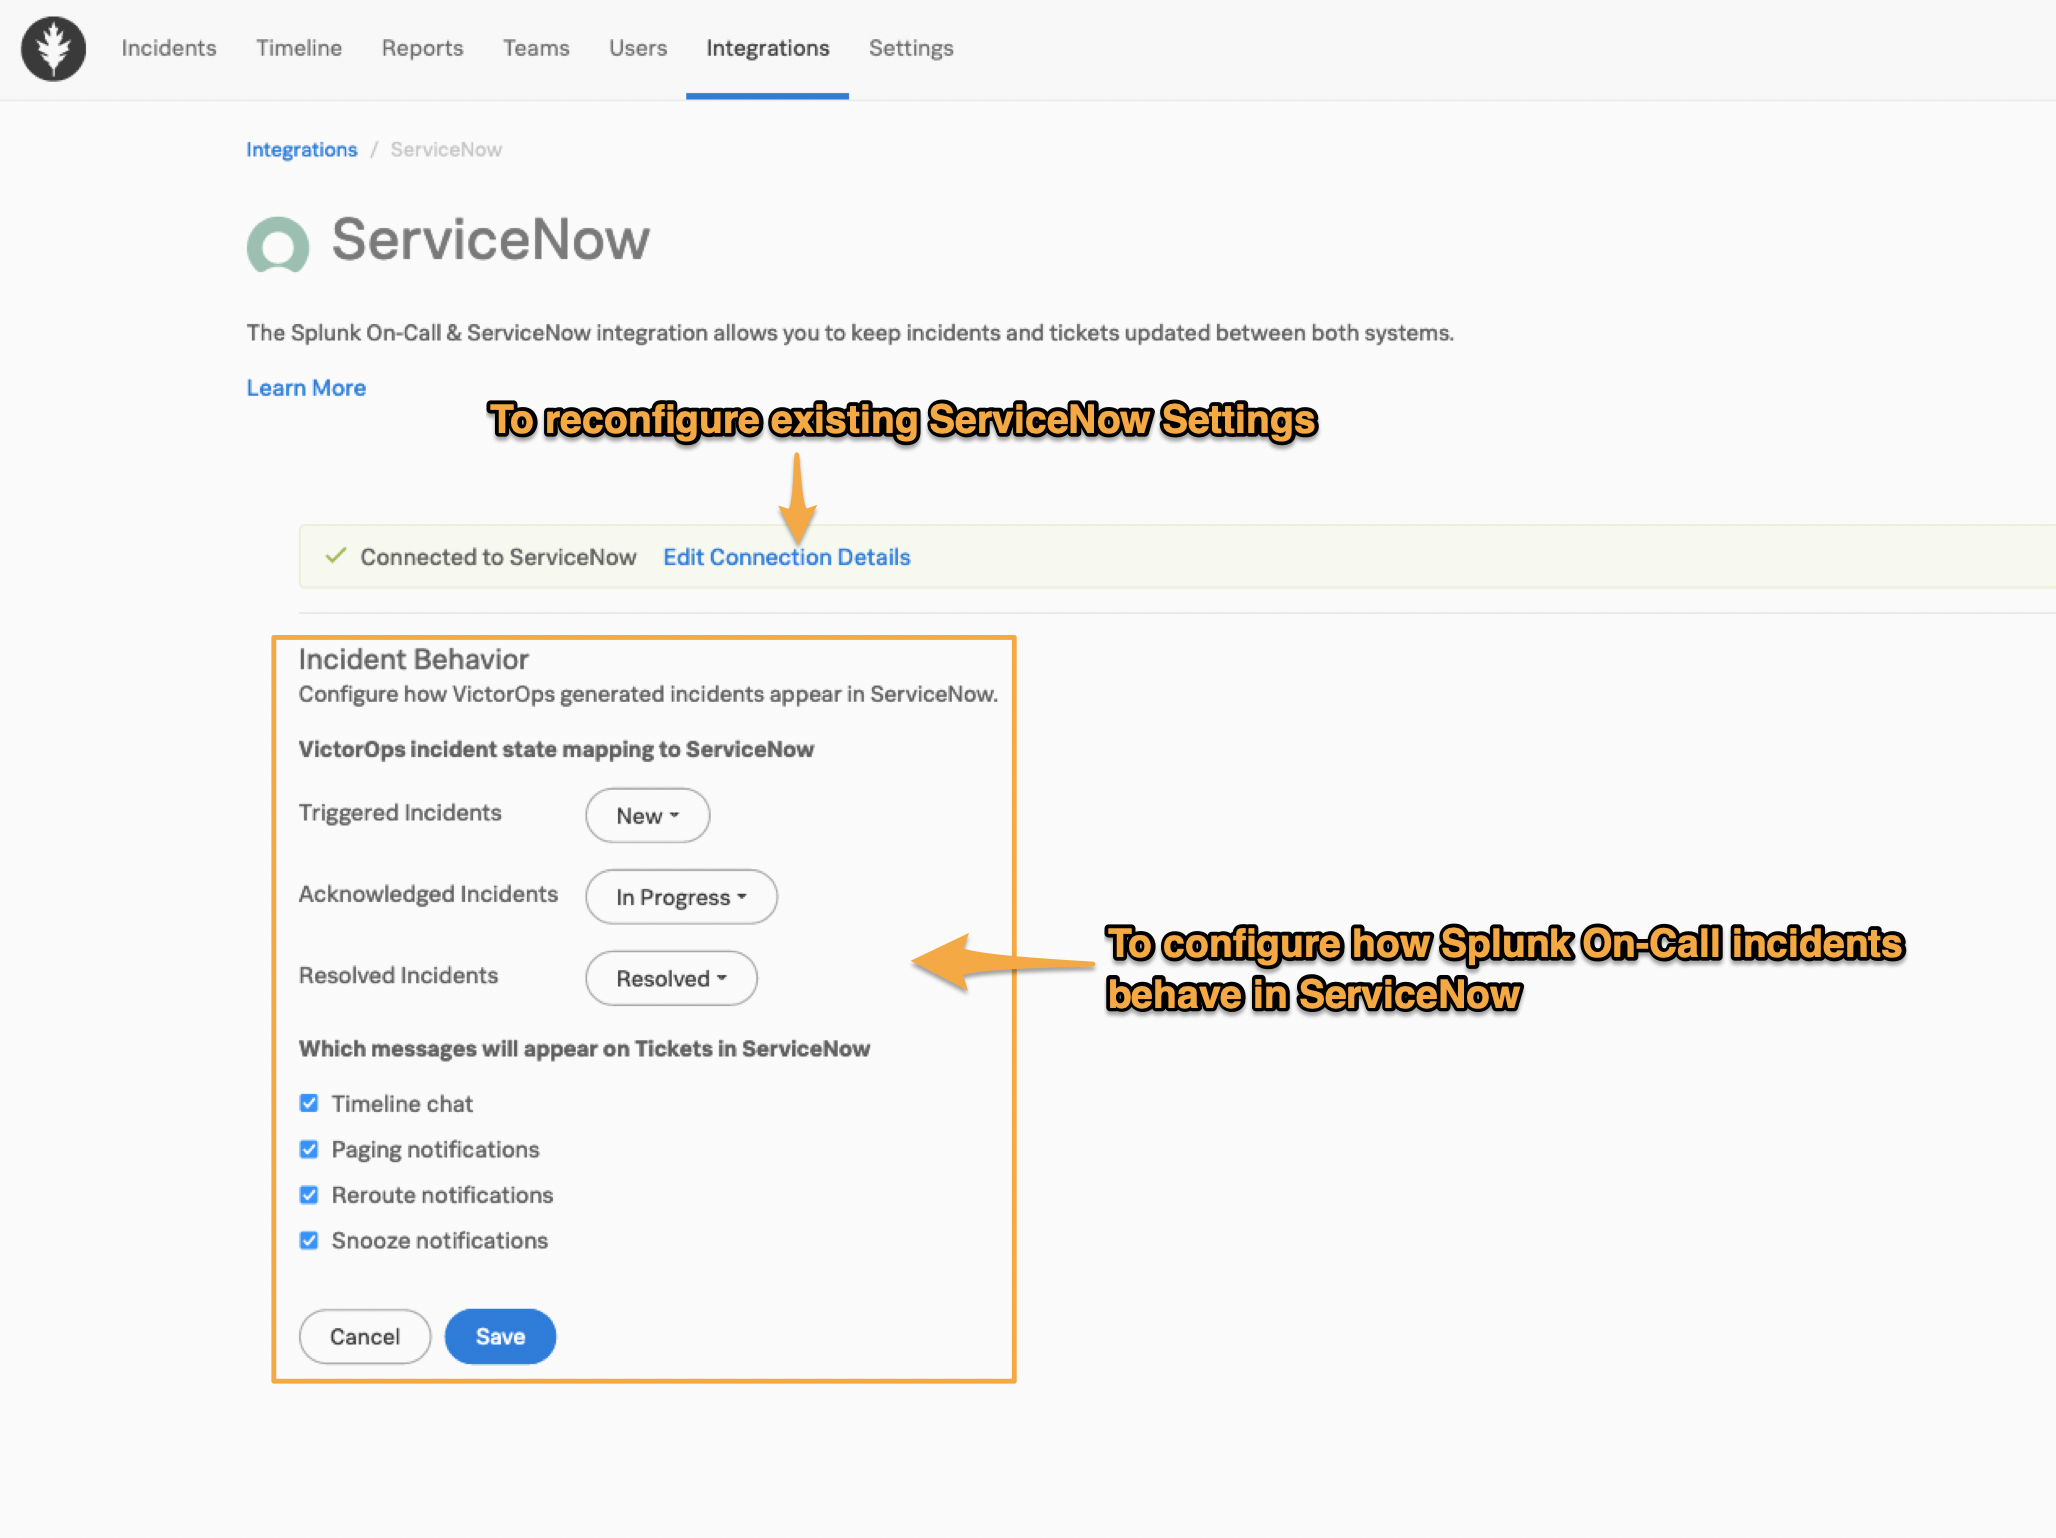
ServiceNow and Splunk On-Call will stay in sync as determined by the state mapping that you set up within Splunk On-Call. Changing the state in either system means that the opposite system will be updated.
To edit Splunk On-Call incident states after saving, click the Edit Integration button. Here you may also reconfigure your ServiceNow Connection Details.
Mapping ServiceNow Assignment Groups
Upon validating credentials, you will be able to map Splunk On-Call Escalation Policies to ServiceNow Assignment Groups. This will allow you to update the Assignment Group in ServiceNow when sending an incident from Splunk On-Call or determine where an incident will go when sent from ServiceNow.
When the mapping is set, the ServiceNow Assignment Group field will be updated based on the Escalation Policy being paged. This field will also update when an incident is rerouted to another Escalation Policy. If the incident reroutes to a specific user, the assignment group will be cleared. Updating an assignment group in ServiceNow will not affect paging behavior in Splunk On-Call.

Select Add Mapping to see available choices. For the ServiceNow Assignment Group, start typing in the ‘filter’ box to see the different available options.

User Mapping
Upon clicking save on the edit integration page or when taking action on an incident, all available users will be synced across the systems based on an email match.
Updating ServiceNow “Assigned To” Field from Splunk On-Call
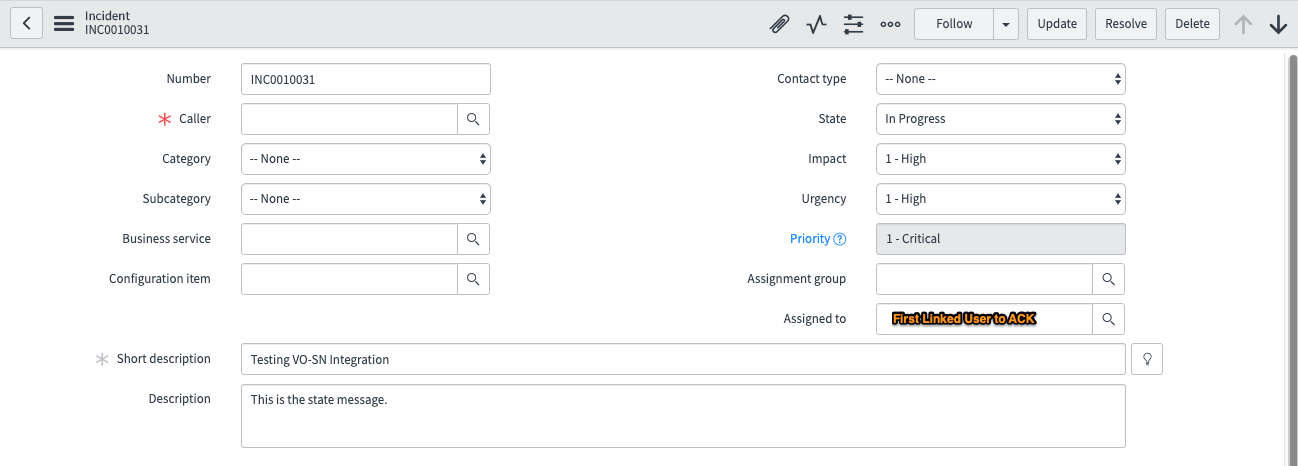
The Assigned To field in ServiceNow will be populated with the first user to acknowledge an incident. If the Splunk On-Call incident goes back to a triggered state, the next person to acknowledge will populate the field.
Incident Linking
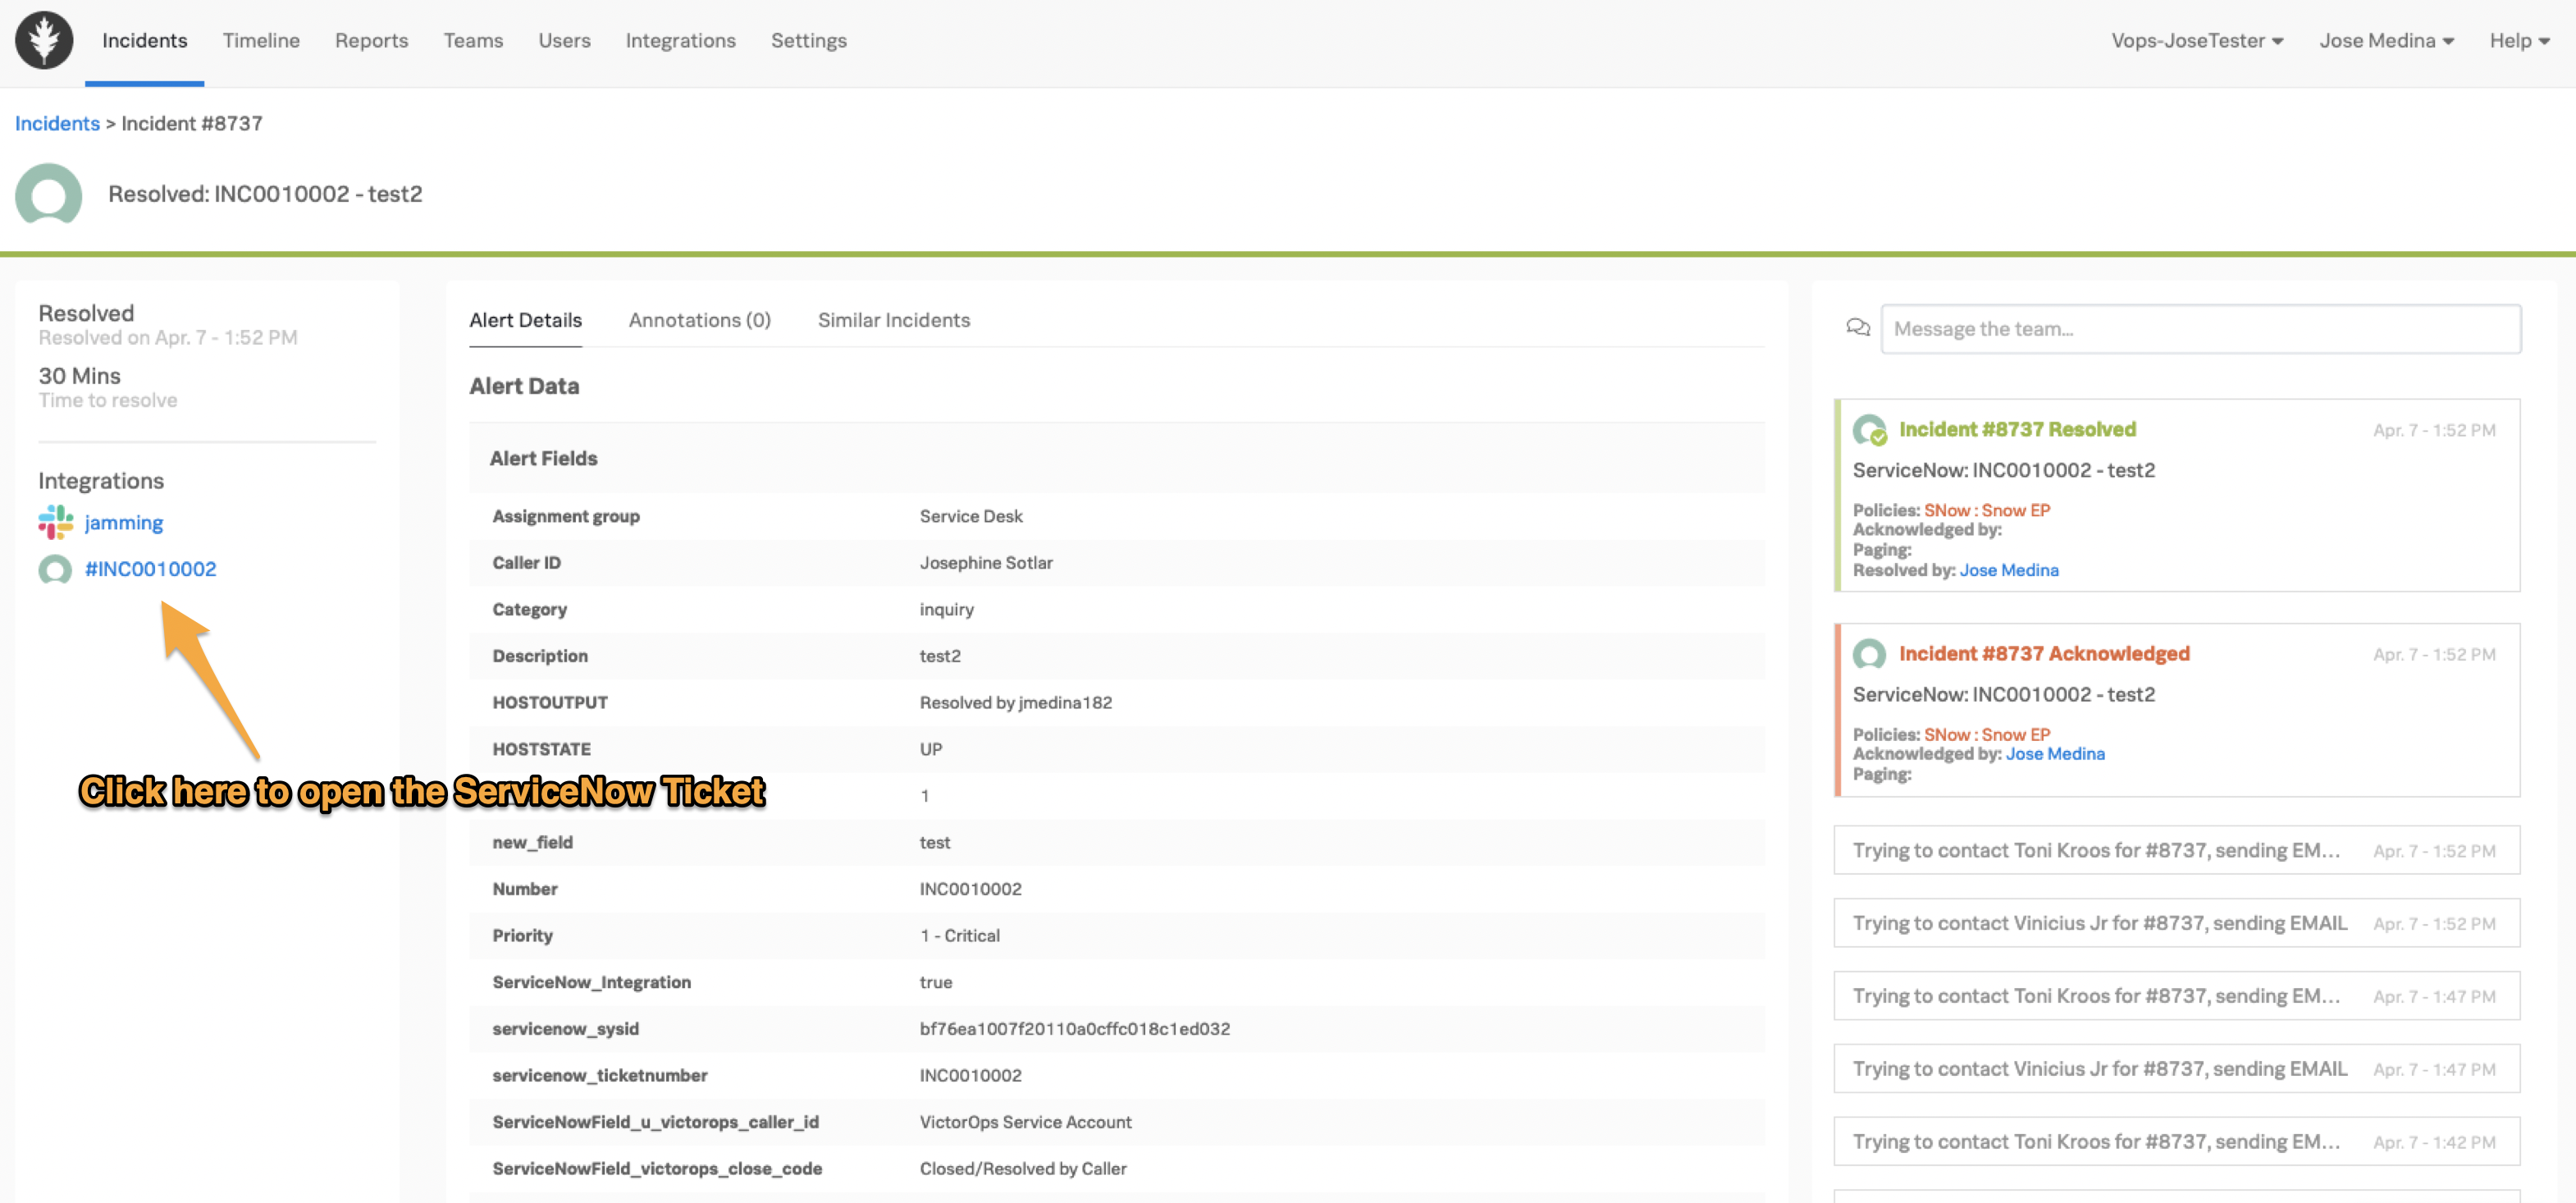
When Splunk On-Call Sends an Incident to ServiceNow
To complete the integration an alert rule will need to be created. Navigate to Settings >> Alert Rules Engine.
Add a rule which defines a matching condition to send Splunk On-Call incidents to ServiceNow.
For example, to send all critical incidents to ServiceNow, use:
When message_type matches CRITICAL using Wildcard
Set ServiceNow_Integration to new value true.
In this example, we are also providing resolution field information to enable auto-resolution of Incidents to ServiceNow.
Mapping Fields from Splunk On-Call to ServiceNow
Available Fields
Preconfigured fields that are immediately available are:
close_code, close_notes, work_notes, short_description, description, state, assignment_group, assigned_to, and resolved_by.
All the above fields can be set by the rules engine using the syntax:
ServiceNowField_victorops_<field_name>. However, assignment_group, state, work_notes, short_description, description, assigned_to, and resolved_by should automatically be handled by the integration mapping.
Mandatory / Custom Fields
To dynamically assign the value based on an alert field in Splunk On-Call, use the syntax ‘${{victorops_field_name}}‘. See field expansion for more tips on dynamic assignment.
Only some out of the box fields are preconfigured with the Splunk On-Call app, so mapping additional fields in ServiceNow requires additional configuration.
- In ServiceNow, use the filter navigator to search for ‘x_splu2_victorops_incident_import.list‘ and hit enter. It should take you to a page where you will see a table with some empty fields.
- Hit New in the top, next to ‘Incident Reports’. This will show you all the current active fields.
- Click the Menu button at the top (three line icon), then look for Configure then Form Layout.
- On this new page we will create a new import table field. This will be the field name to use in the rules engine.
Eg. “VictorOps caller id” would end up needing the syntax ServiceNowField_victorops_caller_id field on the rule.- Under the Create New Field section, add the name of the field you want to map. You will want to keep the same format that you see in the Selected list: VictorOps <name of field>.
- Change the Field Length to Medium.
- Click Add. You will see the field added to the ‘Selected’ column. Make sure you hit Save at the end.
- Now go back to the filter navigator to search for ‘Transform Maps‘, under System Import Sets. Then look for ‘VictorOps Incident‘, you can use the search box inside the Table Transform Maps page.
- Open the VictorOps Incident table transform map, then scroll down to ‘Field Maps‘ and click the ‘Mapping assist‘ link right on top of the Field Maps tab. Note: if you get some error or pop up in the screen, you can hit cancel for now.
- In the Mapping Assist page, you will see three boxes. The left box will be your Source Fields; the right box will be the Target Fields; and in the middle box, you have the actual mapping for these fields, where you match the source with the Target.
- First thing you will want to do is search in the ‘Source Field‘ for the name of the field you created in step 4. Once you find it, select it carefully and hit the Add arrow.
- Next, you will want to do the same thing for the Target Field box. Find and assign the Target Field you want to match with and add it to the Field Map box.
- Lastly, make sure the two fields are next to each other (mapped), in the Field Map box. Make sure you hit Save at the end.
After the above steps are complete you can use the Splunk On-Call alert rules engine to supply the field values with the same syntax as before:
‘set ServiceNowField_<field_name> to new value <value>‘
In the example image below, the field value on the Splunk On-Call import table (in ServiceNow) is “victorops_custom_field”.

Note: If the field name in ServiceNow has capital letters in it, you’ll want to replace them with lower case letters when creating the alert rule in On-Call. Ex: A custom ServiceNow Field “Test Field” becomes “ServiceNowField_test_field” in the Alert Rule.
This syntax can also vary depending on your specific ServiceNow version. If you find that “ServiceNowField_test_field” doesn’t work, please add an _u to look like “ServiceNowField_u_test_field”
Set Logic to Send Incidents and Fields to Splunk On-Call
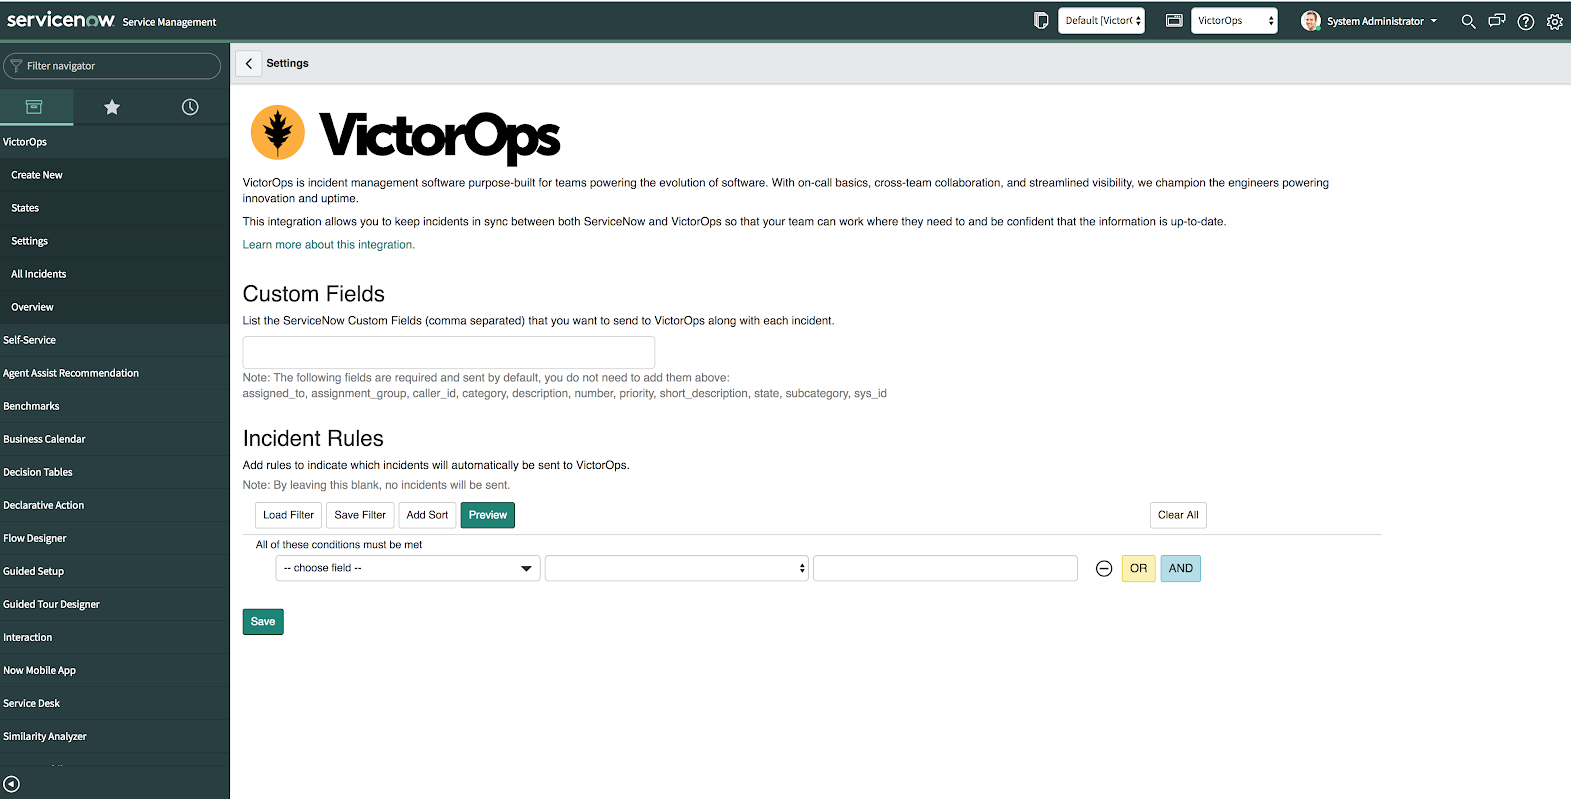
ServiceNow will automatically send the following fields to Splunk On-Call: assigned_to, assignment_group, caller_id, category, description, number, priority, short_description, state, subcategory, sys_id. To include more fields than the above, add custom fields separated by a comma and they will appear in the alert payload within Splunk On-Call.
Use “Incident Rules” to create custom logic that allows you to set logic as to when incidents are sent from ServiceNow to Splunk On-Call automatically.
Note: If after saving your Incident Rules and/or Custom Fields, the screen refreshing and your changes are gone, you may have to change the Application scope to Splunk > VictorOps. Click on the globe icon near the upper righthand corner to change the application scope and then try again.
Manually Send Incidents from ServiceNow to Splunk On-Call
If the incident rules above have not been met, you may still send the incident with required information including assignment group, by clicking the button “Send to VictorOps” to manually send an incident to Splunk On-Call.
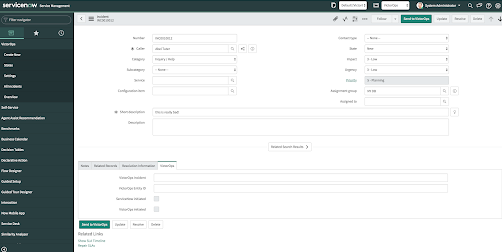
If you have any questions, please contact Splunk On-Call support.
Splunk On-Call and ServiceNow CMDB
The Splunk On-Call app can interact with the ServiceNow CMDB by setting any cmdb item field which exists on the incidents table. You can interact with these fields by leveraging the Splunk On-Call alert rules engine and the ServiceNow transform map following the steps under section “Mapping Fields from Splunk On-Call to ServiceNow”
Troubleshooting
I am getting a message that my “ServiceNow is connected, but you do not have the proper permissions for the integration to work.”
The app configures the service user with the roles we expect are needed for out of box configurations of ServiceNow. It is very common for additional roles to be required that are unique to your instance of ServiceNow. You will need to identify the subset of roles that are required by your instance and add them to the service user account. One easy way to identify if this is the case, is to temporarily add the ‘admin’ role since it inherits all other roles. Then test the integration. If everything works as expected, there is some role or subset of roles that need to be identified and added.
I am getting messages in my Splunk On-Call Incidents and Timeline that “ServiceNow API call timed out.”
Our system will wait 10 seconds for a response from ServiceNow before we drop the attempted request. Many times, ServiceNow will queue the api call, but the link between Splunk On-Call Incident and ServiceNow incident is not established because our system did not receive the response in time. To speed up the requests, apply an index in ServiceNow on the field ‘x_splu2_victorops_victorops_incident’ on the ‘Incidents’ table.