Your Primary Paging Policy is executed when an incident is routed to you based on a team’s Escalation Policy. Learn more about team escalation policies if you need help setting those up. Your Paging Policy is part of your personal profile and gives you control of how, and how often you’re contacted when incidents are routed to you.
Want to dive deeper into time-based paging policies? Learn more about setting up custom paging policies here.
Getting Started With Your Primary Paging Policy
In the top right-hand corner of the web UI, click your Username -> Profile.
Input Contact Methods
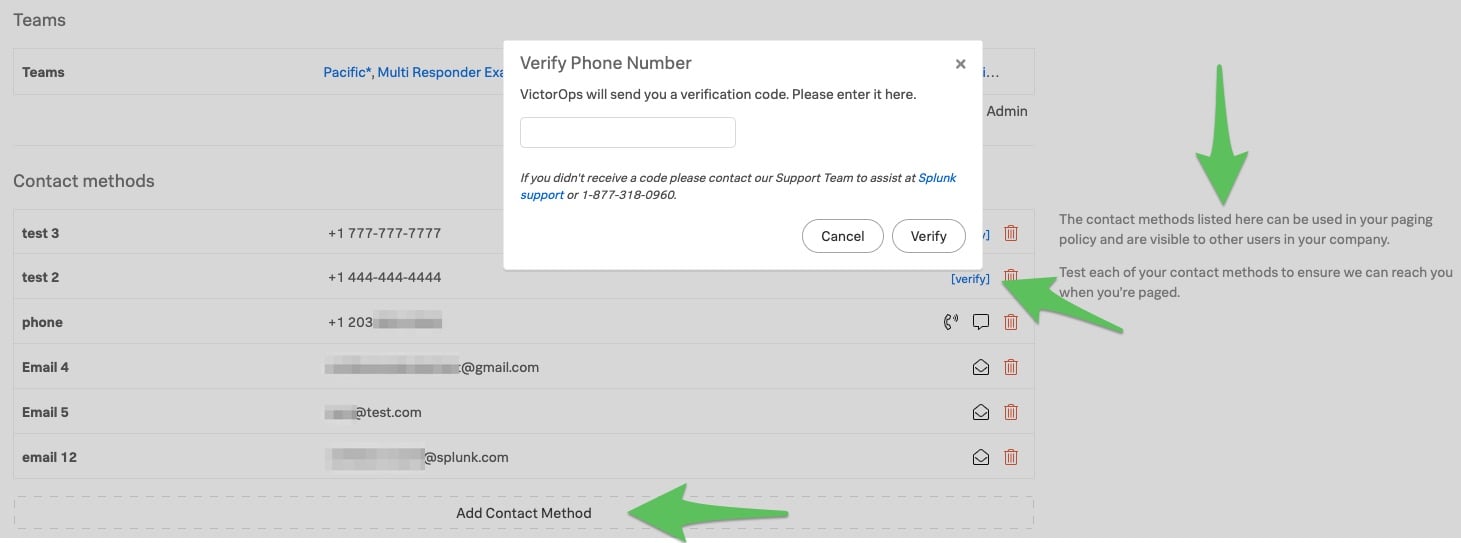
We recommend adding a few different contact methods (i.e. phone number and email) so you can have multiple steps in your paging policies. A good paging policy is a diverse paging policy.
Splunk On-Call offers Push, Phone Call, SMS, and Email contact methods.
To utilize Phone Call or SMS, you’ll first need to verify your phone number. From your profile, click Add Contact Method and supply a label and number for your phone. Next, click on the blue Verify button. Enter the verification code you received on your phone, then click on the final Verify button to complete the verification process. Note that it is still necessary to add the contact method to your Paging Policy before it will be used in notifications.
Configure Your Personal Paging Policy
When an incident is routed to you, either directly or via an escalation policy that you’re on-call for, you may determine how you’re contacted. The steps in a personal paging policy will execute in order. The last step of the policy will repeat until the incident is acknowledged.
Your paging policies can be adjusted by clicking on your name in the upper-righthand corner of the web UI and then selecting Profile.
There are two types of personal paging policies detailed below: Primary and Custom.
Primary Paging Policy
Your primary paging policy is your default paging policy and it is not time-based. You can’t delete your primary paging policy. If an incident is routed to you, Splunk On-Call will first check all of your custom paging policies to see if any of them match the current time. If none of the custom paging policies match the current time, then your primary paging policy will be used to notify you.
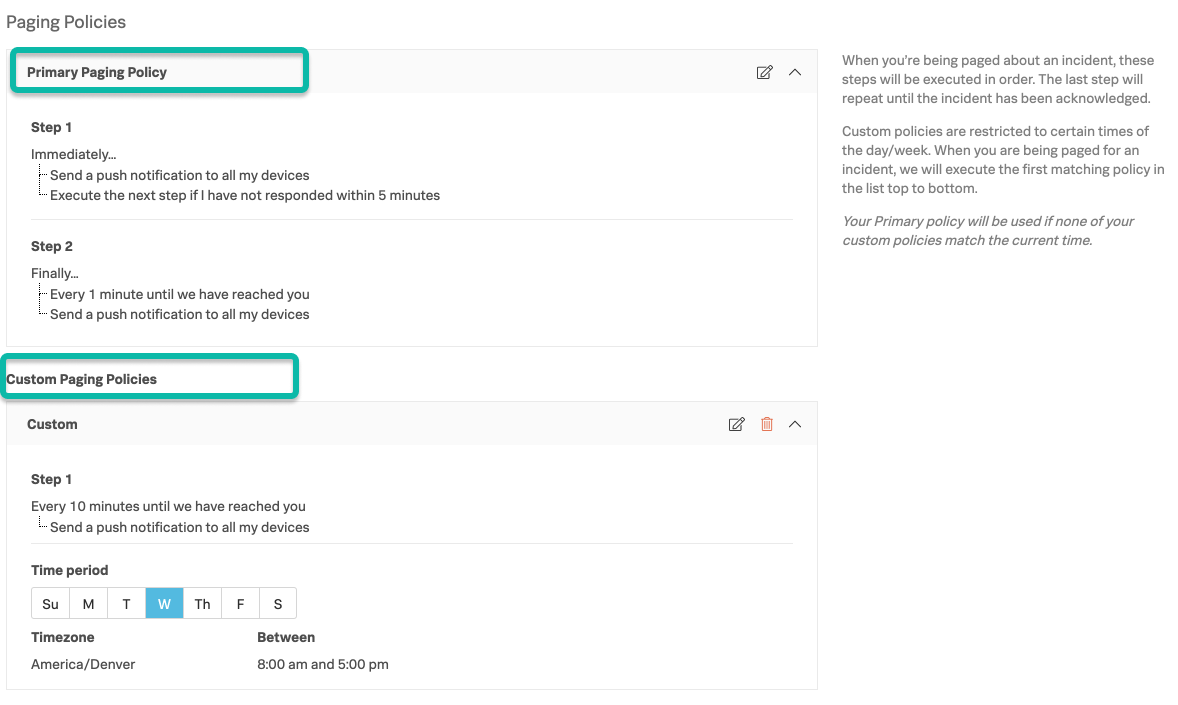
Custom Paging Policy
For detailed information on Custom Paging Policies, please see this article.
Recovery Notifications
When the following box is checked under Settings >> Alert Configuration

You will be notified of incidents you were paged for or took action on by what is configured in the Recovery Notification setting in your Profile.