Wavefront is a cloud-hosted service where you send your time-series (metric) data – from CollectD, StatsD, JMX, Ruby’s logger, AWS, anything. Then you can perform arbitrary mathematical operations on any number of those series, render charts to see anomalies or KPI dashboards, and ultimately create truly intelligent alerts to proactively watch over your entire stack. The following guide will walk you through this integration.
In VictorOps
From the VictorOps web portal, select Settings, then Alert Behavior, then Integrations.
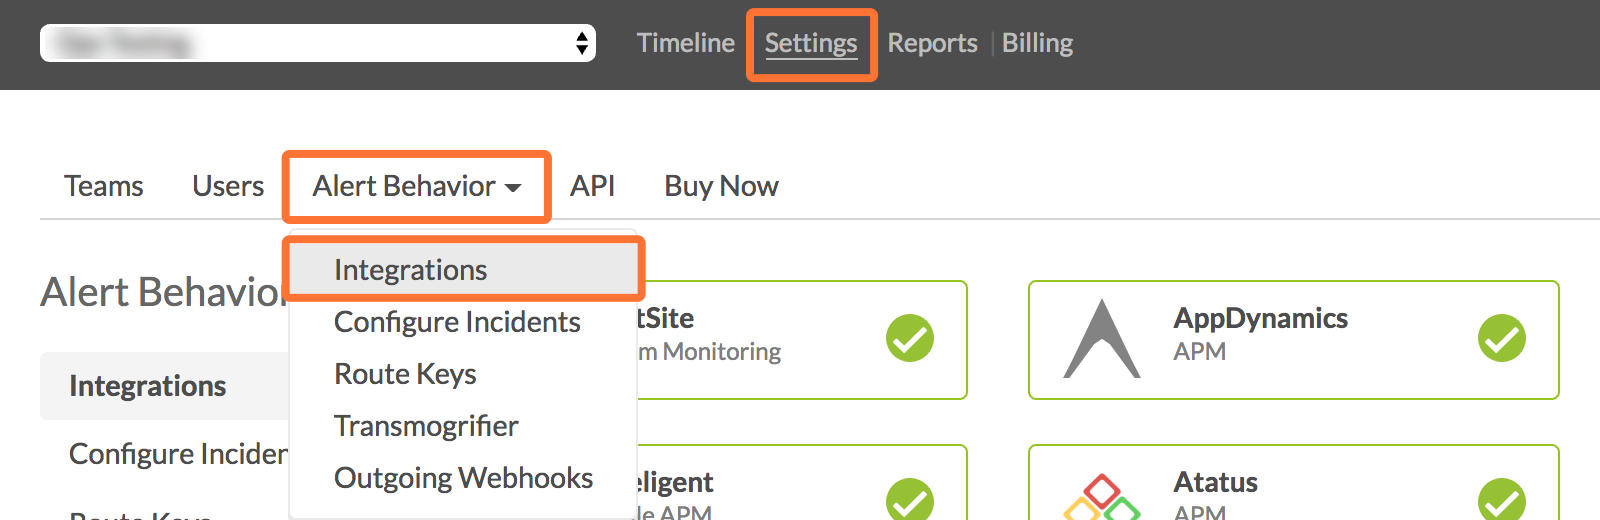
Select the Wavefront integration option.
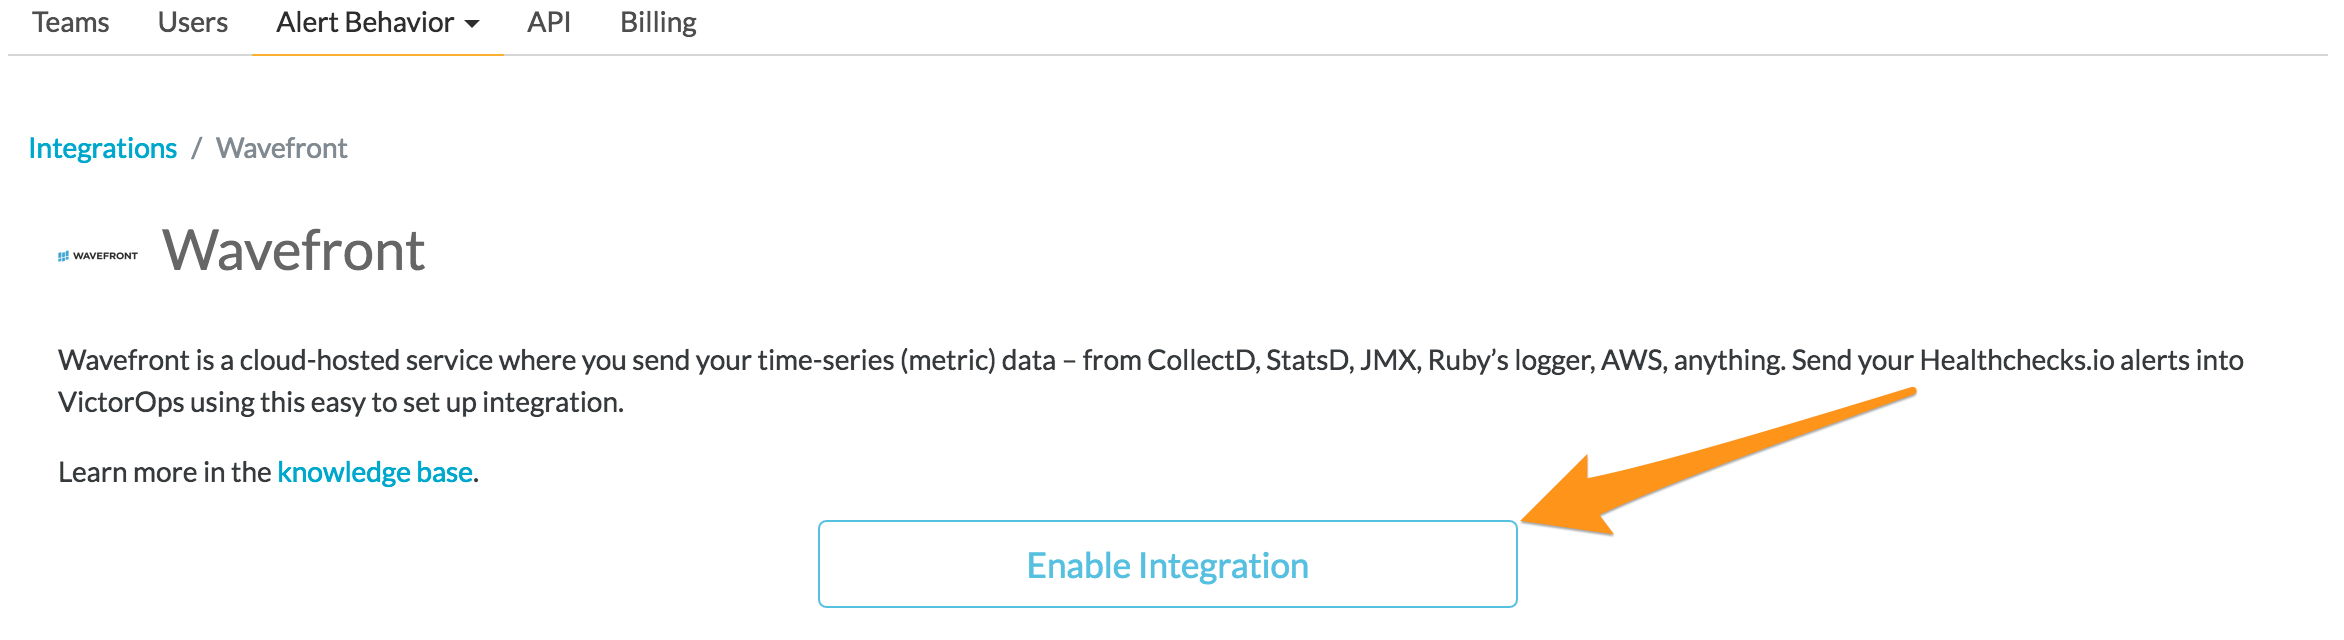
Click Enable Integration.
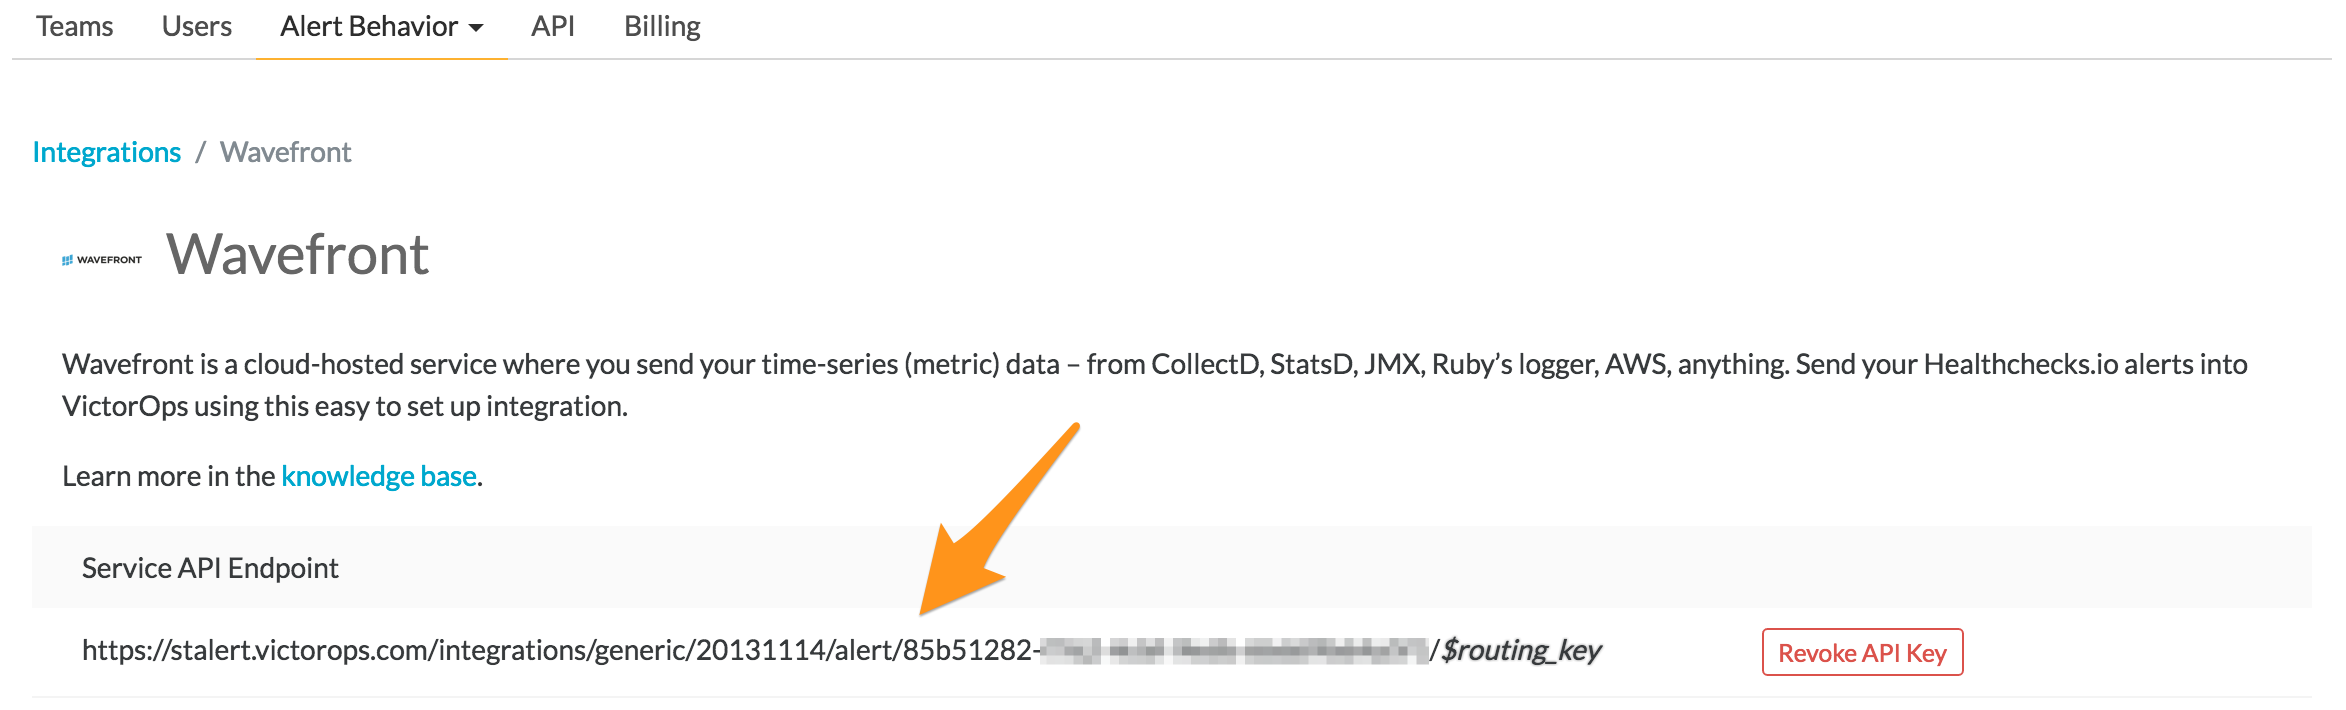
Copy the Service API Endpoint to the clipboard. Be sure to replace the “$routing_key” section with the actual routing key you intend to use. (To view or configure route keys in VictorOps, click Alert Behavior, then Route Keys)
In Wavefront
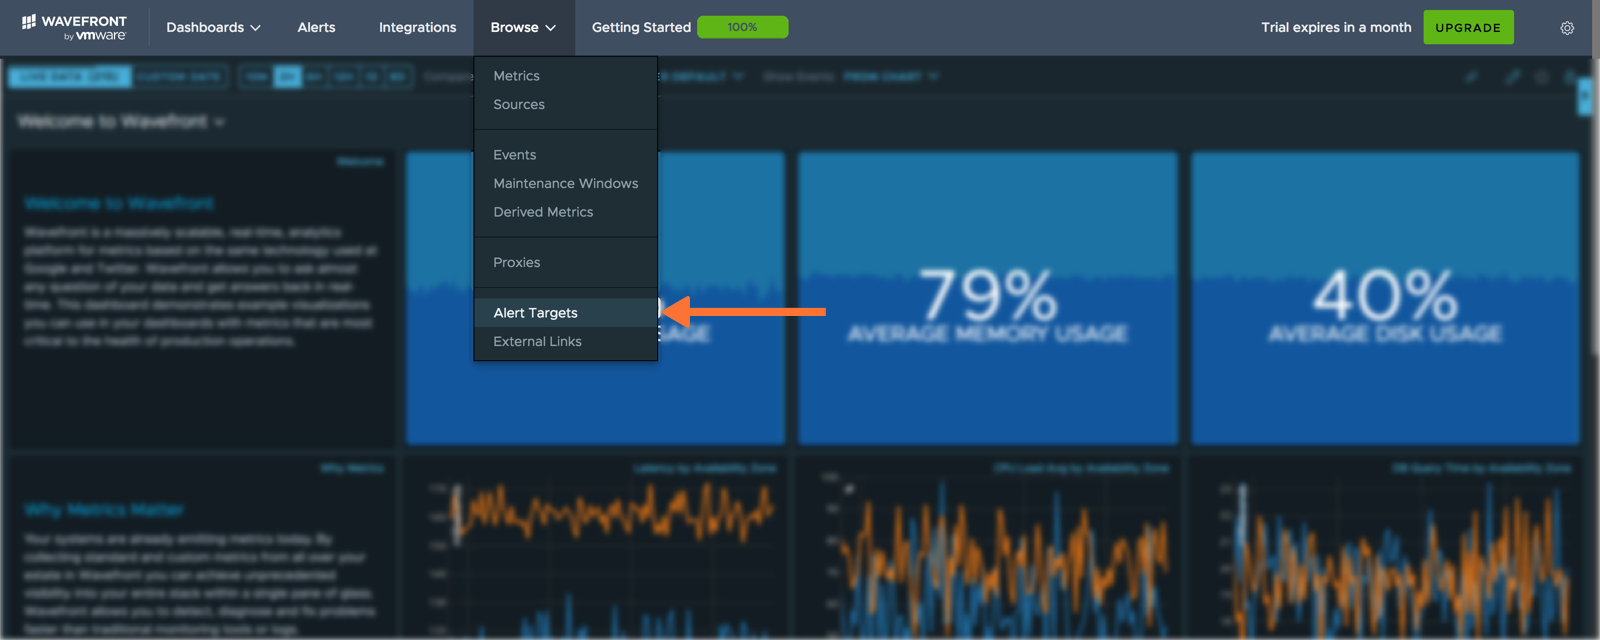
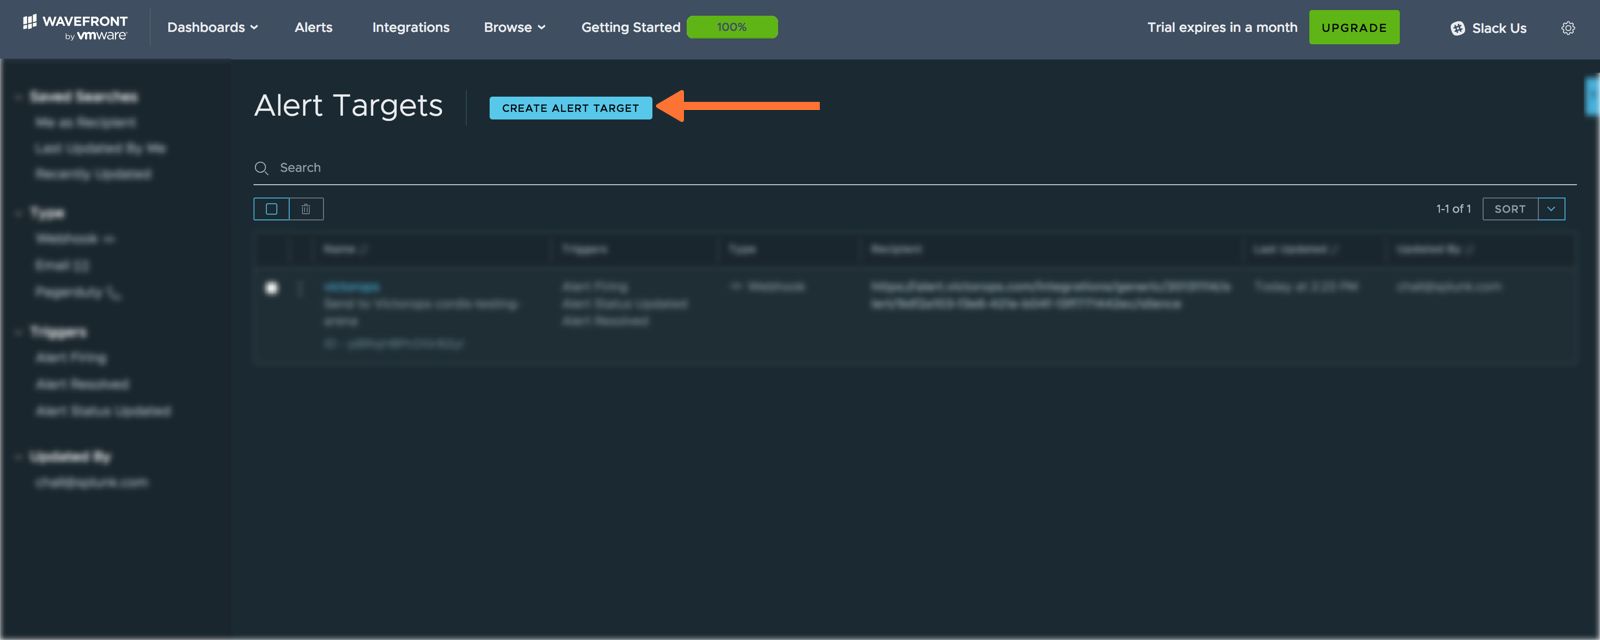
Login to the Wavefront web interface, select Browse, then Alert Targets.
Click Create Alert Target.
Enter a name for your webhook in the “Name” field along with a short description. Select Alert Opened, Alert Status Updated, and Alert Resolved in the “Triggers” section. Paste the “URL to notify” from the previous “In VictorOps” section into the “URL” field. Select application/json from the “Content Type” dropdown menu. Last from the “Alert Target POST Body Template”, select VictorOps. Click Save.
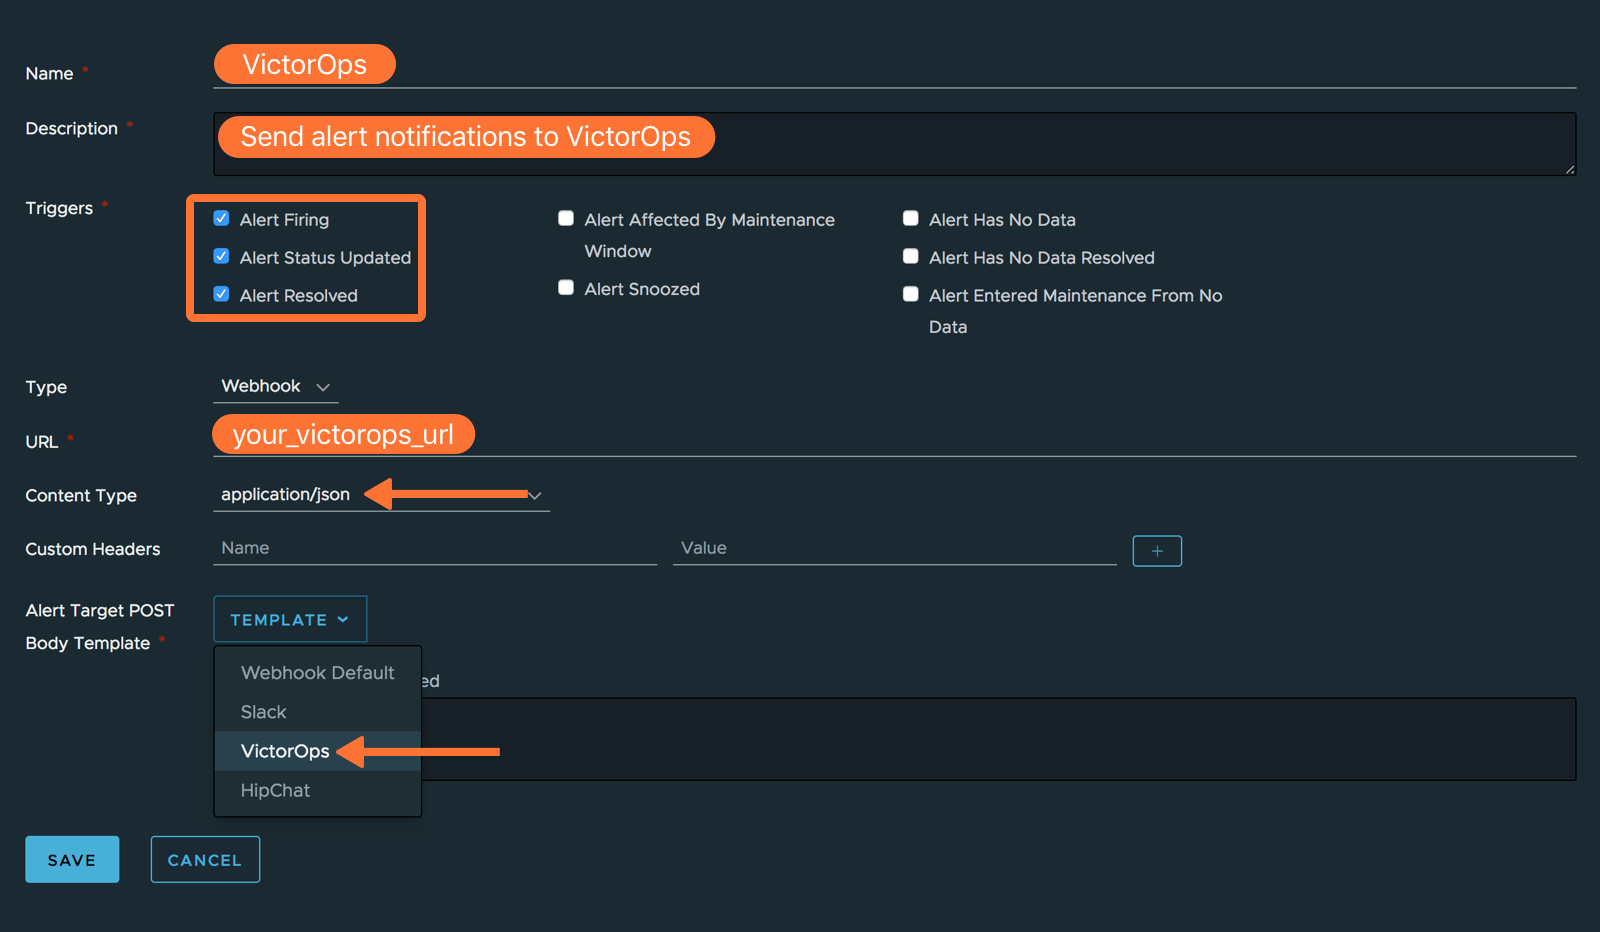
For convenience, the template is also pasted below:
{

"message_type": "{{#endedTime}}recovery{{/endedTime}}{{^endedTime}}{{#severitySmoke}}info{{/severitySmoke}}{{#severityInfo}}info{{/severityInfo}}{{#severityWarning}}warning{{/severityWarning}}{{#severitySevere}}critical{{/severitySevere}}{{/endedTime}}",

"entity_id": "{{#trimTrailingComma}}{{^endedTime}}{{#failingHosts}}{{{.}}},{{/failingHosts}}{{/endedTime}}{{#endedTime}}{{#recoveredHosts}}{{{.}}},{{/recoveredHosts}}{{/endedTime}}{{/trimTrailingComma}}",

"state_message": "{{{name}}}\n{{{url}}}\n{{#jsonEscape}}{{{additionalInformation}}}{{/jsonEscape}}",

"monitoring_tool": "Wavefront",

"entity_display_name": "{{#jsonEscape}}{{{hostsFailingMessage}}}{{/jsonEscape}}"

}
You should now see the VictorOps Alert Target listed. Click the dropdown menu on the left, then select Test.
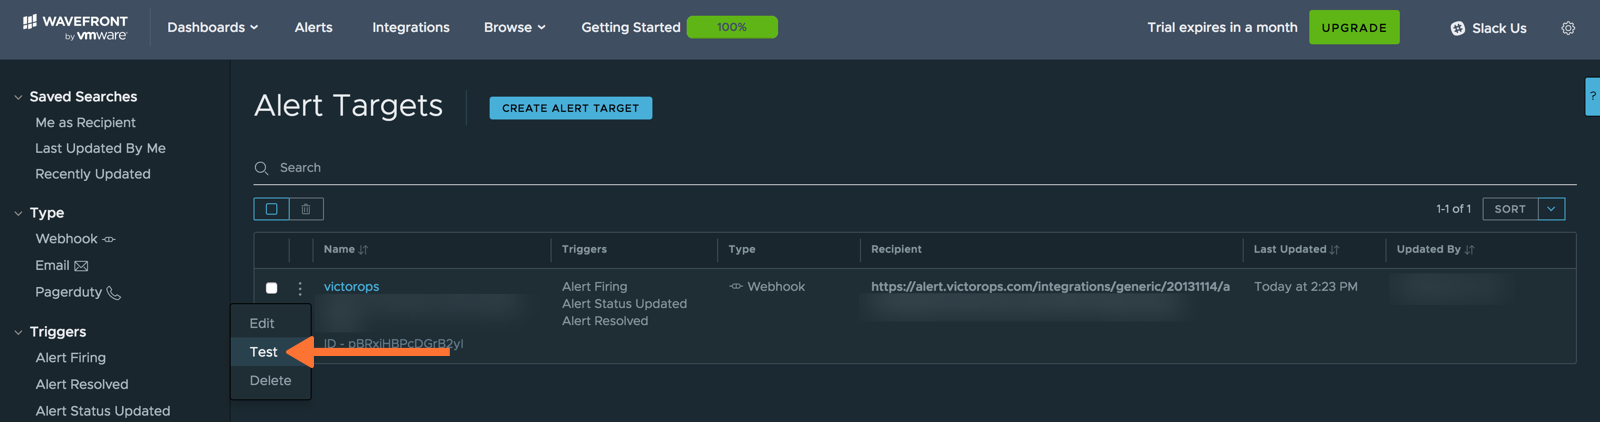
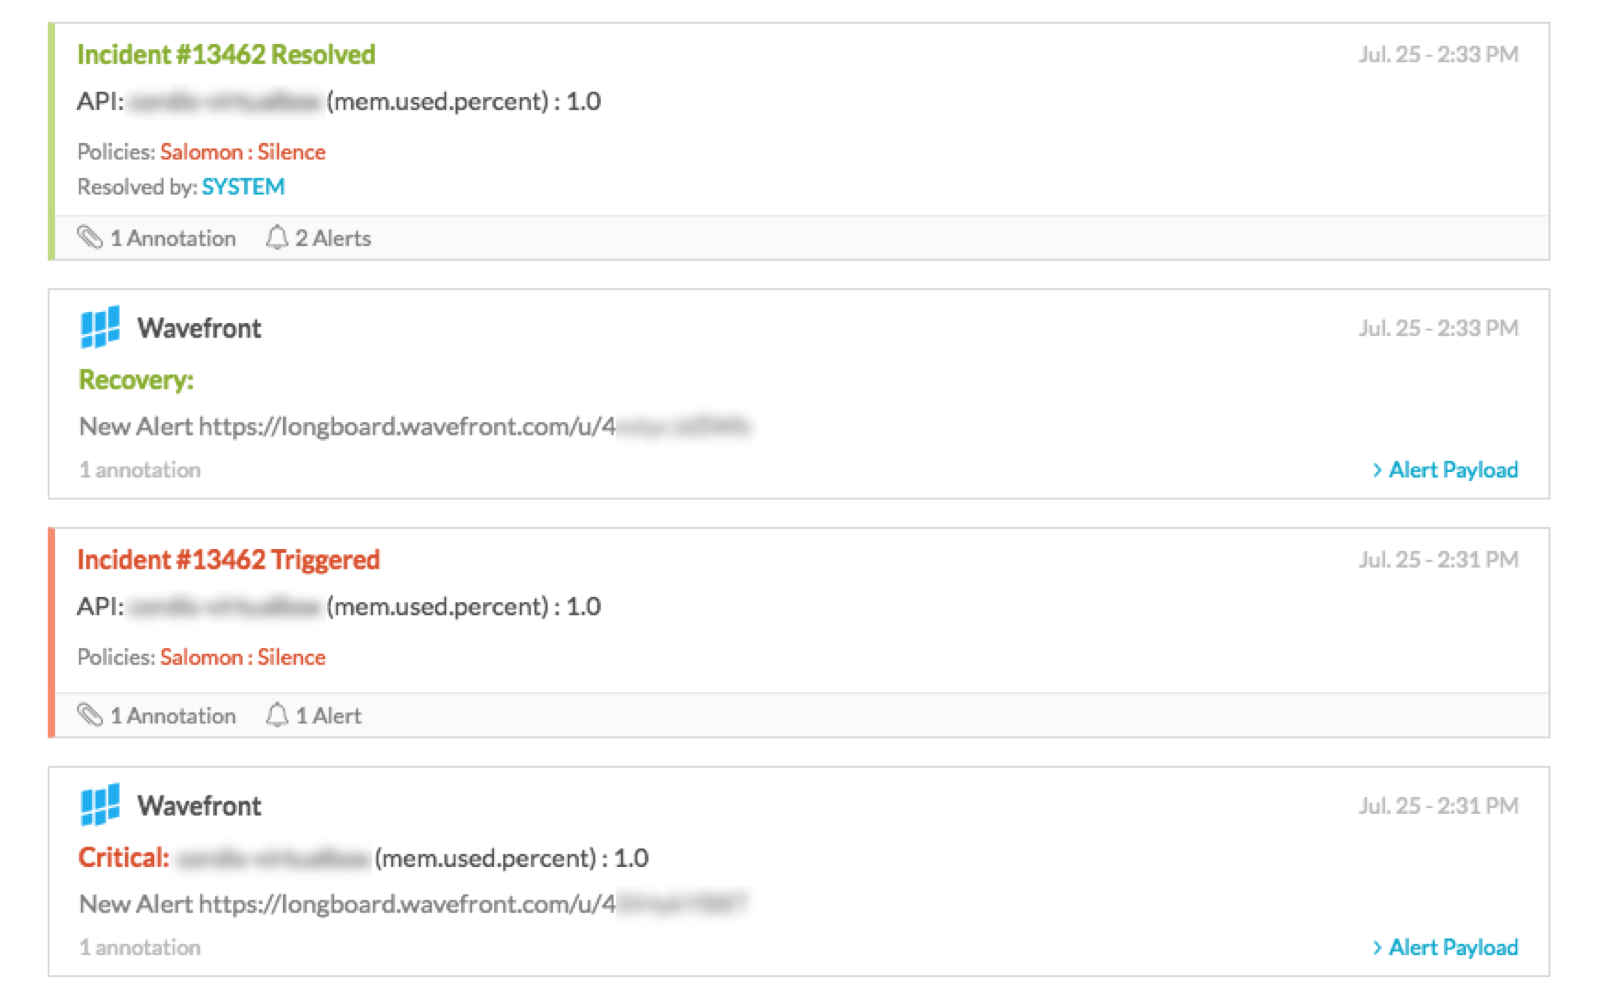
Check for the notification in VictorOps.
Last, you’ll want to attach the Alert Target to an actual alert. Whether creating or editing an alert, use the below example as guide for connecting VictorOps to an alert. First, edit (or create) an alert.
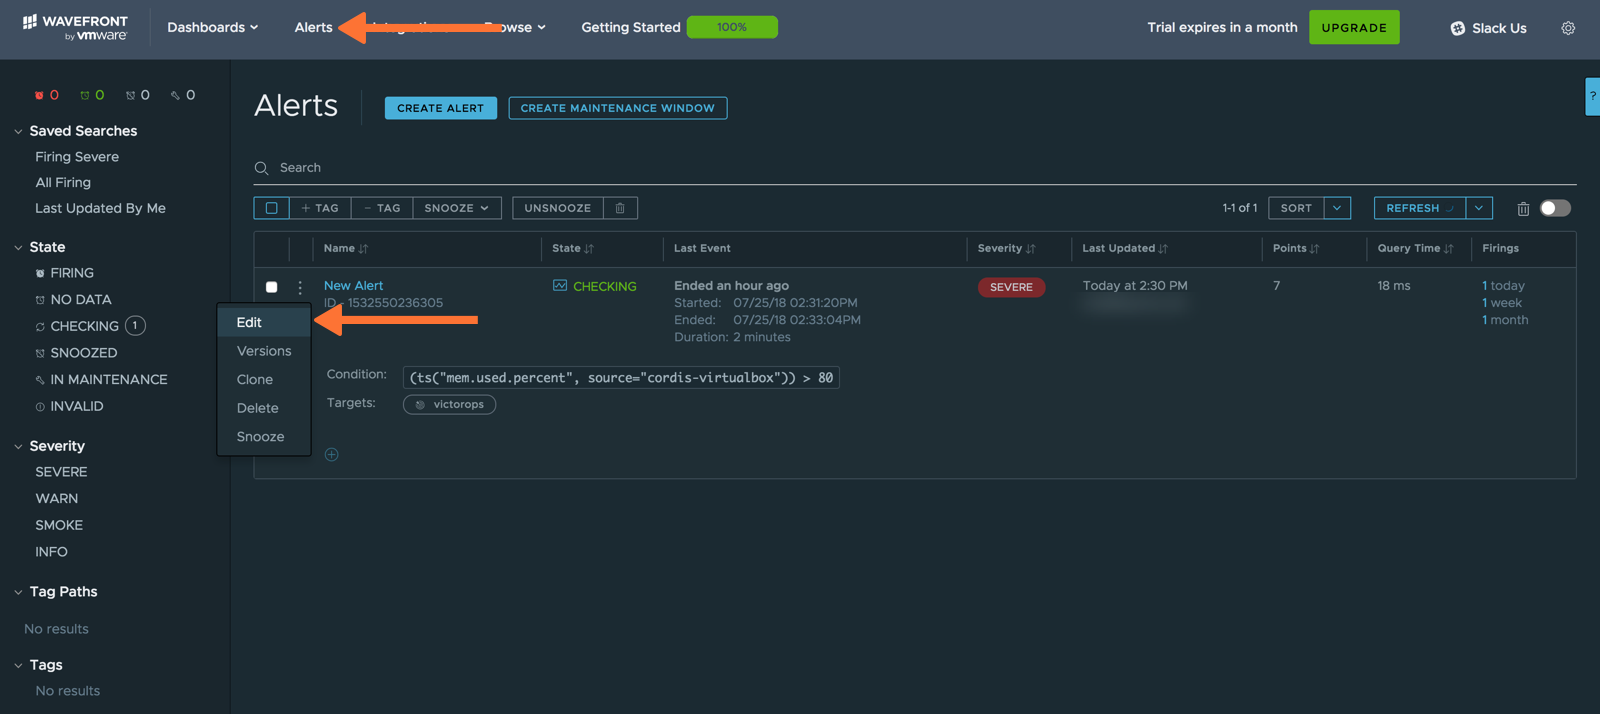
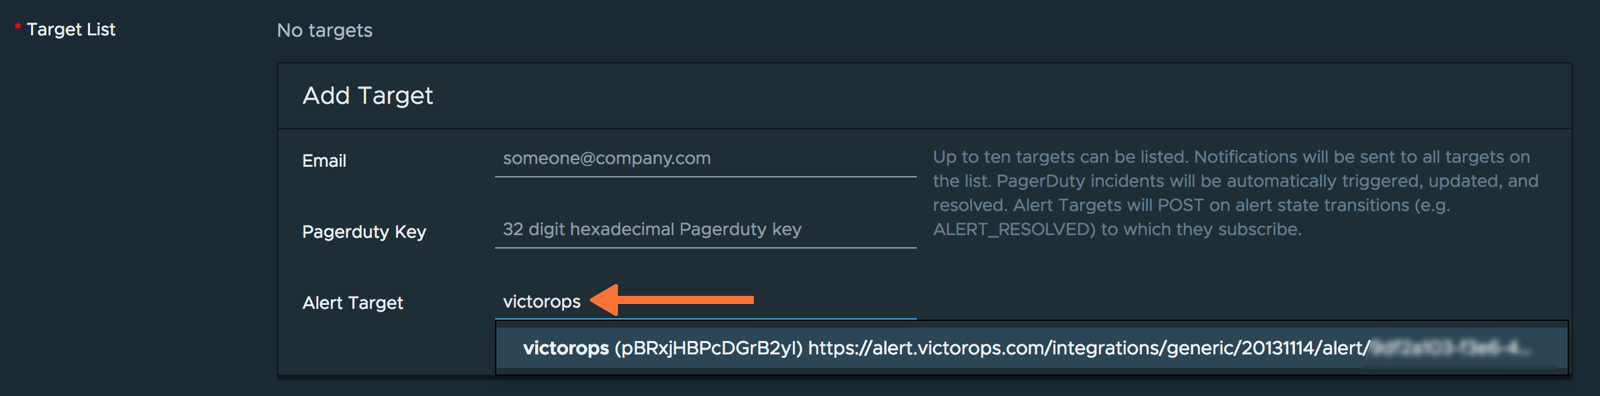
If creating a new alert, specify the alert condition you would like; otherwise, leave the alert as is. Under “Target List”, begin typing the name of your VictorOps Alert Target. The VictorOps alert target should populate below for you to select. Click Save.
You have completed setting up this integration. If you have any questions, please contact VictorOps support.