Wormly offers server monitoring, website monitoring and uptime monitoring to keep you online and performing fast. The integration between Wormly and VictorOps utilizes the generic email endpoint to send alerts from Wormly into the VictorOps timeline. Below is a short guide explaining how to set up this simple integration.
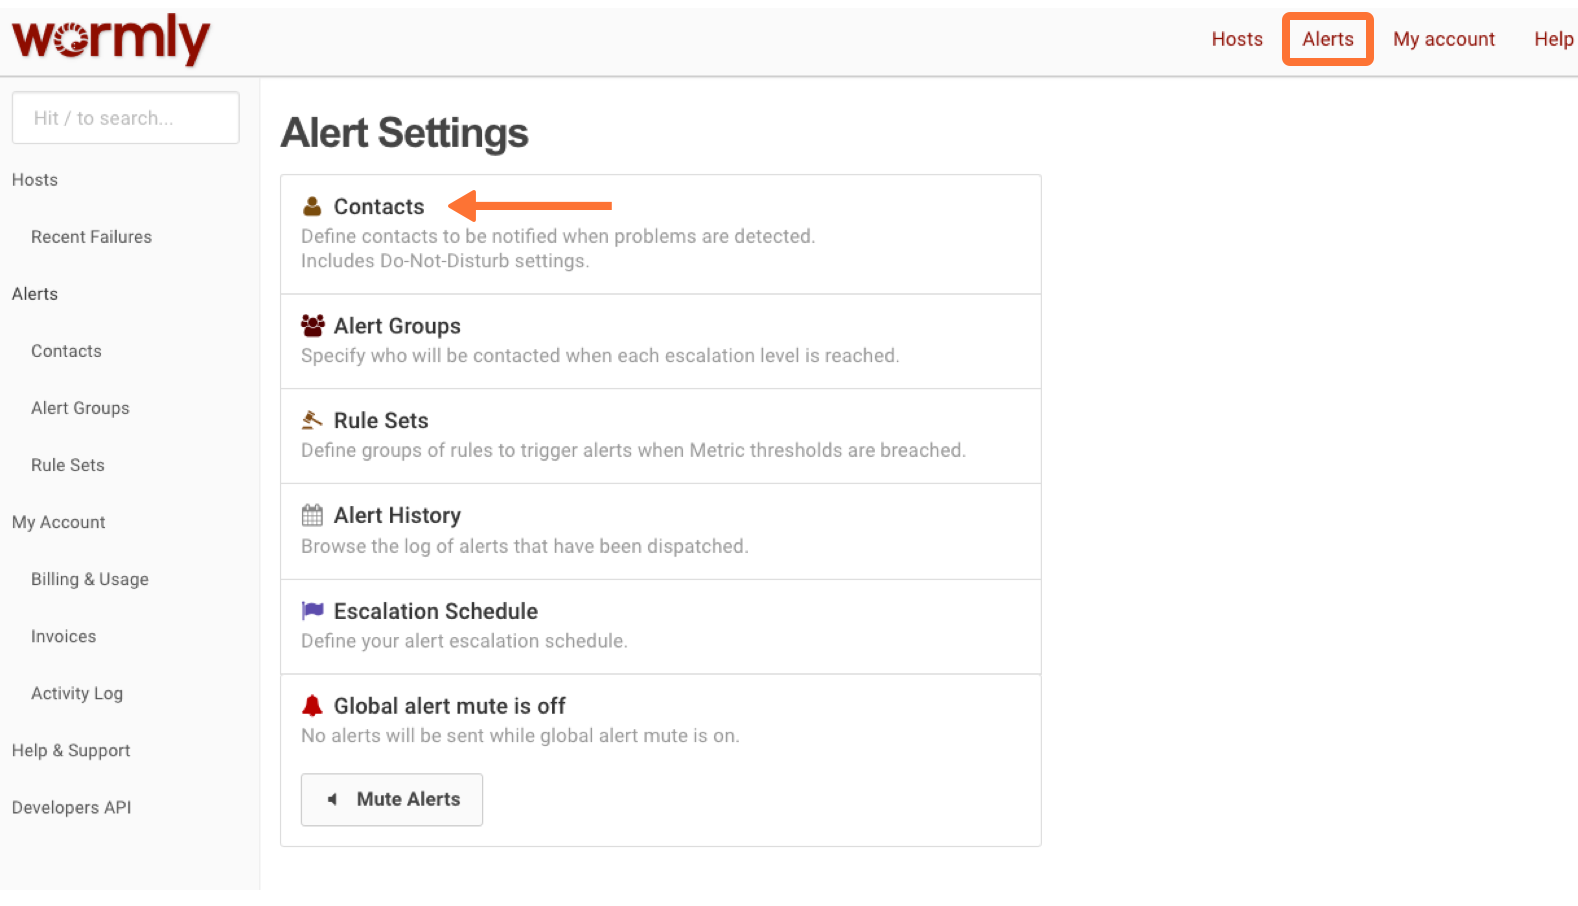
- From the Wormly UI select ‘Alerts’ and then ‘Contacts’
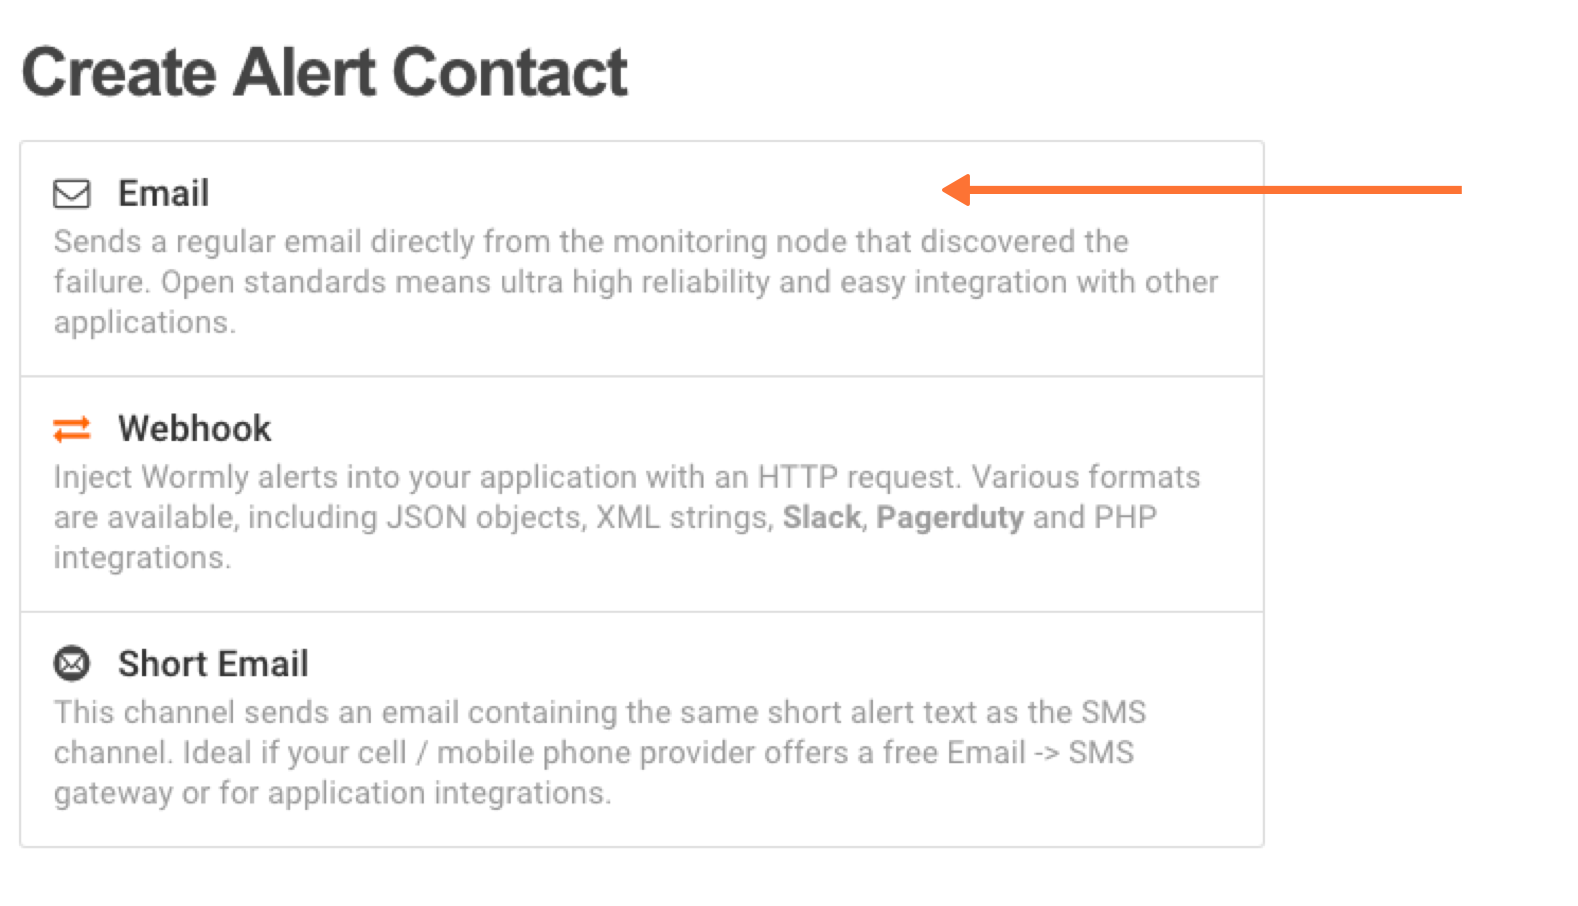
- Next select ‘+ Create New Contact’ and click on the Email contact type. Then enter a name for the contact (VictorOps Timeline for example).
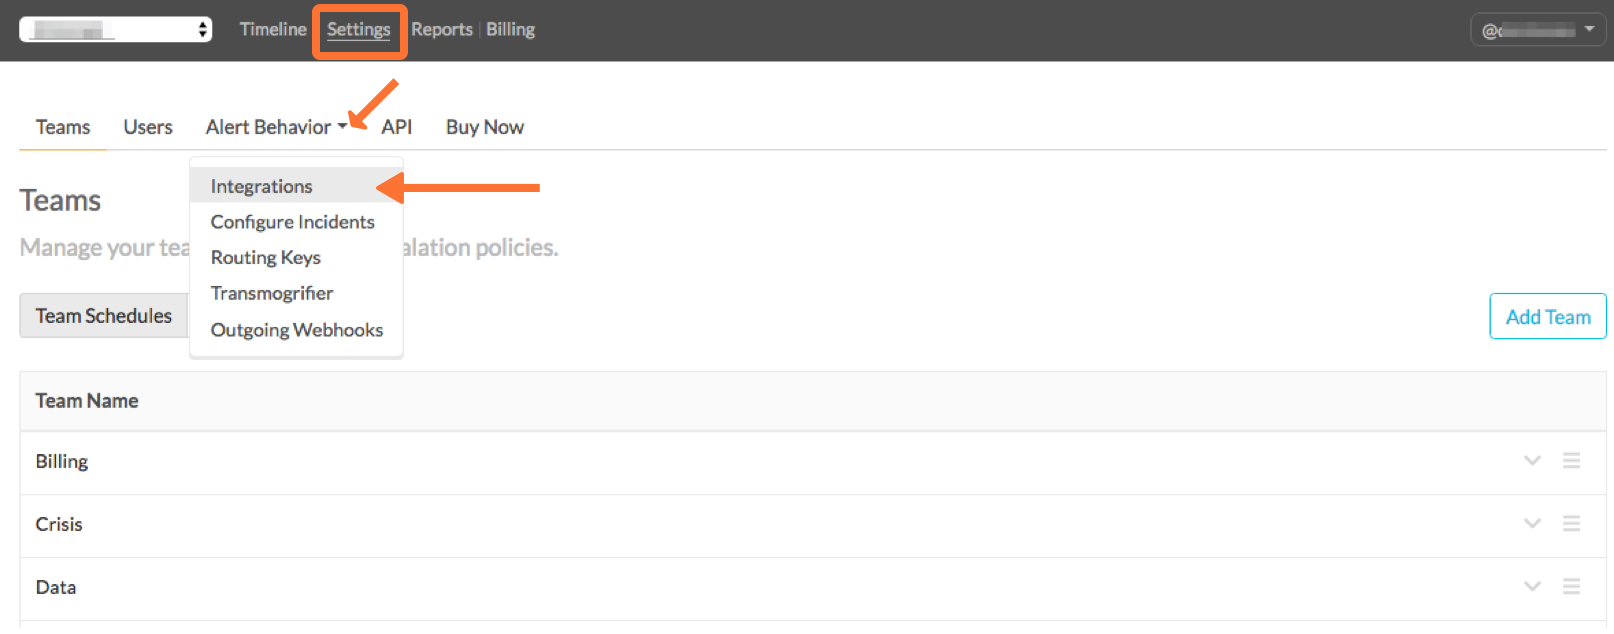
- In VictorOps, select Settings >> Alert Behavior >> Integrations >> Wormly.
 If the integration has not yet been enabled, click the “Enable Integration” button to generate your endpoint URL as seen below. Be sure to replace the “$routing_key” section with the actual routing key you intend to use. (To view or configure route keys in VictorOps, click Alert Behavior >> Route Keys)
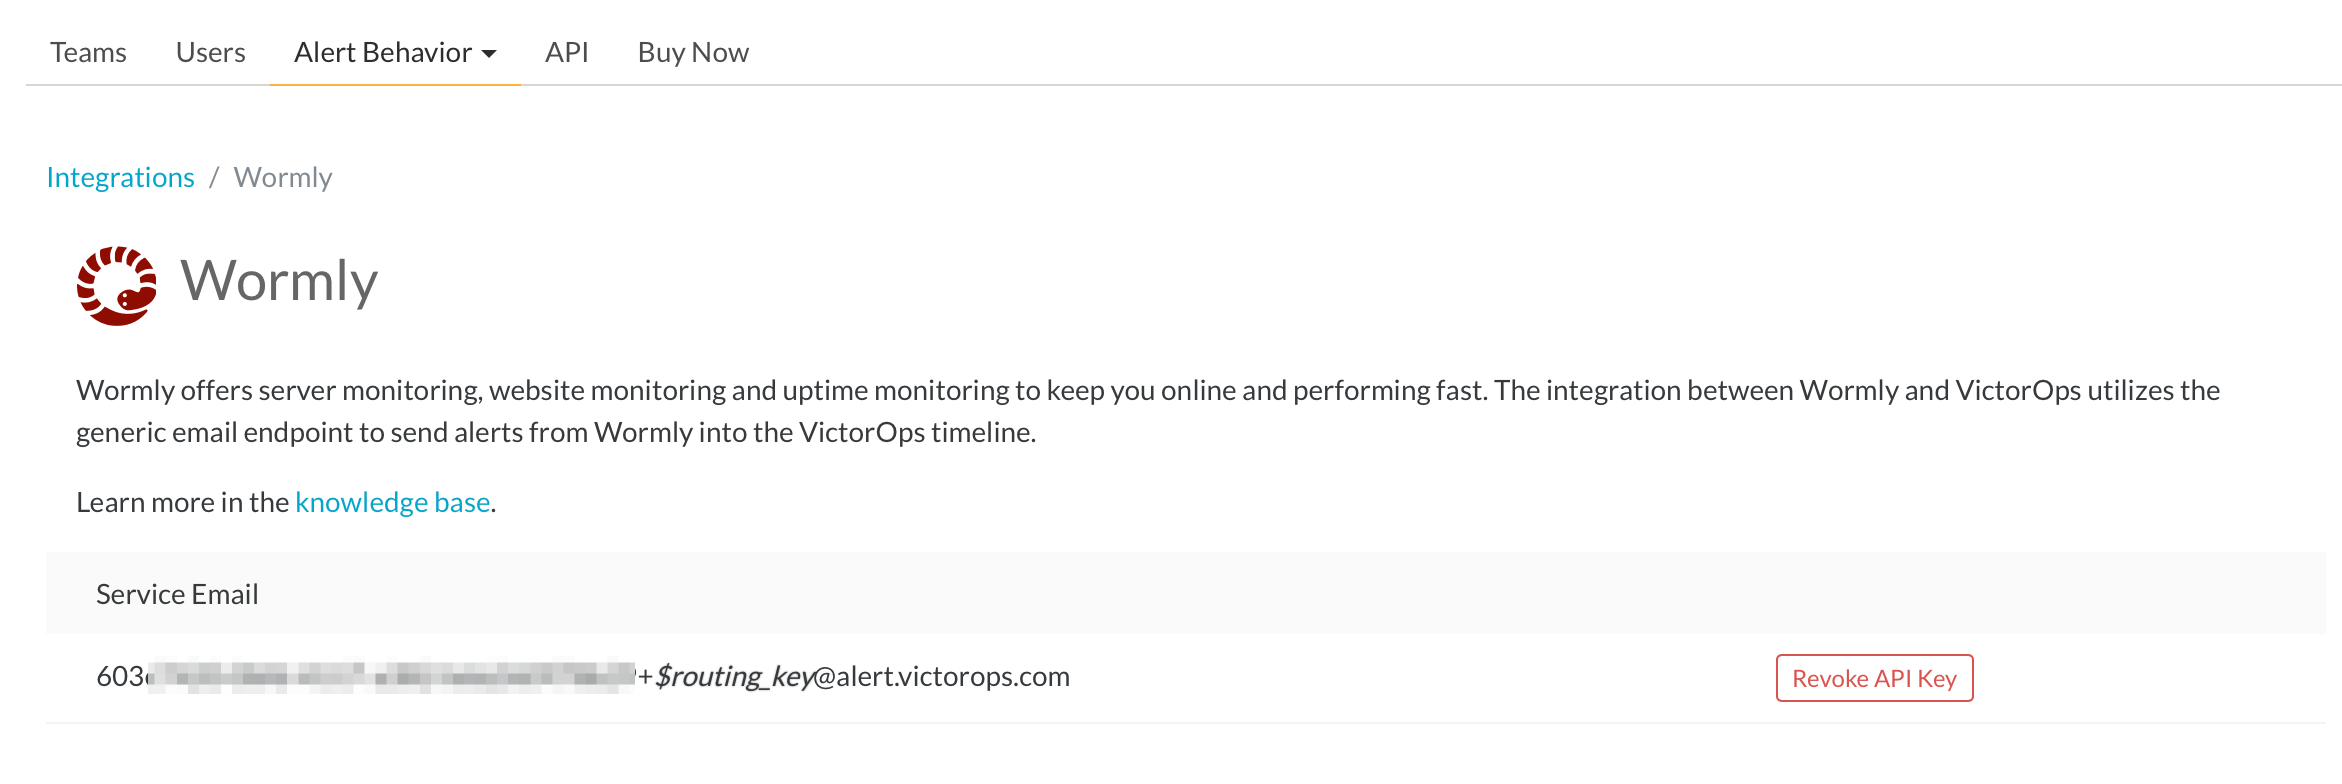
- Copy the email string and make sure to put in the appropriate routing key after the ‘+’ sign so that all Wormly alerts are sent to the right teams.
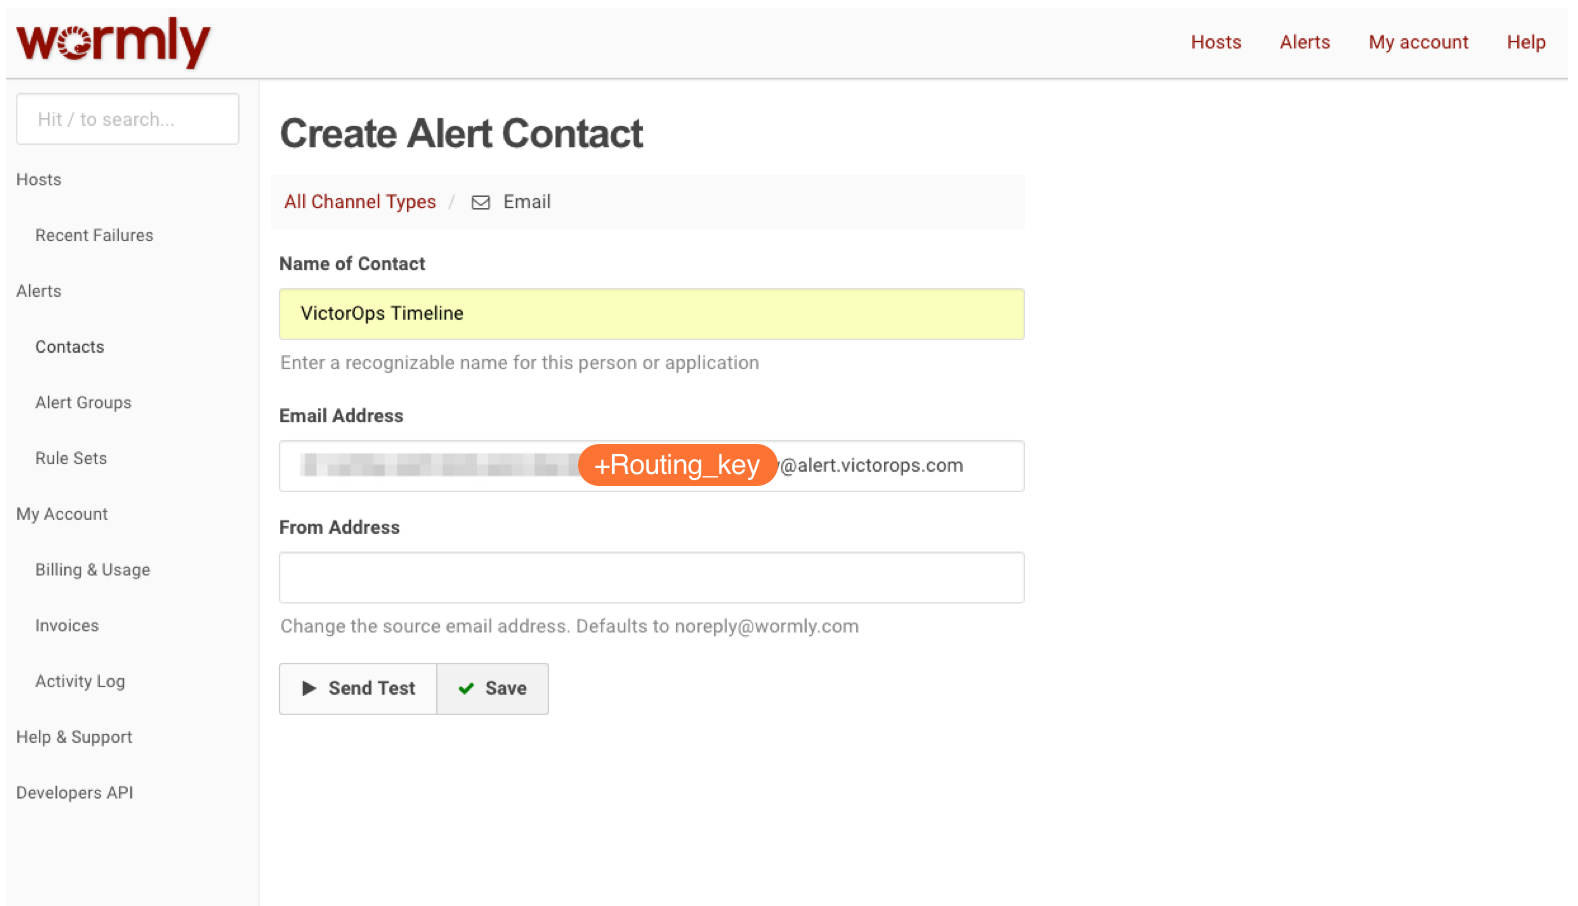
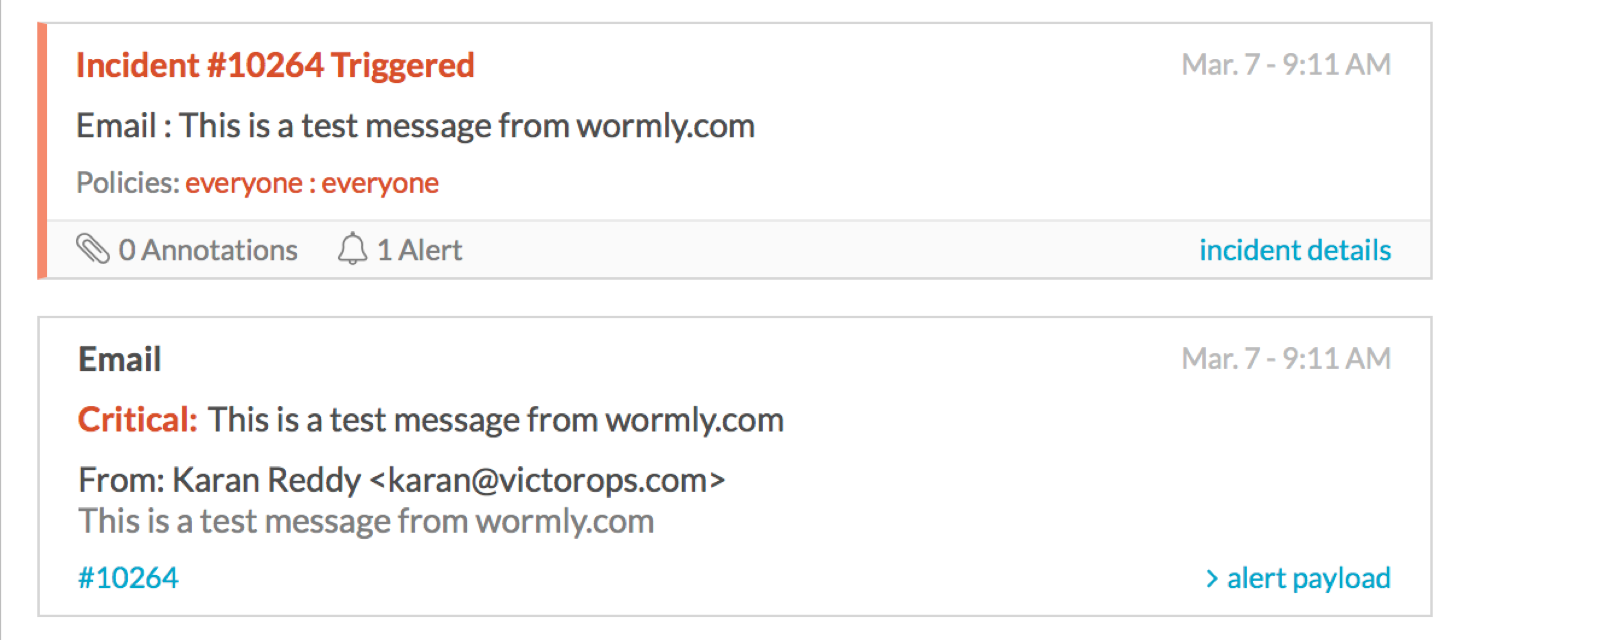
- Paste the email address into the Email field in Wormly and click Send Test. You should get a result like the one pictured here.
- Hit ‘Update’ and you are done.