SiteScope monitors more than 100 different target types for critical health and performance characteristics. You can also extend your monitoring environment by creating your own monitor types and customizing existing monitors. The following guide will walk you through this integration.
In VictorOps
From the VictorOps web portal, select Integrations. From the resulting list of integration options, select the HP SiteScope integration option.
Copy the Service Email to the clipboard. Be sure to replace the “$routing_key” section with the actual routing key you intend to use.
In HP SiteScope
On your SiteScope server, add 3 files with the following names and contents in the templates.mail directory (i.e. …\SiteScope\templates.mail).
Filename: VictorOps_CRITICAL
[Subject: <siteScopeHost>/<groupID>/<name>/<alert::name> CRITICAL]

This alert is from SiteScope at <newSiteScopeURL>

Monitor: <groupID>:<name>
Tags: <tag>
Group: <group>
Status: <state>
Sample #: <sample>

Time: <time>

---------------------- Detail ----------------------

<mainParameters>

<mainStateProperties>
Filename: VictorOps_WARNING
[Subject: <siteScopeHost>/<groupID>/<name>/<alert::name> WARNING]

This alert is from SiteScope at <newSiteScopeURL>

Monitor: <groupID>:<name>
Tags: <tag>
Group: <group>
Status: <state>
Sample #: <sample>

Time: <time>

---------------------- Detail ----------------------

<mainParameters>

<mainStateProperties>
Filename: VictorOps_RECOVERY
[Subject: <siteScopeHost>/<groupID>/<name>/<alert::name> RECOVERY]

This alert is from SiteScope at <newSiteScopeURL>

Monitor: <groupID>:<name>
Tags: <tag>
Group: <group>
Status: <state>
Sample #: <sample>

Time: <time>

---------------------- Detail ----------------------

<mainParameters>

<mainStateProperties>
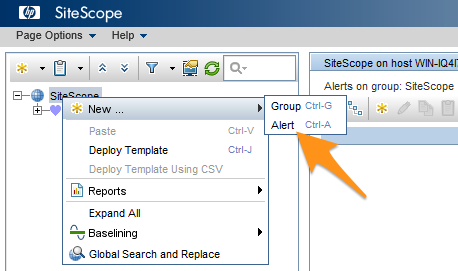
From the HP SiteScope web interface, right-click on the Context Tree, then select New, then Alert.
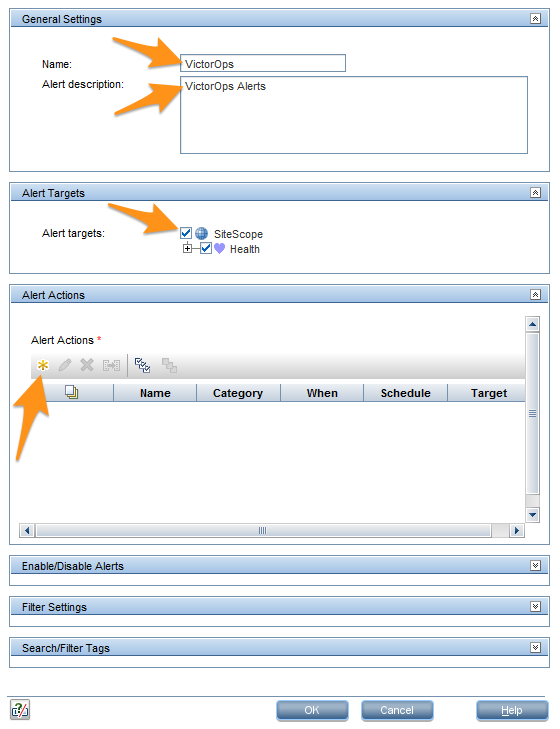
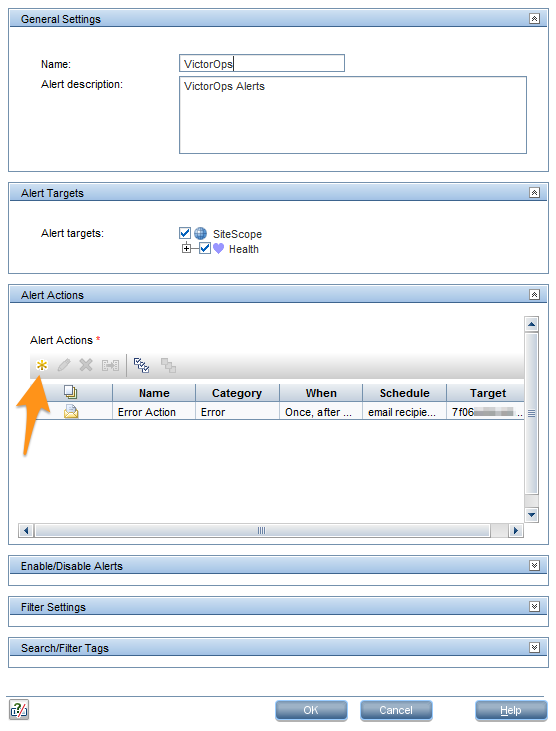
Enter “VictorOps” in the “Name” field and “VictorOps Alerts” in the “Alert description” field. Check the checkbox next to “SiteScope” in the “Alert Targets” section. In the “Alert Actions” section, click on the New Alert Action icon.
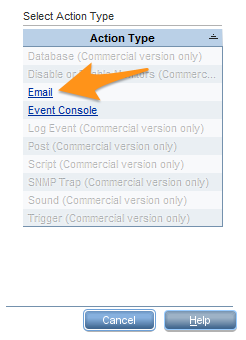
Click on Email in the “Action Type” list.
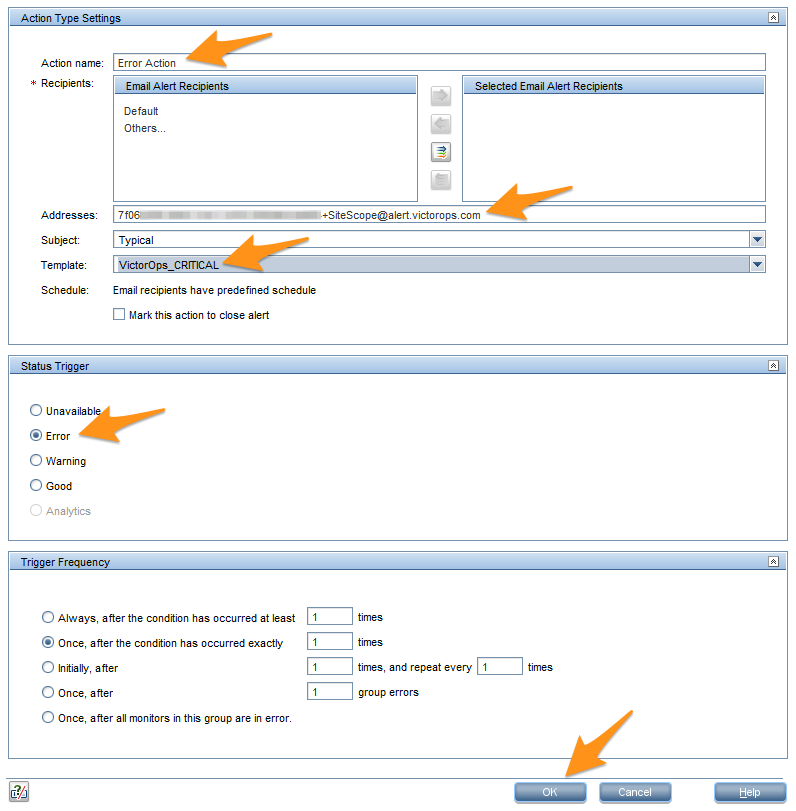
Enter “Error Action” in the “Action name” field. Paste the Email Address from the “In VictorOps” section into the “Addresses” field. Select VictorOps_CRITICAL from the “Template” dropdown menu. Select Error in the “Status Trigger” section, then click OK.
In the “Alert Actions” section, click on the New Alert Action icon.
Click on Email in the “Action Type” list.
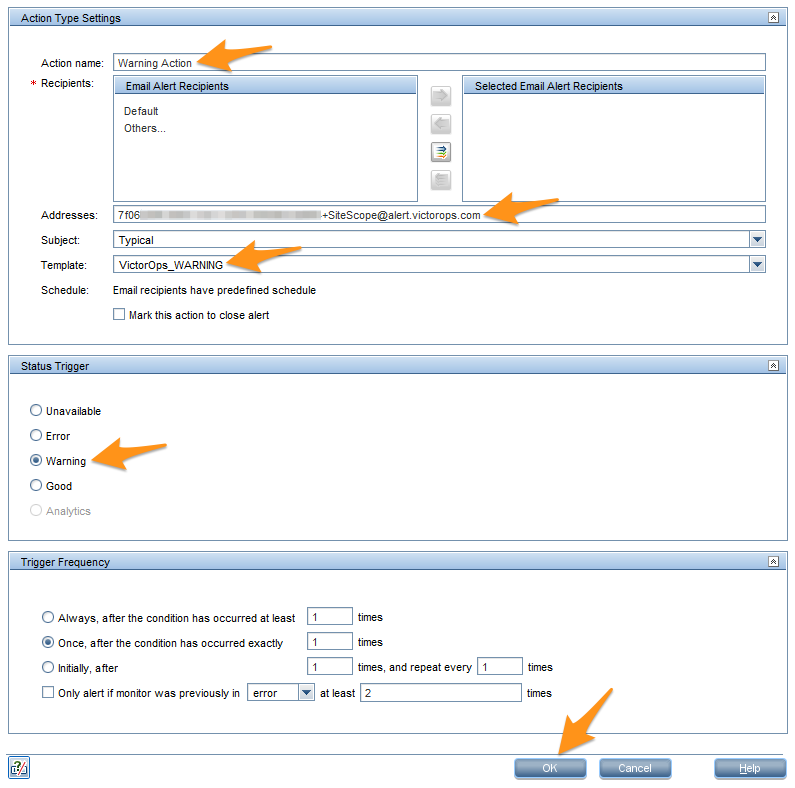
Enter “Warning Action” in the “Action name” field. Paste the Email Address from the “In VictorOps” section into the “Addresses” field. Select VictorOps_WARNING from the “Template” dropdown menu. Select Warning in the “Status Trigger” section, then click OK.
In the “Alert Actions” section, click on the New Alert Action icon.

Click on Email in the “Action Type” list.
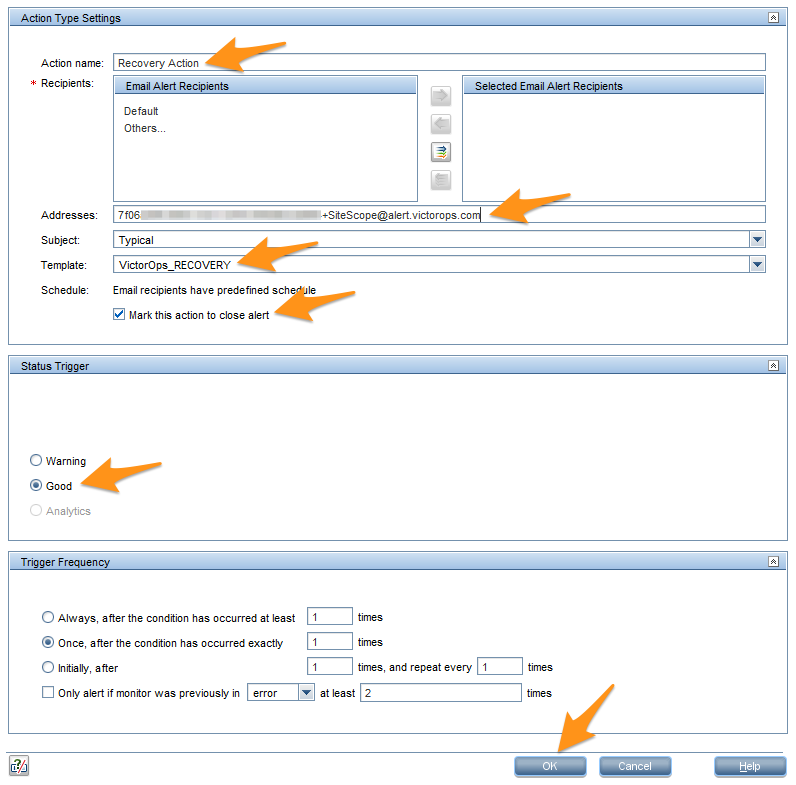
Enter “Recovery Action” in the “Action name” field. Paste the Email Address from the “In VictorOps” section into the “Addresses” field. Select VictorOps_RECOVERY from the “Template” dropdown menu, then check the checkbox next to “Mark this action to close alert”. Select Good in the “Status Trigger” section, then click OK.
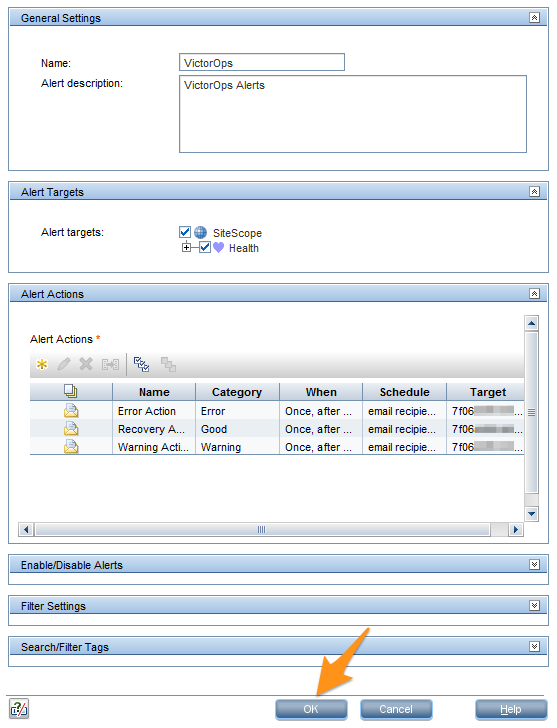
Click OK.
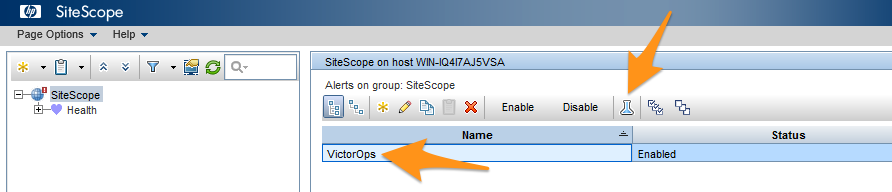
Select VictorOps from the alert list, then click on the Test icon.
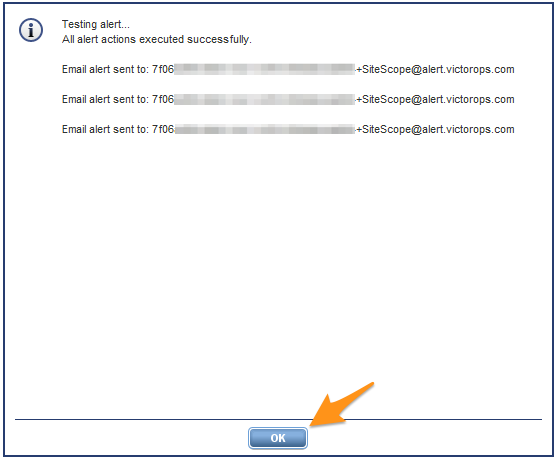
Click OK.

You should see a confirmation that the email alerts were successfully sent to your VictorOps email address. Click OK.
Alerts should now show up in your VictorOps timeline.