Versions Supported: N/A (SaaS)
Splunk On-Call Version Required: Getting Started, Growth, or Enterprise
The Circonus integration with Splunk On-Call (formerly VictorOps) allows you to add Splunk On-Call as a Contact Group in Circonus so you can send alerts into the Splunk On-Call timeline.
Circonus combines multiple monitoring, alerting, event reporting, and analytical tools into one unified solution. Use any data, in any application, from any system, and visualize it in real-time.
In Splunk On-Call
In Splunk On-Call, select Settings >> Integrations >> Circonus.
If the integration has not yet been enabled, click the Enable Integration button to generate your endpoint URL as seen below. Be sure to replace the “$routing_key” section with the actual routing key you intend to use. It is essential that you replace what you see here with the actual routing key you intend to use. Everything after the final forward slash must be replaced with you your key. For example, assuming a routing_key value of “database”:
………36437/$routing_key ==> ……..36437/database
Routing keys in VictorOps can be set up and associated by clicking on Settings >> Alert Behavior >> Route Keys.
For more information on routing keys and best practices, click HERE.
In Circonus
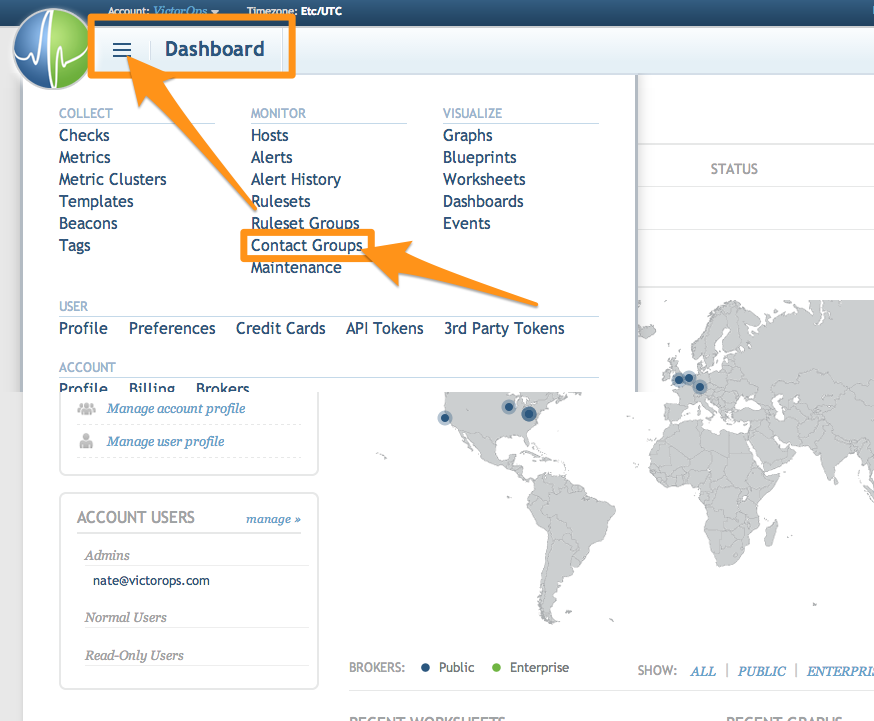
From the Circonus Dashboard select the drop down in the upper left hand corner and the Contact Groups.
Create a new Contact Group.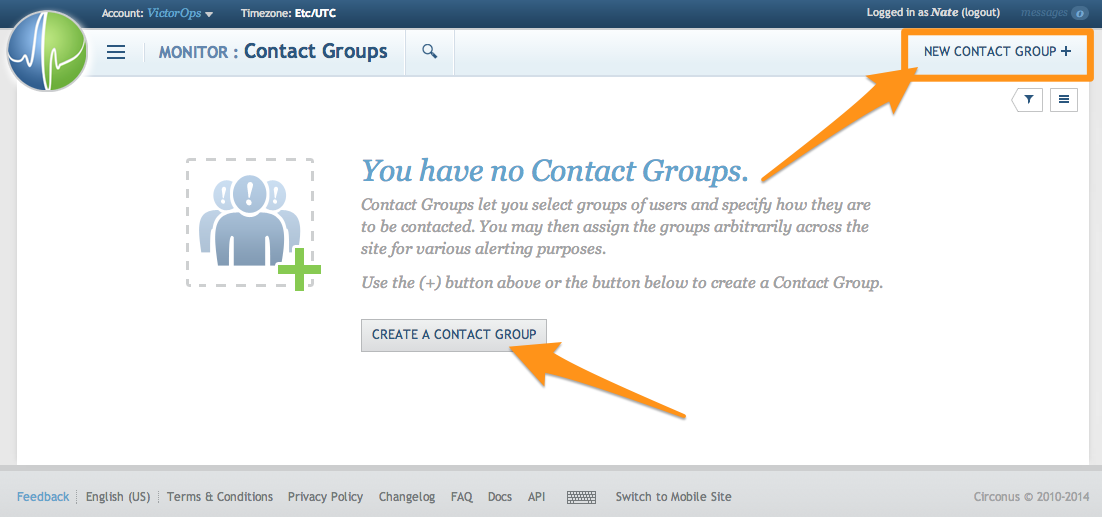
Give it a name, select VictorOps for the Use Third Party option, then hit OK.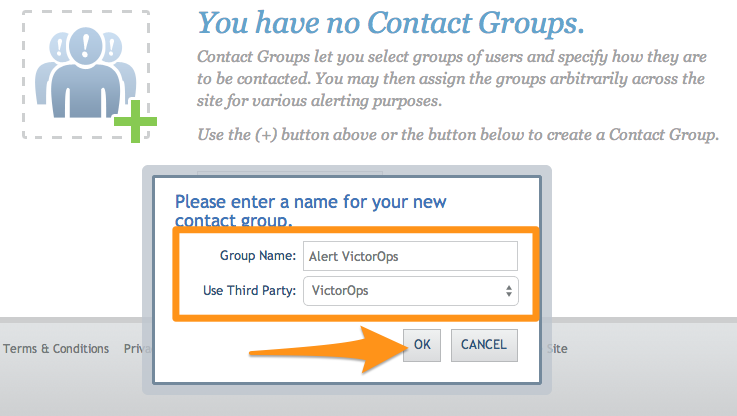
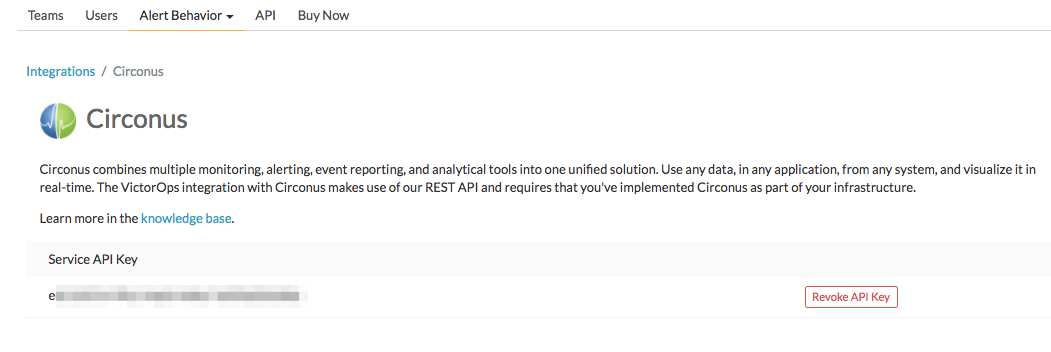
Grab your API key from the REST Endpoint URL on the Splunk On-Call integrations page. From the main timeline select Settings >> Integrations >> Circonus, as mentioned in the In Splunk On-Call section above.
Copy the API key into the box provided in Circonus. In the Team box you can define the Splunk On-Call routing key you would like to use for this integration.
If you would like further clarification on Splunk On-Call routing keys please click here.
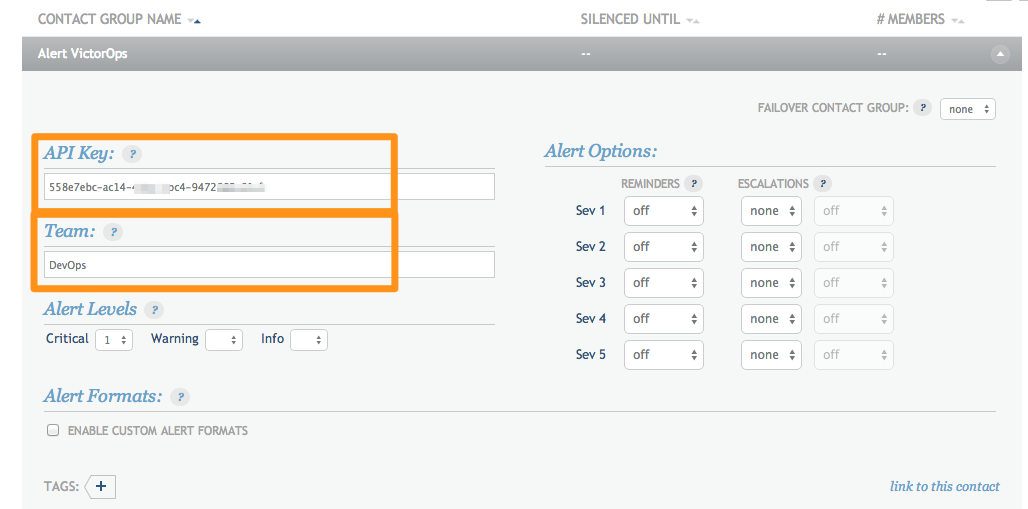
Adjust the Alert Levels and Alert Options so that Splunk On-Call will only creates incidents when needed.
That’s it! You can send a test message, just to make sure everything is configured appropriately, and an info message will be sent into the Splunk On-Call timeline.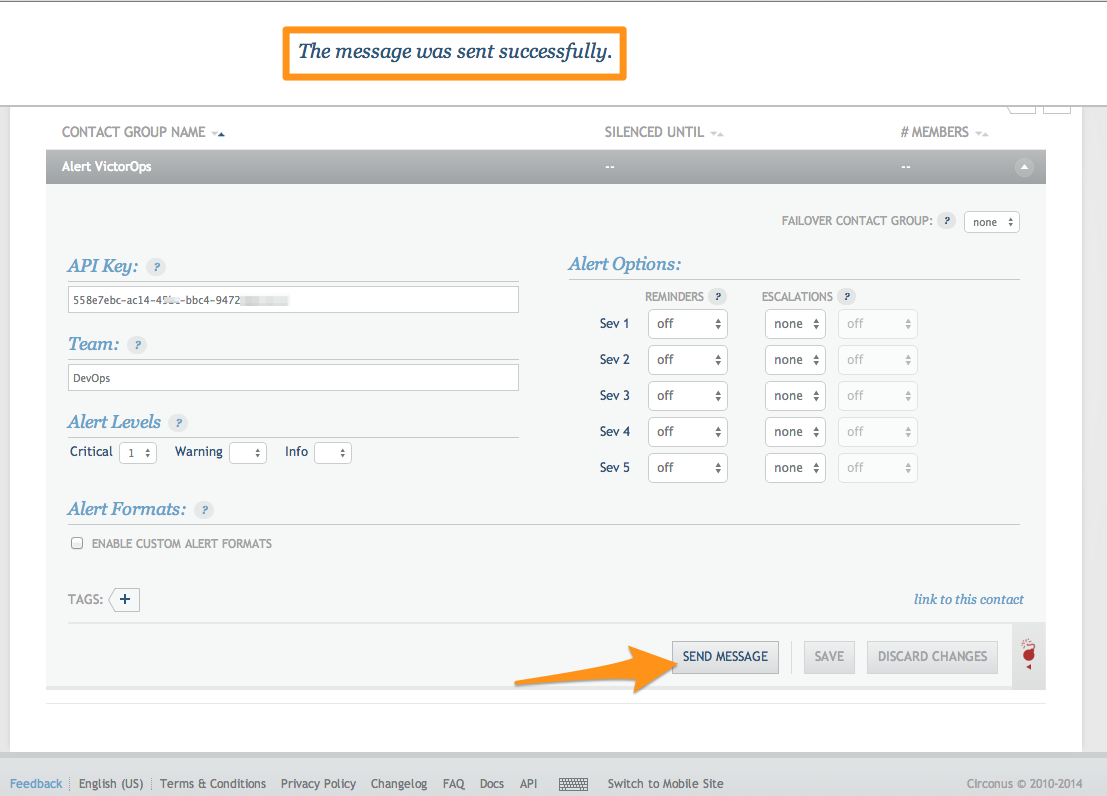
Sending Acknowledgements to Circonus
To send acknowledgements back to Circonus we will use Splunk On-Call’s Custom Outbound Webhooks. To begin we will create a new outbound webhook in Splunk On-Call.
From the settings page select Integrations >> Outgoing Webhooks.
Select Add Webhook.
Next fill in the fields as shown. Make sure to paste in the Webhook URL from your Splunk On-Call Contact Group from Circonus into the To: field.
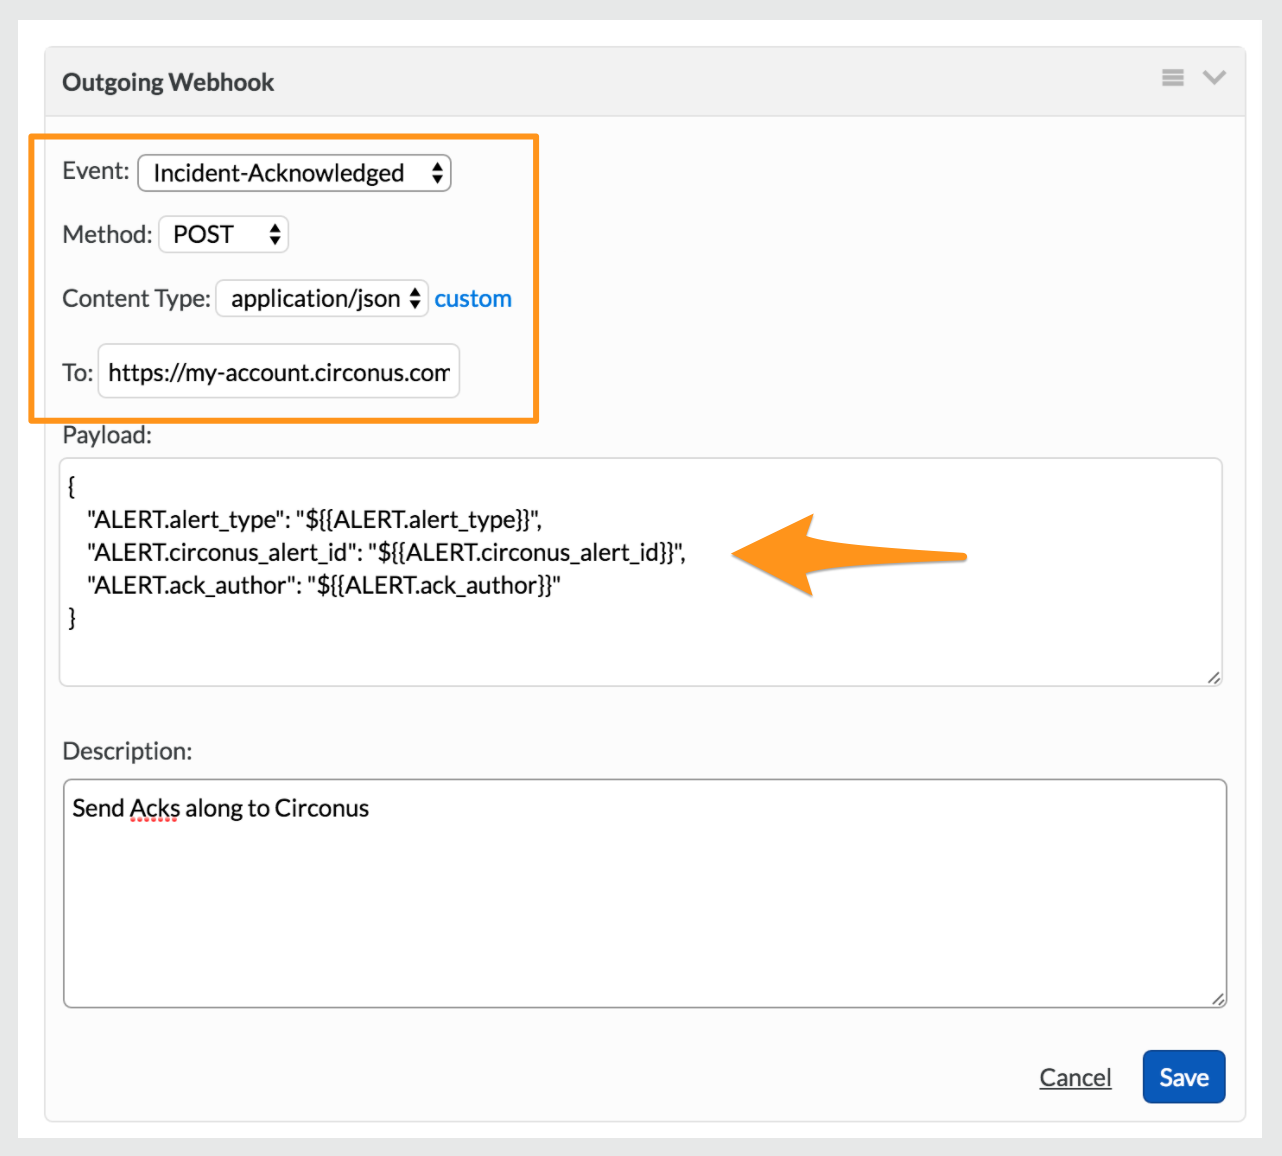
Paste in the following into the Payload field:
1 2 3 4 5 | {
"ALERT.alert_type": "${{ALERT.alert_type}}",
"ALERT.circonus_alert_id": "${{ALERT.circonus_alert_id}}",
"ALERT.ack_author": "${{ALERT.ack_author}}"
} |
Note: If you want alerts that are “Resolved” via Splunk On-Call to clear the acknowledgment at Circonus (allowing the alert to be triggered again) set the Event field to Any-Incident. Otherwise, set it to “Incident-Acknowledged” and the acknowledgement at Circonus will expire normally (if the alert condition doesn’t clear first).
When acknowledging alerts via Splunk On-Call, the alert at Circonus is acknowledged for 30 minutes by default. You can change this by adding the following option to the Webhook URL query string: ?acknowledge_minutes=X
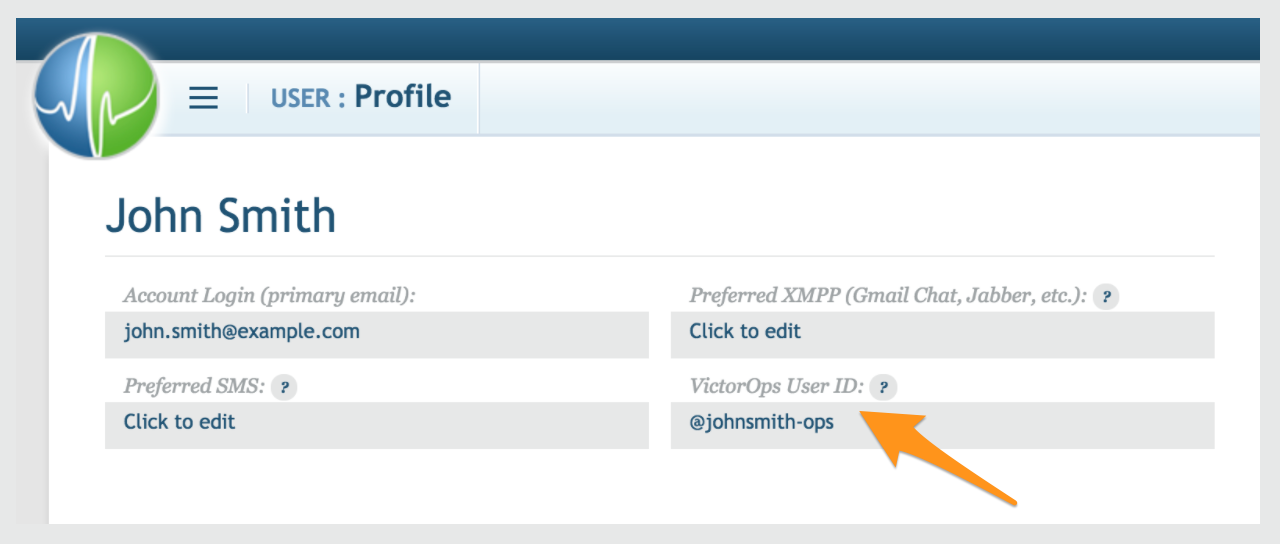
Important: The Splunk On-Call team member who acks the alert must have a Circonus account that has write (Normal or Admin) access to the account whose metric is alerting. To link the Splunk On-Call user to the Circonus user, go to the User Profile page at Circonus and type in the Splunk On-Call username: