IMPORTANT NOTE:
You must be a Slack Admin to configure this integration.
If you prefer not to have a Slack Admin in the required Slack Channels please create a Slack Admin Service User. Please reference Ownership of Slack Integration section for more detail.
Slack Integration Guide
The Splunk On-Call and Slack integration centralize communication for engineers, developers, and IT managers. The Slack integration bridges the communication gap between on-call incident response and remediation to improve collaboration and reduce MTTR.
Helpful Links:
Download the Slack App for Splunk On-Call
Download the Splunk On-Call App for Android
Download the Splunk On-Call App for iOS
General Requirements
-
-
- Slack Account: Slack Administrative Privileges Required to Integrate.
- Splunk On-Call Version Requirements: Getting Started, Essentials, or Enterprise.
- What You Need to Know:
- If previously enabled, disable the old Slack (webhook) integration prior to enabling this one. Navigate to Integrations >> Slack (webhook) >> Revoke.
- One Slack workspace can integrate with One Splunk On-Call account.
- Multi-channel configuration is available for all levels of service.
- We highly recommend creating a Slack Admin Service User to enable the integration to ensure continuity of the integrations functionality.
-
Slack App Configuration
The Splunk On-Call Slack App allows you to work on the platform of your choice without losing any functionality or information across platforms. With the Splunk On-Call Slack app, you can acknowledge, resolve, snooze, and reroute incidents from your Slack channel of choice. The following guide will walk you through setting up this integration.
Ownership of Slack Integration
You must have Slack Admin or higher permissions to configure this integration.
♦ Best Practice ♦ Create a Slack Admin Service User to configure this integration to ensure the functionality of the integration is not dependent on any one user.
Note: When the integration is enabled, it connects to that specific user’s channels. (i.e. only private channels that user is in will be accessible). Private channels will become inaccessible if the user who originally enabled the integration leaves the Slack Workspace. For this reason, please use a Slack Admin Service User to avoid integration disruption.
If you are not an Owner or Admin of your Slack Workspace please request to have a Slack Admin Service User created or seek increased permissions from your Slack Admin.
WARNING: If the Slack Admin who configured the integration leaves the Slack Workspace, please reach out to Splunk On-Call Support immediately to avoid service disruption of your Slack Integration.
Configure the Integration
From the Splunk On-Call web portal navigate to Integrations >> 3rd Party Integrations >> Slack and click Enable Integration.
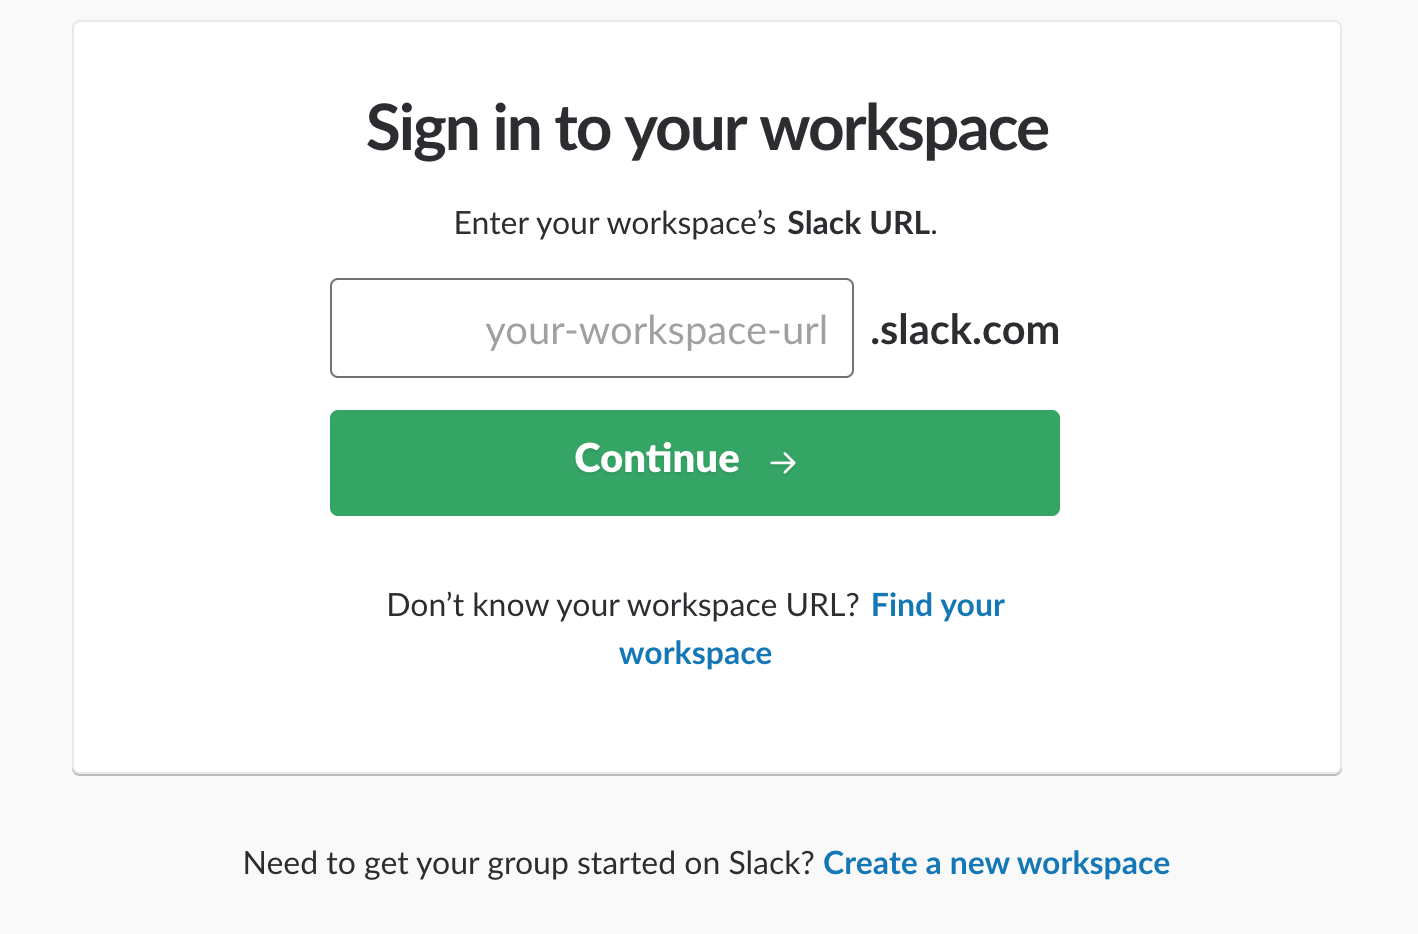
In the resulting Slack screen, enter the workspace you want to integrate, then log in.
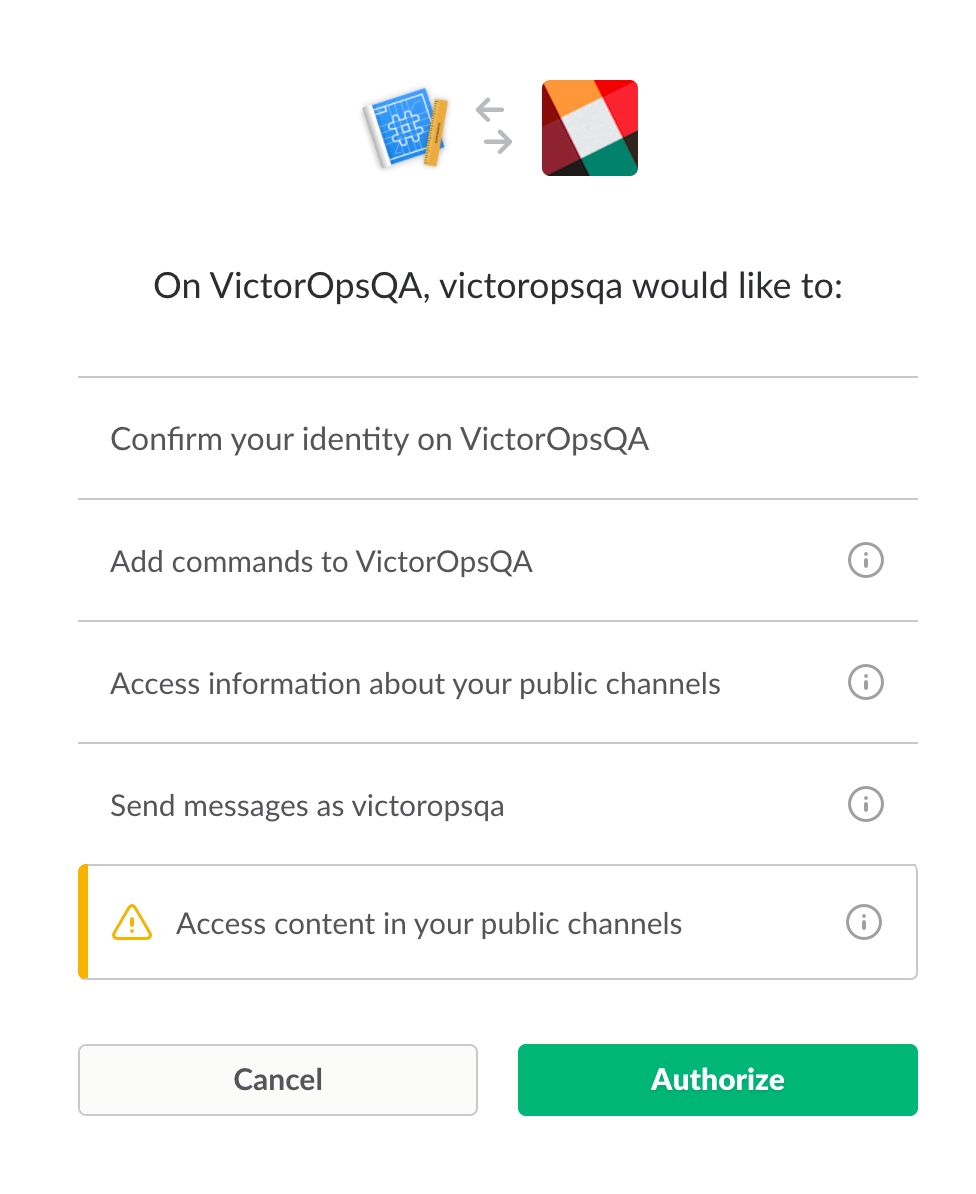
Finally, authorize the application.
Note: If using a previous version of the Splunk On-Call and Slack integration, at this point, you will be prompted to upgrade to Slack v2.3.
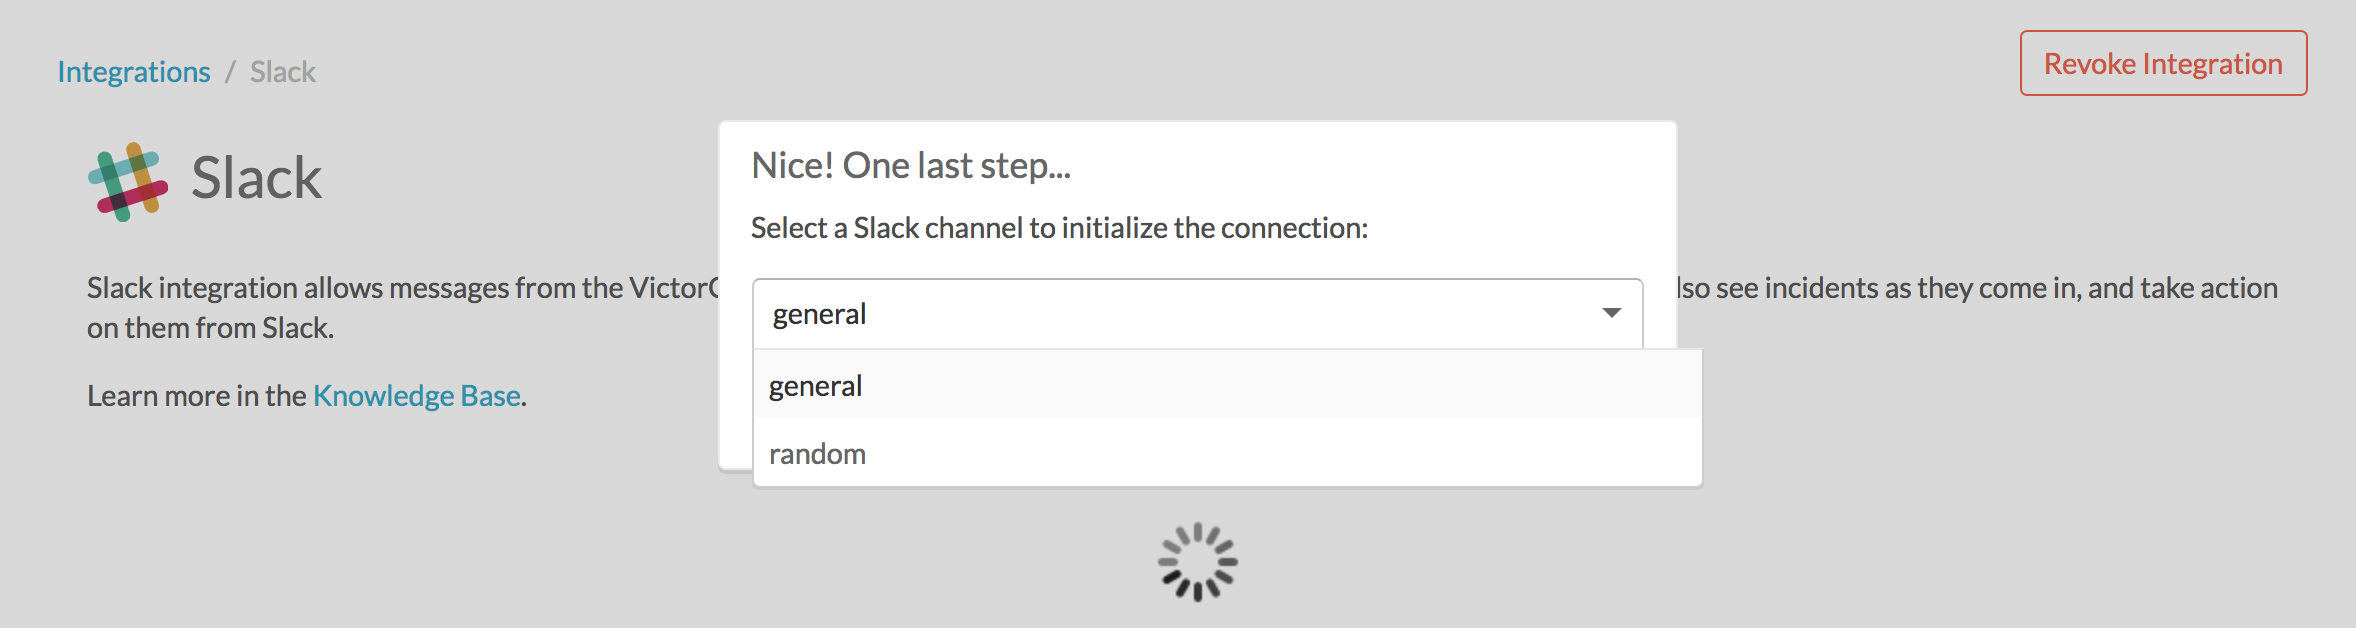
In Splunk On-Call, you’ll immediately be prompted to select a default Slack channel. A default channel is required, however, it will not register any activity if all of the checkboxes are left unmarked.
Add Channel Mappings
On the Slack integrations page in Splunk On-Call (Integrations >> 3rd Party Integrations >> Slack), click Add Mapping.
You must first select a default channel for the integration; this is required. You may prevent incident activity and notifications to this channel by leaving all boxes unchecked.
Select the Splunk On-Call Escalation Policy and Slack channel you’d like to map, and select the message types you’d like Splunk On-Call to send to this Slack channel in the Channel Settings section. Toggling the Channel Settings checkboxes are a good way to limit noise and control information flow into specific channels.
Private Channels
When mapping to private Slack channels you must give the Splunk On-Call app permission to post to your private Slack channel. First, map your Escalation Policy to your desired private Slack channel. Private channels are listed below the public channels.
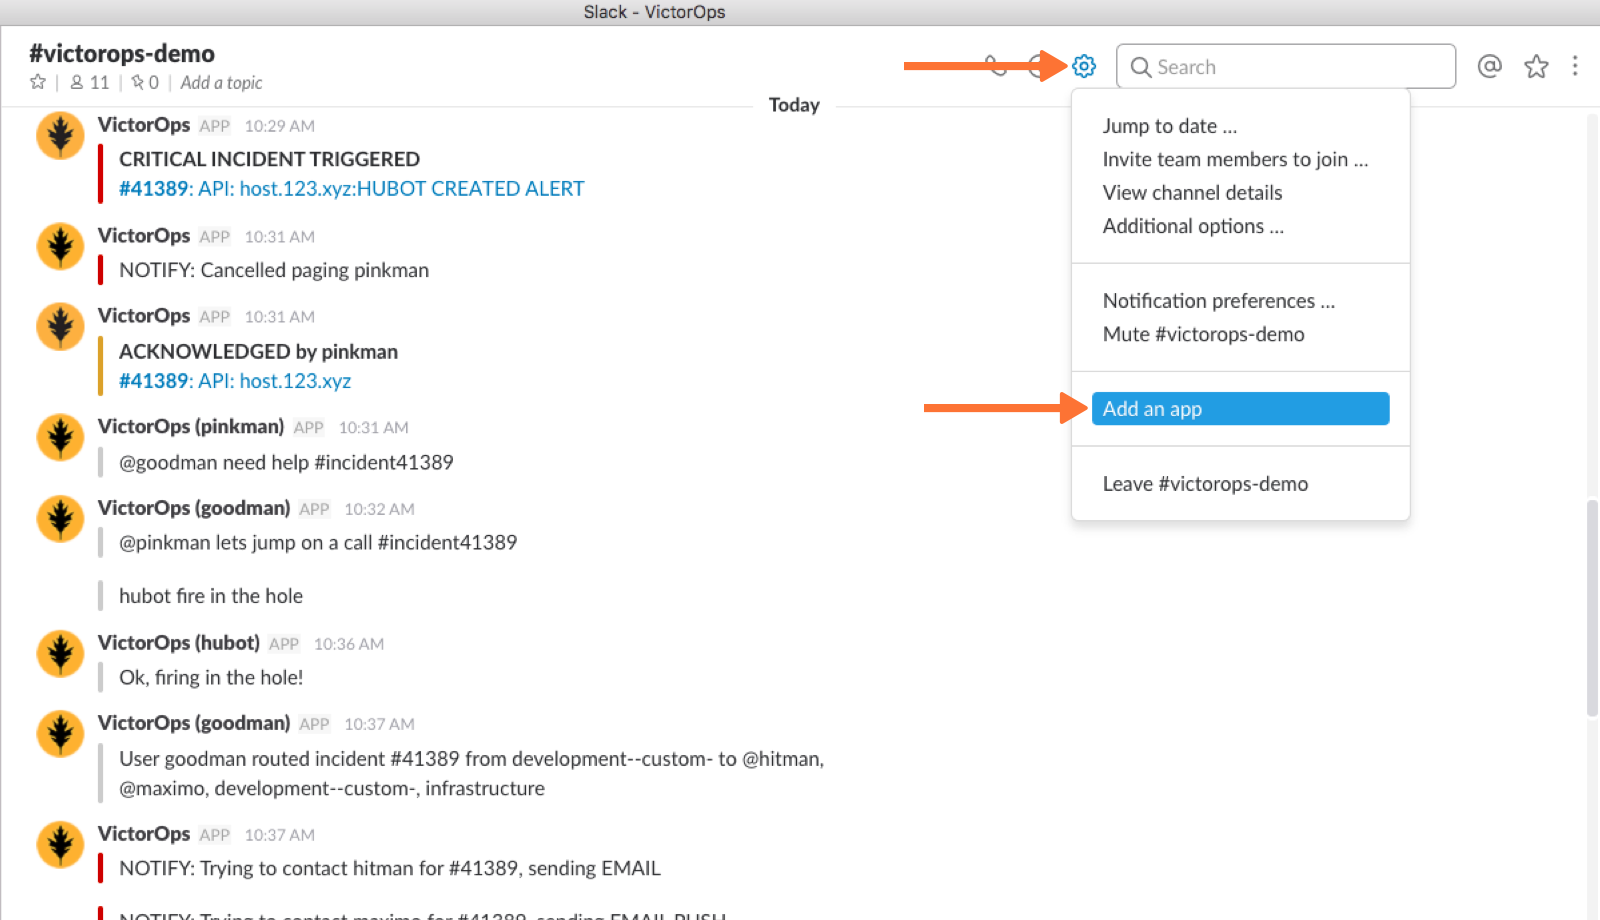
Next, in your private Slack channel, @mention Splunk On-Call or select ‘Add an app‘.
Finally, give the app permission by selecting ‘Invite Them‘.
Note: The scope of private channels is limited to the channels that the person who integrates Splunk On-Call to Slack has access to. If you would like all private channels to be mapped to Splunk On-Call, we recommend creating a “Service Account” that has access to all private channels for this use.
Usage in Slack
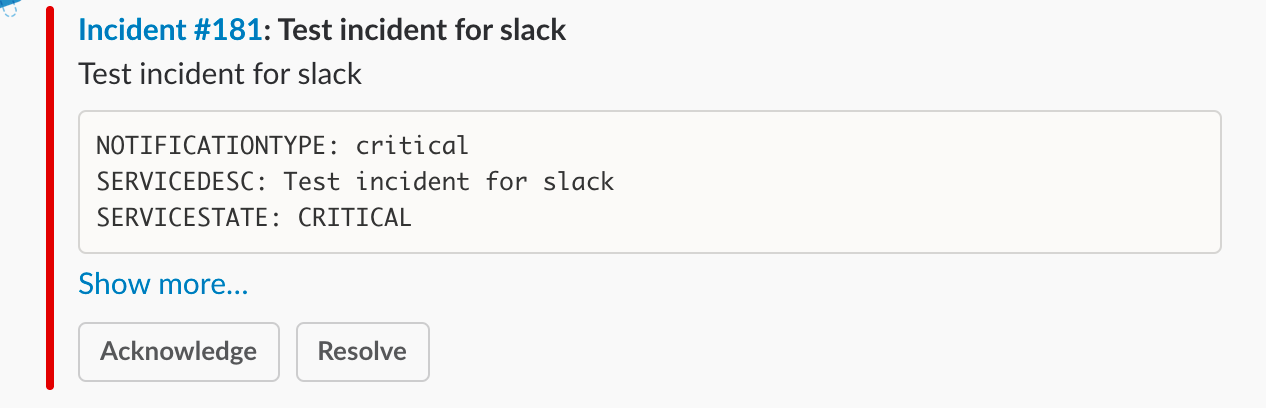
Triggered Splunk On-Call incidents will route to specified Slack Channels based on Escalation Policy as per your specifications in the steps above. From Slack you may Acknowledge, Reroute, Resolve, and even Snooze incidents via the buttons below the incident card in Slack.
Slack Slash Commands
Currently, there are three Slack slash commands that work with Splunk On-Call:
/victor-linkuser
/victor-unlinkuser
/victor-createincident
Note: when using this command please be sure to use the full syntax including brackets as displayed in the command preview. For example, to create an incident, you should :
/victor-createincident [this is an example message] for [victorops username]
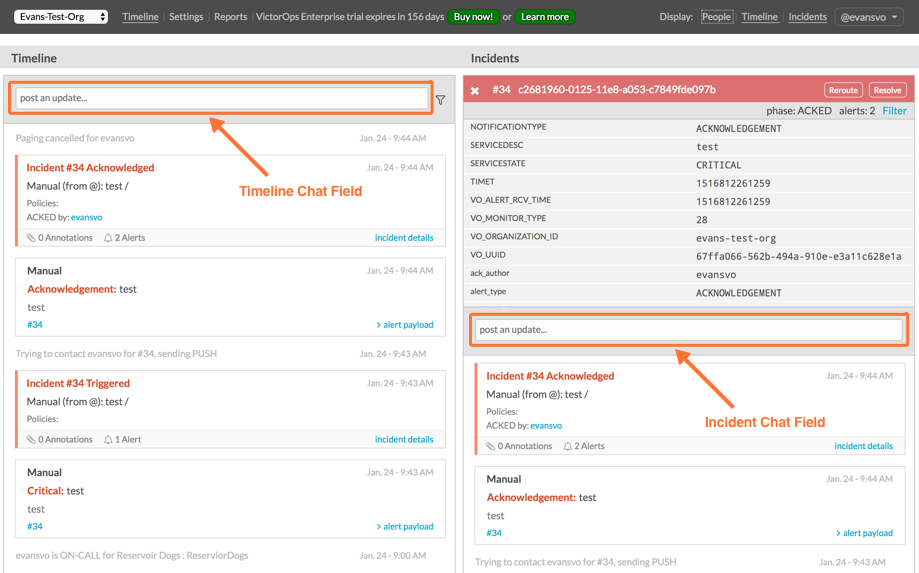
Attaching Messages from Slack to the Splunk On-Call Incident Timeline
To keep communication about an incident all in one place, use a hashtag and the incident number to reference a specific incident within Slack (ie. #incident123).
The message that contains this hashtag will then appear in the relevant incident’s timeline within Splunk On-Call.
Adding Annotations via Webhooks
You can have annotations be sent to a Slack channel via Custom Outgoing Webhooks.
In the below payload, the “title” field carries the clickable link and the “image_url” is the rendered image as defined in the Rules Engine.
You may copy and paste the below example directly into a Splunk On-Call Outgoing Webhook. Edit the channel name, title, image_url, and color fields to suit your needs.
1 2 3 4 5 6 7 8 9 10 11 12 13 | { "channel": "#general", "username": "VictorOps", "icon_url": "https://victorops.com/assets/img/branding/logo-yellow-mark.png", "attachments": [ { "fallback":"What this image is in case it does not render", "title": "https://en.wikipedia.org/wiki/Australian_Cattle_Dog", "image_url": "http://i.dailymail.co.uk/i/newpix/2018/04/21/05/4B606CDA00000578-0-image-a-32_1524284530816.jpg", "color": "danger" } ] } |
For further reference on attaching content and links to Slack via webhook, please read the Slack documentation.
Multi-Channel Configuration via Custom Webhooks
Slack Account: May Require Slack Administrative Privileges (in Slack this is called Primary Owner) to Integrate Incoming Webhooks
Splunk On-Call Version Required: Enterprise
What you need to know: This Slack multi-channel configuration is to be used with Splunk On-Call Custom Outgoing Webhooks and our Slack App integration. To avoid confusion, this configuration is NOT to be used with our legacy Slack (Webhook) integration. We recommend using this documentation with our standalone Slack App integration.
Currently, in this multi-channel configuration, bi-directionality is not supported outside of the main Splunk On-Call Slack App channel. This configuration is Splunk On-Call to Slack only.
Custom Outgoing Webhooks Configuration Overview
This setup allows you to segregate Splunk On-Call incidents into their own separate Slack channels based on the routing_key value in Splunk On-Call Incident-specific chats in Splunk On-Call (chats entered into the incident-pane chat bar on the far right) may also be sent to a specific Slack channel based on the routing_key of the incident. This configuration adds the name of the user that Ack’d and Resolved the incidents, and provides links in Slack that take the user directly to the incidents in Splunk On-Call.
In the following document, we’ll show you how to configure the Slack App for Incoming Webhooks, create VictorOps Outgoing Webhooks, and create new Rules Engine rules to help steer Splunk On-Call incidents and chats into specified Slack channels.
Custom Configuration in Slack
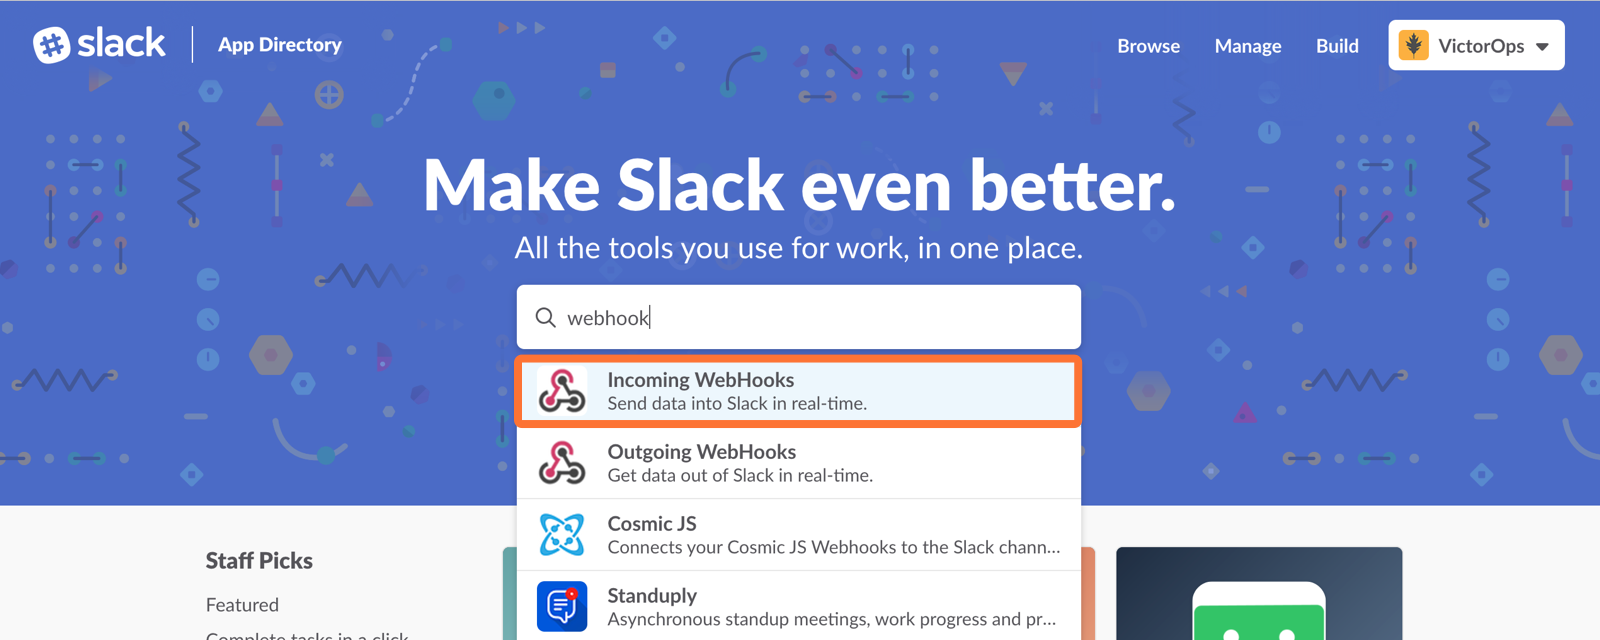
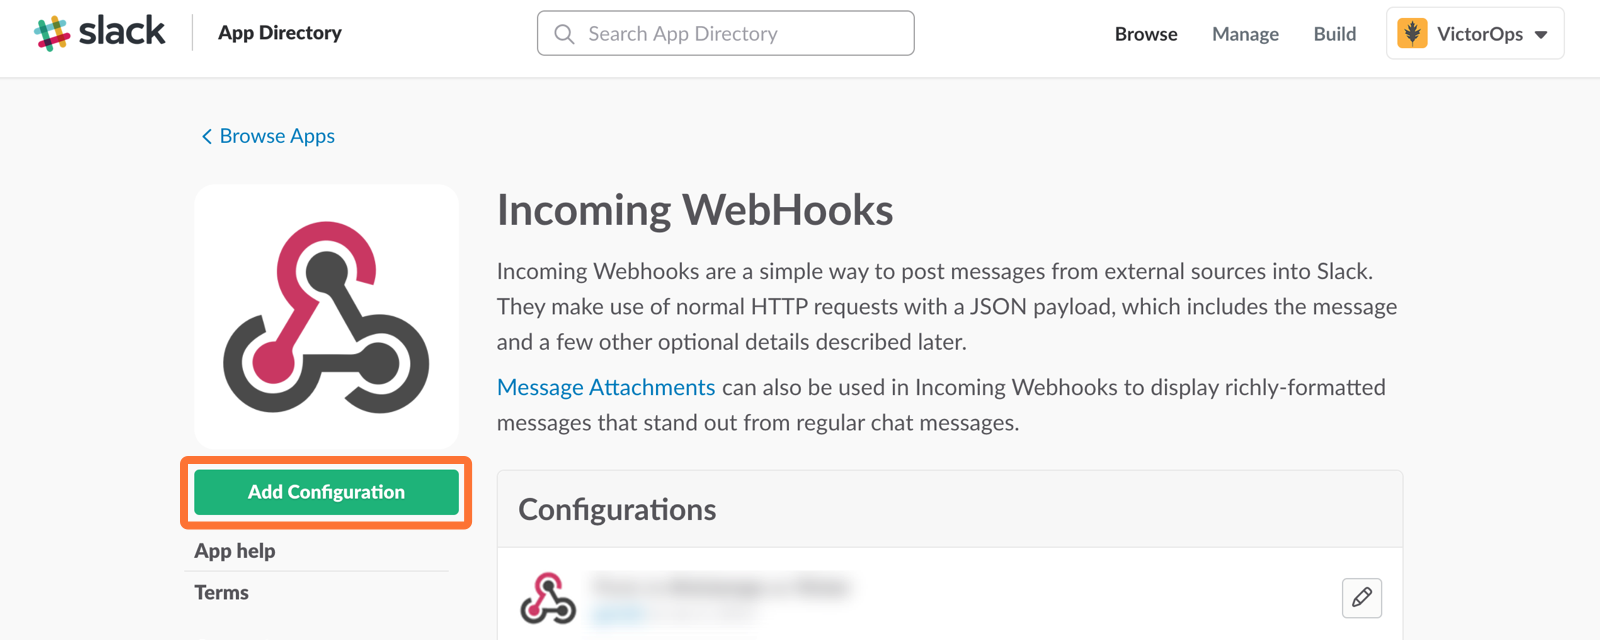
Within Slack, in Slack’s App Directory, add a new Incoming WebHooks configuration.
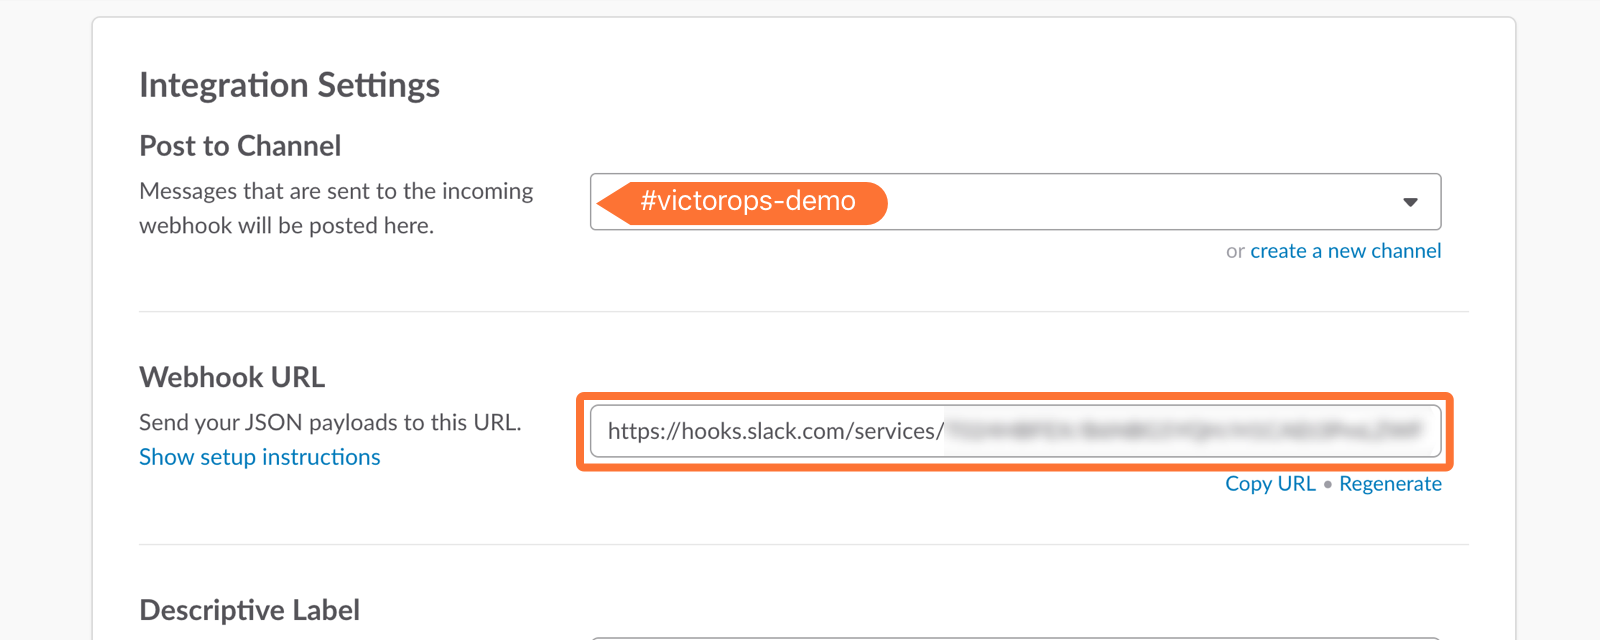
When creating this new Incoming Webhook, under Integration Settings, you’ll want to select your main Splunk On-Call Slack channel as the target for the Post to Channel section. This is the Channel that’s declared in the VictorOps Slack App integration page. You’ll also want to copy the Webhook URL and save it for use when we set up the Splunk On-Call custom Outgoing Webhooks.
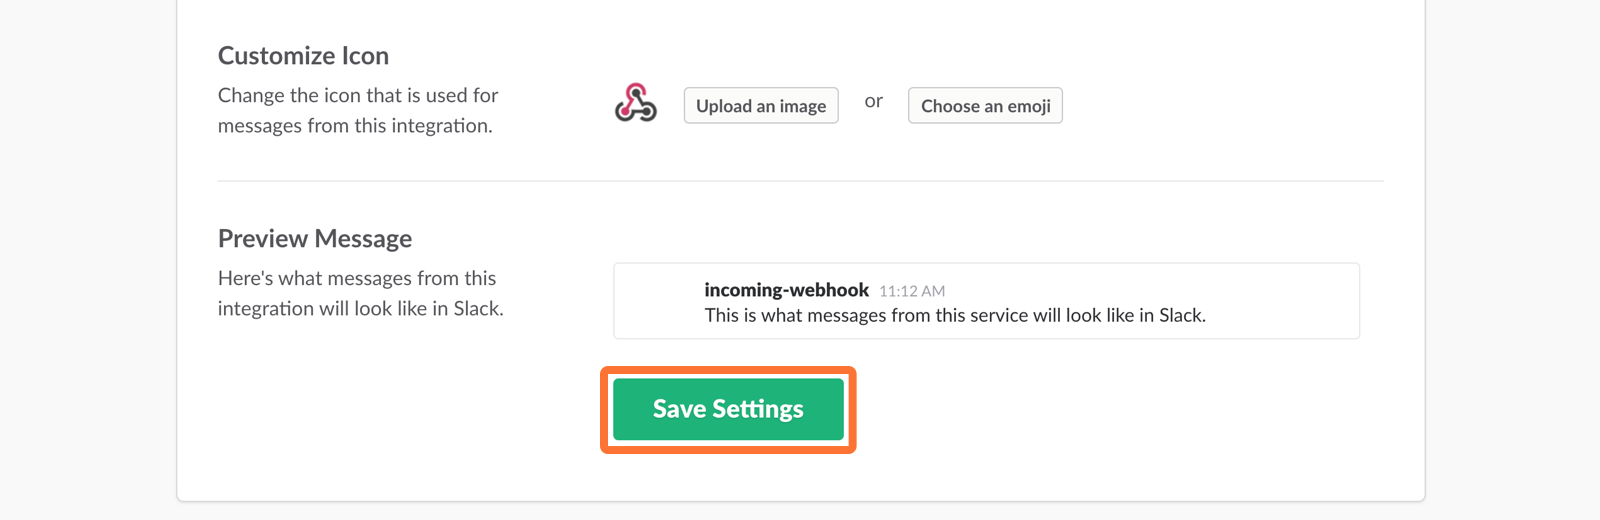
Note: Don’t forget to hit save.
Now that we’ve copied the correct Webhook URL and have the appropriate Slack channel selected, we’re ready to head over to Splunk On-Call for further configuration.
Custom Configuration in Splunk On-Call
Within Splunk On-Call you’ll want to leverage our custom Outgoing Webhooks and Rules Engine to steer Splunk On-Call incident, shift change, and chat activity to designated channels in Slack.
Rules Engine
In Splunk On-Call, click Settings >> Alert Rules Engine, then click to Add a Rule (in all cases, do not check the box to Stop after this rule has been applied)
The first rule will add the slugified version of your organization name (colloquially known as the org slug) to all incidents. To find your org slug, when you are logged into the main timeline, your org slug is located at the end of the URL. For example, if the URL is https://portal.victorops.com/client/my-company, then the org slug, in this case, is “my-company”.
For the matching condition of this rule, specify:
When entity_id matches *
The asterisk indicates a wild card, and as such will catch all incidents regardless of entity_id value.
For the Transform, specify to set the literal value of org_slug to the new value of your specific org slug:
Set org_slug to new value <your org slug>
(where <your org slug> is replaced with the value of your actual org slug)
Click Save once complete!
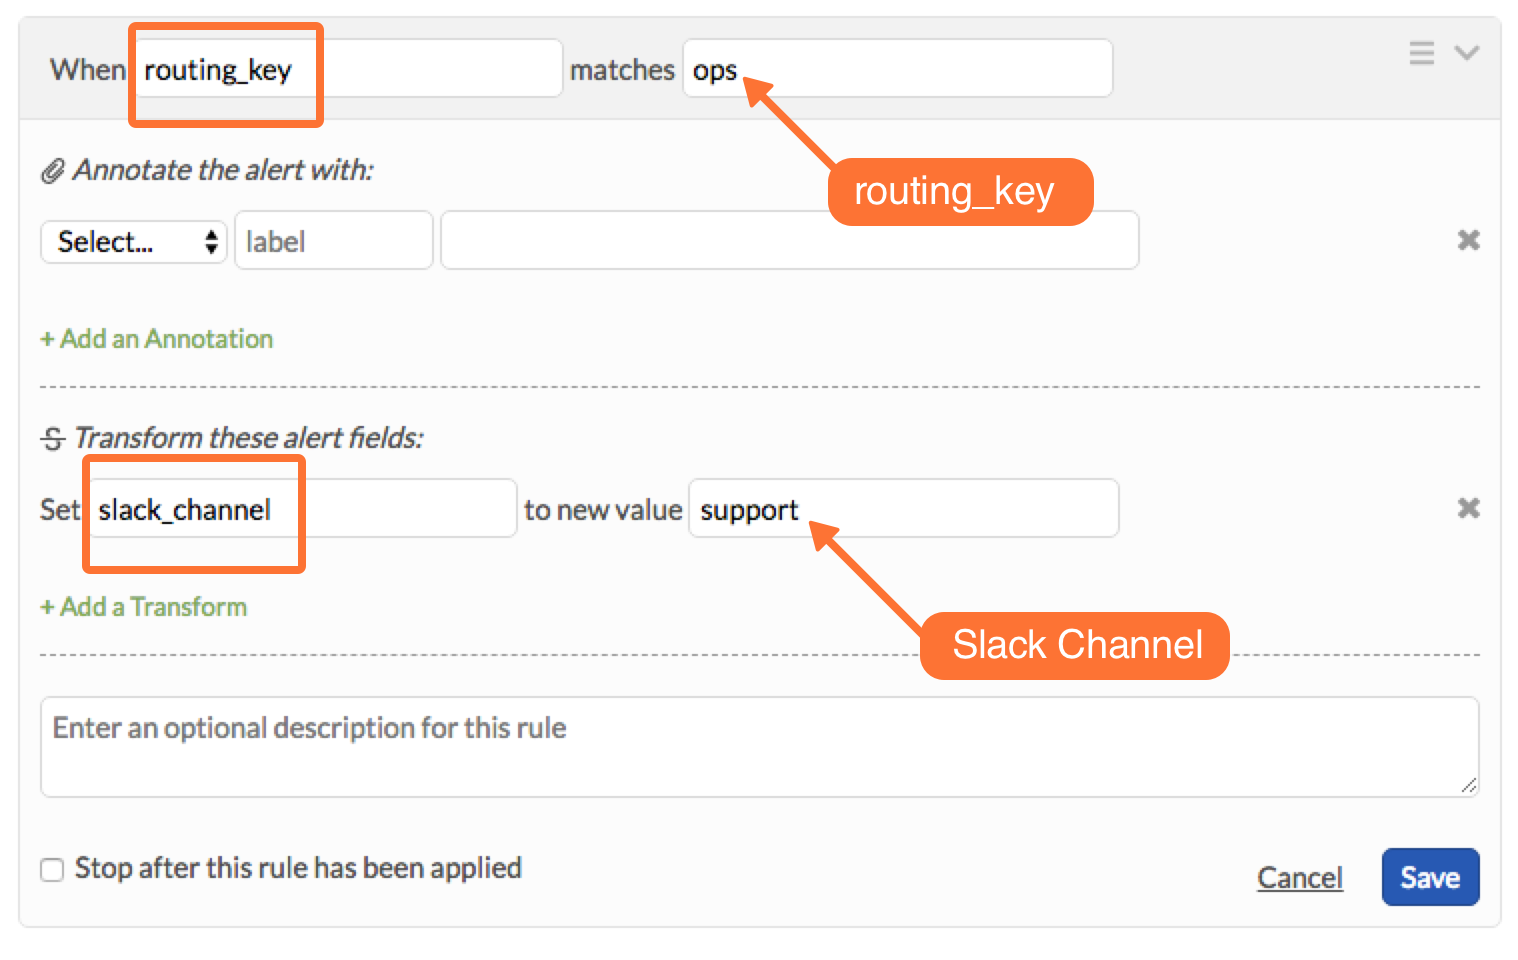
Now you will create rules to associate your Slack channels to their appropriate routing_keys in Splunk On-Call. In this example, the routing key I want to use is “ops” and the name of the Slack channel I wish to link is “support”.
Click Add a Rule. For the matching condition, specify:
When routing_key matches <Your routing_key>
where your routing key is your desired routing key.
For the Transform, alert field = slack_channel AND new value = (Slack channel name here) like the example below. Do not include a # sign before the channel name.
If you have have many Slack channels and many routing keys, you will need one rule per Splunk On-Call routing_key. In other words, configure one Rules Engine rule per routing_key in order to send routed alerts to specific slack channels.
Outgoing Webhooks
Navigate to Integrations >> Outgoing Webhooks. Here you’ll want to create four different outgoing webhooks based on Event Type.
All four of these webhooks will use the same URL (the one we copied from Slack) in the “To Field:” You can copy and paste the templated payloads found below exactly as they are. If you would like to add more variables to your payload, see the ‘Available Variables’ column to the right of the payload. As long as you have the required Rules Engine rules, no editing of the payload should be necessary.
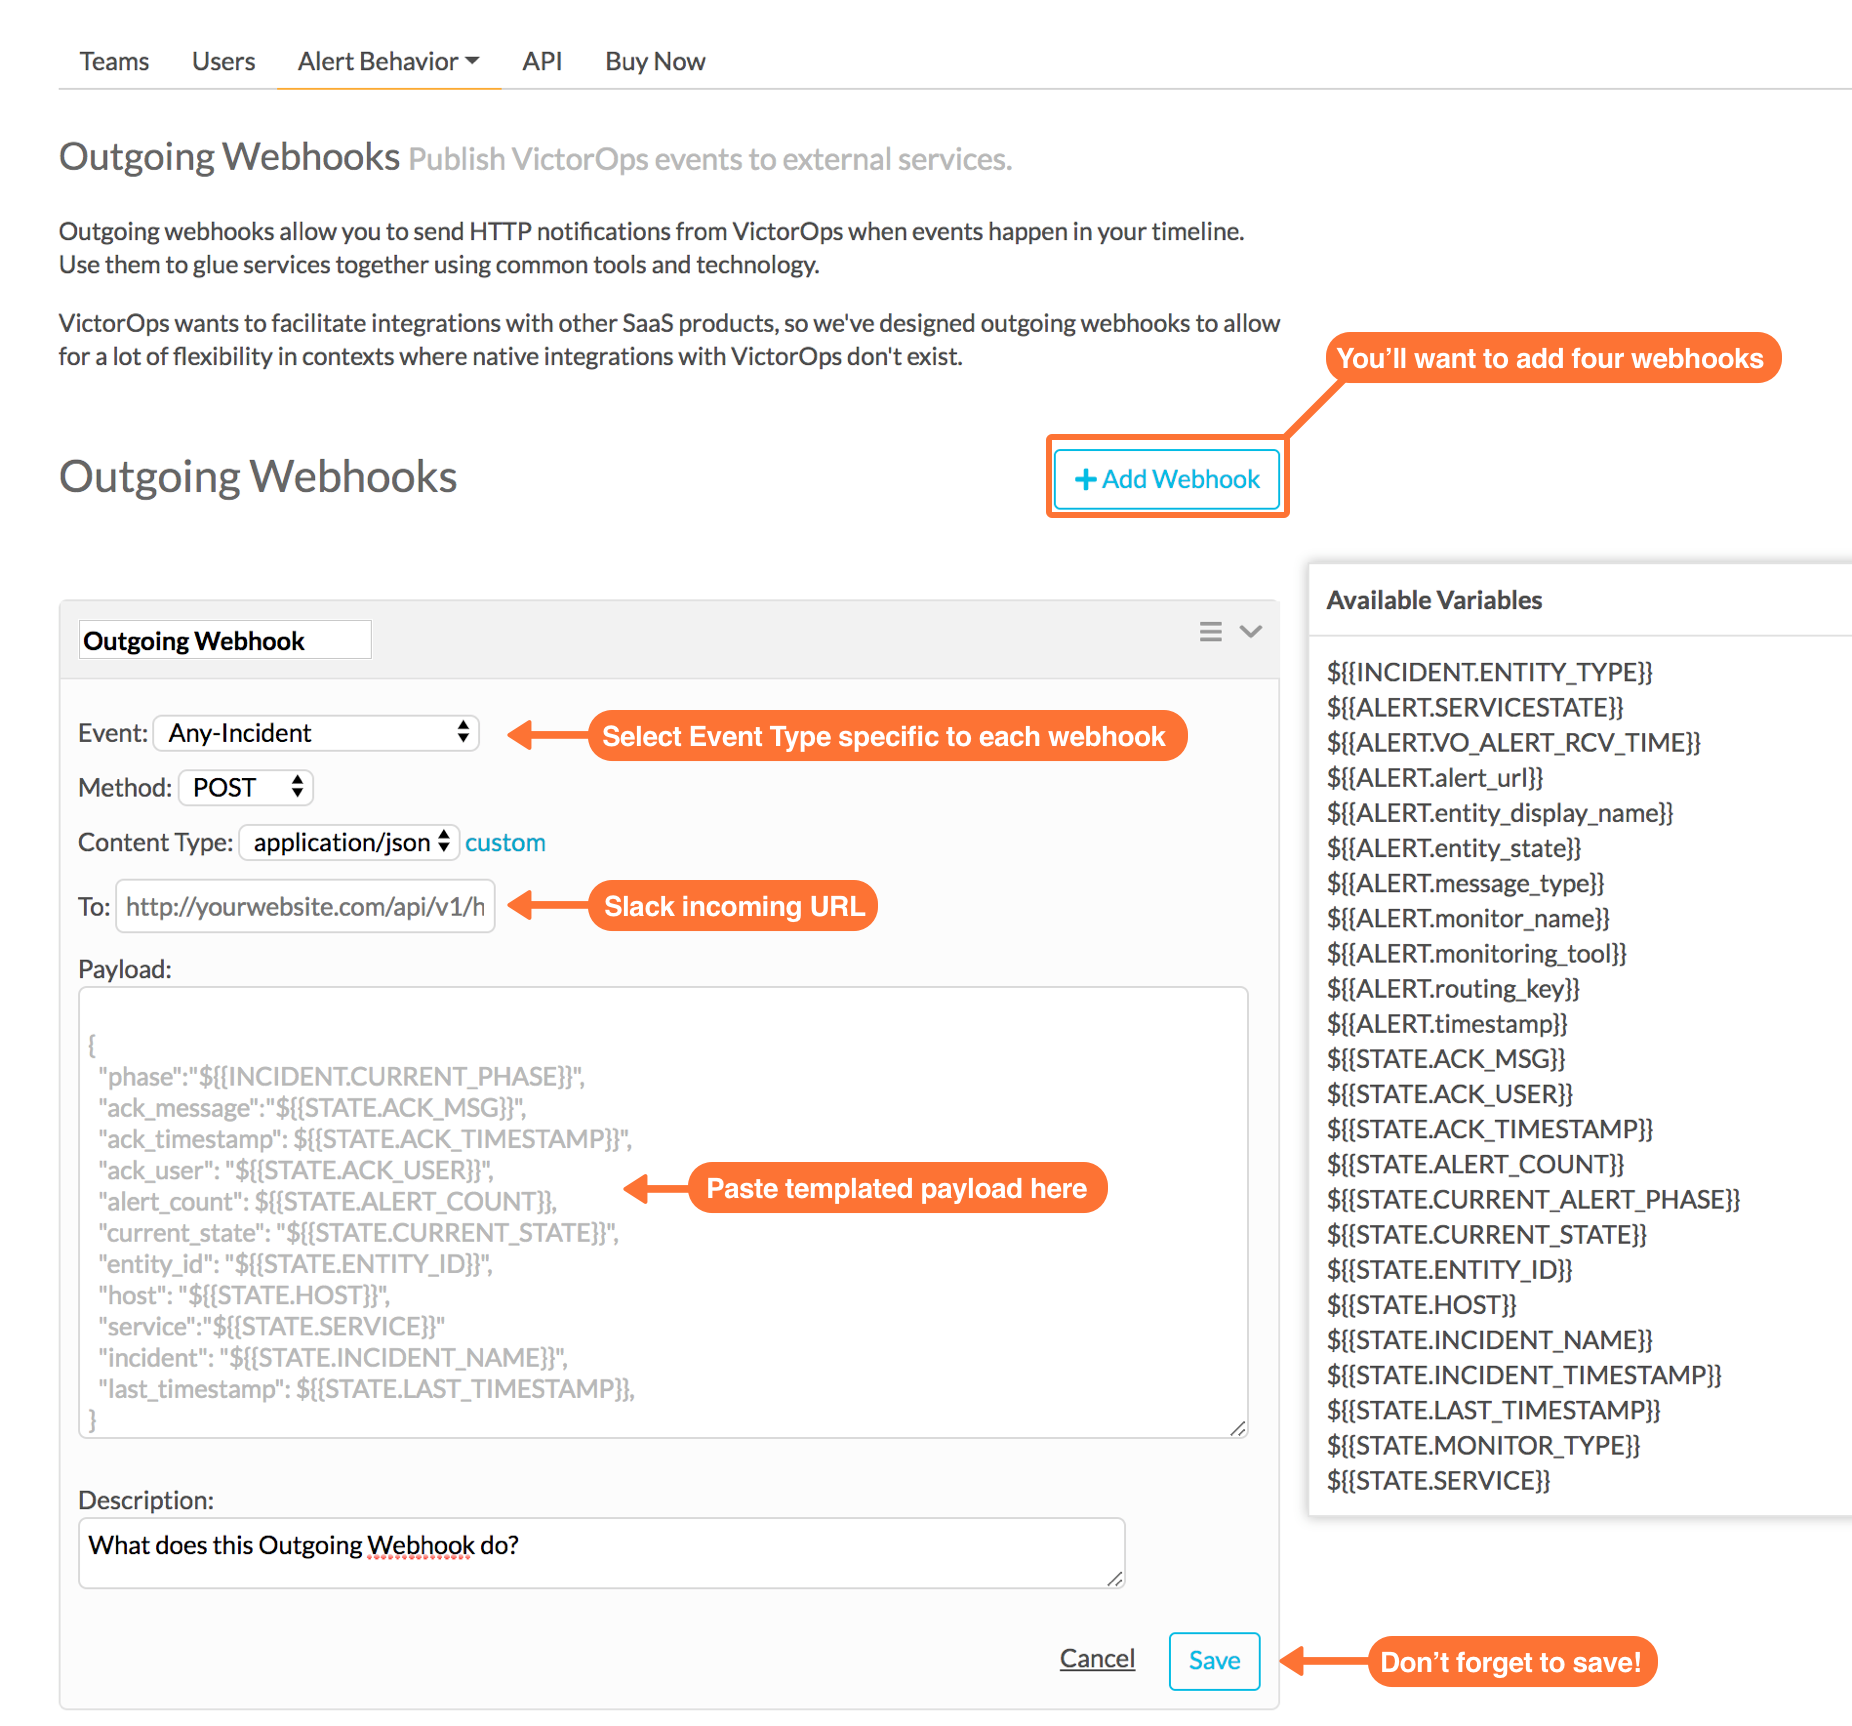
Configure the following webhooks (you will have to click Add Webhook at the top each time, then scroll down to the new window).
1) Incident Chats to Slack:
- Event: Incident-Chats
- Method: POST
- Content Type: application/json
- To: (Your Slack URL from step 8 of the basic setup)
- Payload:
1 2 3 4 5 6 7 8 9 10 | { "channel": "#${{ALERT.slack_channel}}", "username": "VictorOps Chat (${{CHAT.USER_ID}})", "icon_url": "https://victorops.com/assets/img/branding/logo-yellow-mark.png", "attachments": [{ "text": "${{CHAT.TEXT}} \n <https://portal.victorops.com/client/${{ALERT.org_slug}}#/incident/${{STATE.INCIDENT_NAME}}|*#${{STATE.INCIDENT_NAME}}*: ${{ALERT.monitoring_tool}}: ${{ALERT.entity_display_name}}>", "color": "#4dc3ff", "mrkdwn_in": ["text"] }] } |
- Description: Send incident chats to their appropriate Slack channel
2) Critical Incidents to Slack:
- Event: Incident-Triggered
- Method: POST
- Content Type: application/json
- To: (Your Slack URL from step 3 of the basic setup)
- Payload:
1 2 3 4 5 6 7 8 9 10 11 12 13 | { "channel":"#${{ALERT.slack_channel}}", "username":"VictorOps", "icon_url":"https://victorops.com/assets/img/branding/logo-yellow-mark.png", "attachments": [ { "title":"CRITICAL INCIDENT TRIGGERED", "text": "<https://portal.victorops.com/client/${{ALERT.org_slug}}#/incident/${{STATE.INCIDENT_NAME}}|*#${{STATE.INCIDENT_NAME}}*: ${{ALERT.monitoring_tool}}: ${{ALERT.entity_display_name}}>", "color":"danger", "mrkdwn_in": ["text"] } ] } |
- Description: Send triggered incidents to their appropriate Slack channel
3) Acknowledgements to Slack:
- Event: Incident-Acknowledged
- Method: POST
- Content Type: application/json
- To: (Your Slack URL from step 3 of the basic setup)
- Payload:
1 2 3 4 5 6 7 8 9 10 11 | { "channel":"#${{ALERT.slack_channel}}", "username":"VictorOps", "icon_url":"https://victorops.com/assets/img/branding/logo-yellow-mark.png", "attachments": [ { "title":"ACKNOWLEDGED by ${{STATE.ACK_USER}}", "text": "<https://portal.victorops.com/client/${{ALERT.org_slug}}#/incident/${{STATE.INCIDENT_NAME}}|*#${{STATE.INCIDENT_NAME}}*: ${{ALERT.monitoring_tool}}: ${{ALERT.entity_display_name}}>", "color":"warning", "mrkdwn_in": ["text"] } ] } |
- Description: Send incident acknowledgements to their appropriate Slack channel
4) Recoveries to Slack:
- Event: Incident-Resolved
- Method: POST
- Content Type: application/json
- To: (Your Slack URL from step 3 of the basic setup)
- Payload:
1 2 3 4 5 6 7 8 9 10 11 12 13 | { "channel":"#${{ALERT.slack_channel}}", "username":"VictorOps", "icon_url":"https://victorops.com/assets/img/branding/logo-yellow-mark.png", "attachments": [ { "title":"RESOLVED by ${{STATE.ACK_USER}}", "text": "<https://portal.victorops.com/client/${{ALERT.org_slug}}#/incident/${{STATE.INCIDENT_NAME}}|*#${{STATE.INCIDENT_NAME}}*: ${{ALERT.monitoring_tool}}: ${{ALERT.entity_display_name}}>", "color":"good", "mrkdwn_in": ["text"] } ] } |
- Description: Send incident recovery events to their appropriate Slack channel
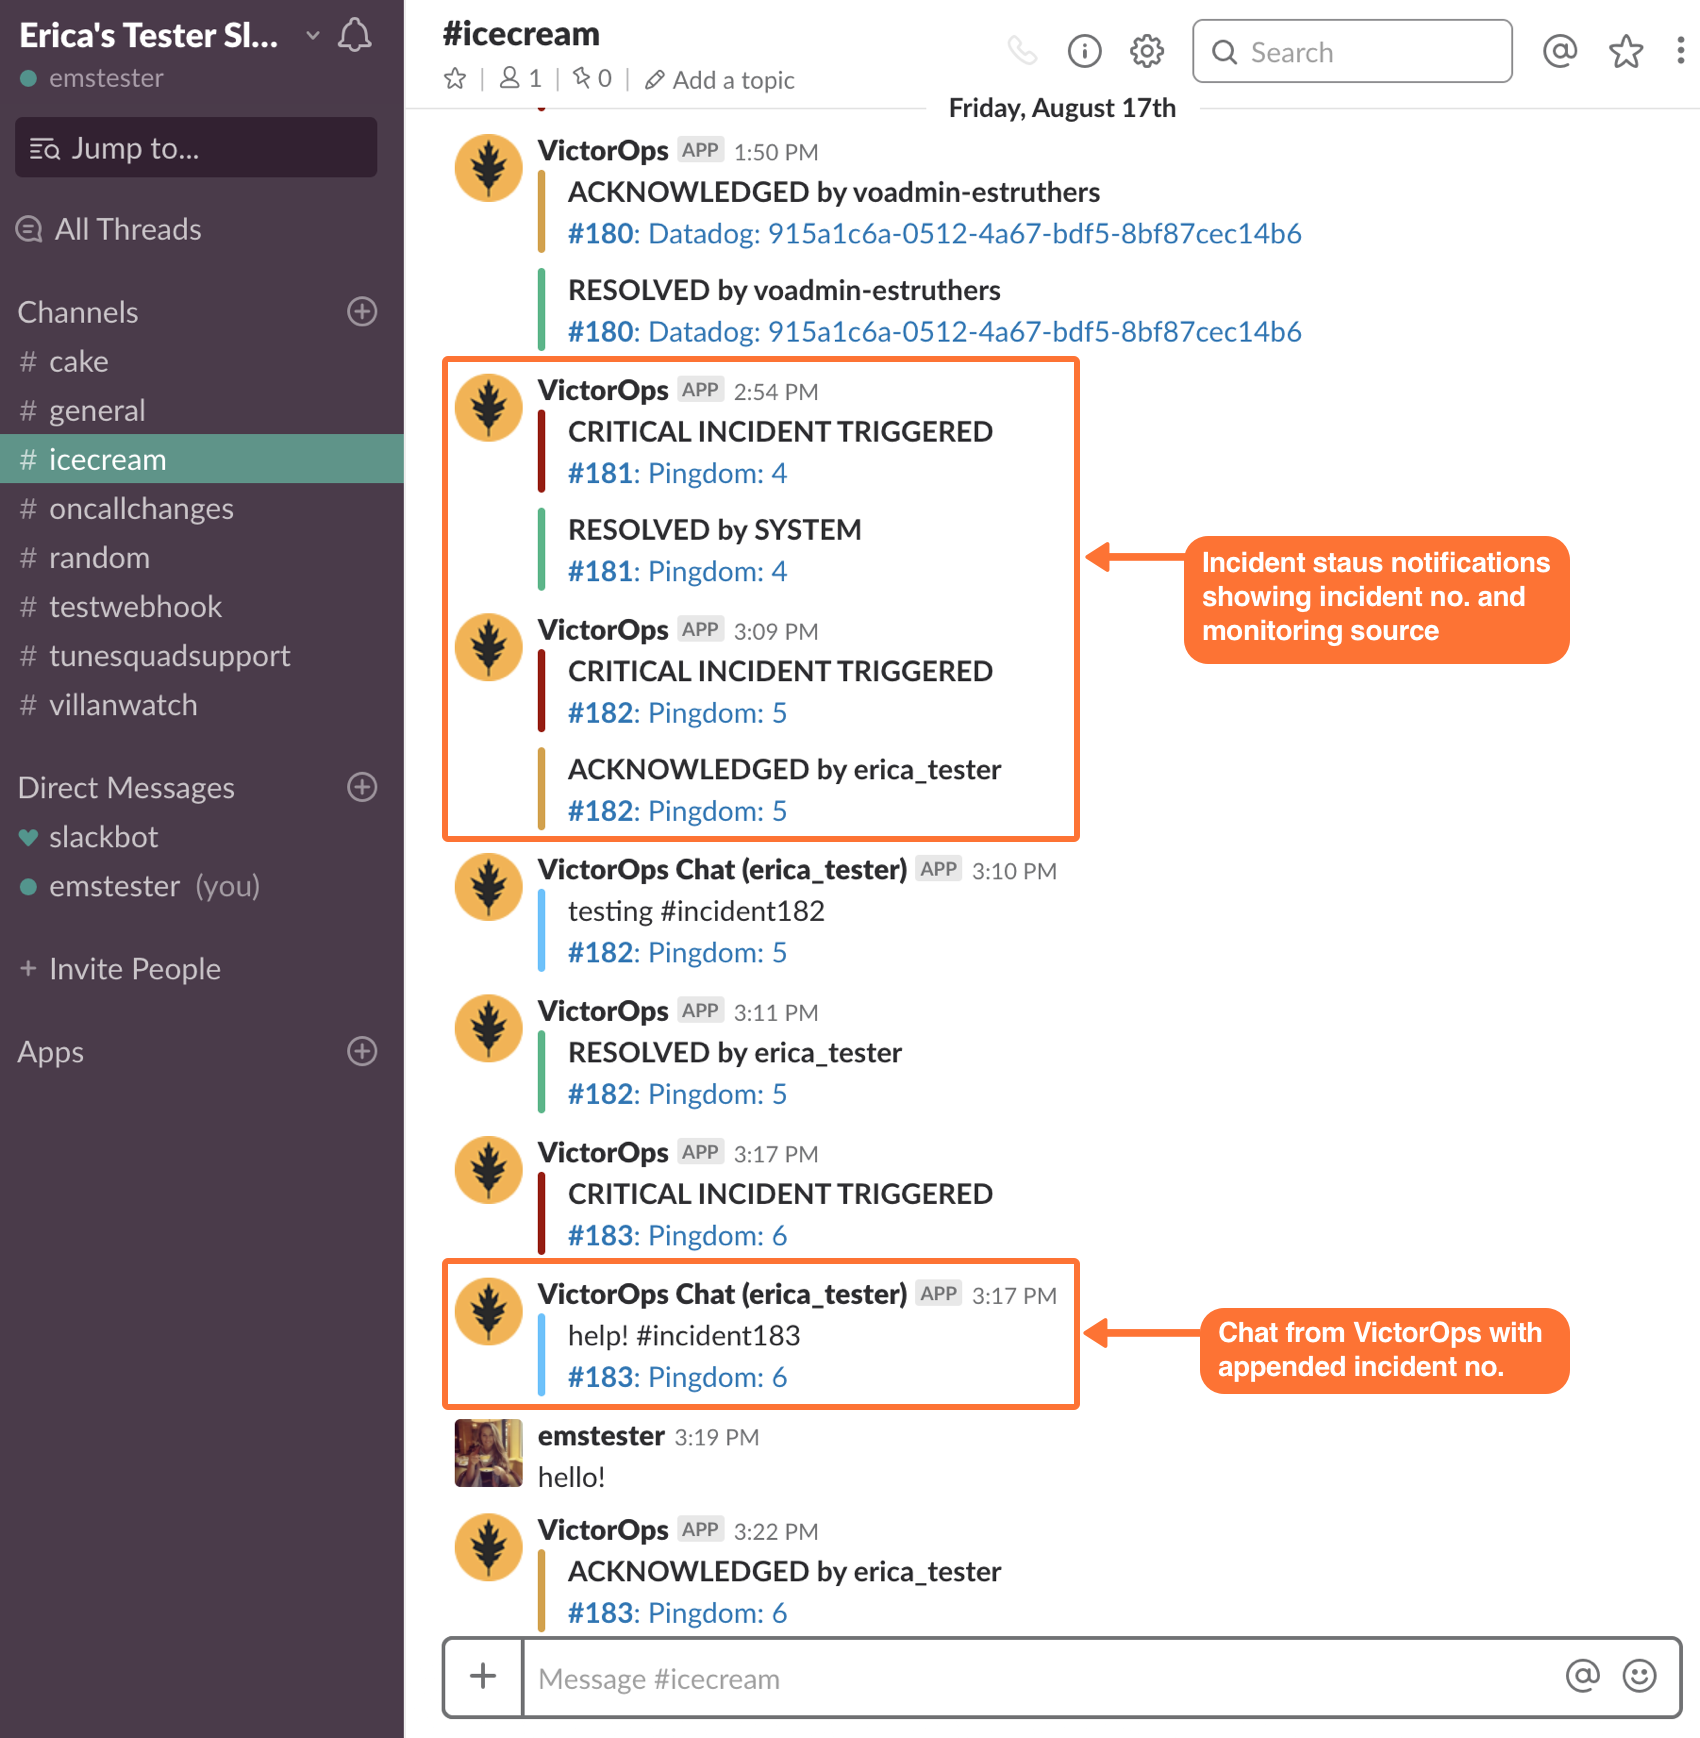
End Result in Slack
Back in Slack, each channel should see incident activity (based on routing key) for the four configured webhooks. As you can see, in the below image there’s a incoming Triggered event, Acknowledged event, Resolved event, and a Chat.
Legacy Slack Integration Guides
Transfer of Ownership in Slack
Please be sure to recognize the administrative rights of your Slack environment. If you are not the Primary Owner of your Slack workspace you will need to seek out permission to transfer ownership in order to integrate with Splunk On-Call.
These permissions may be managed in Slack under the main settings >> Manage Members.
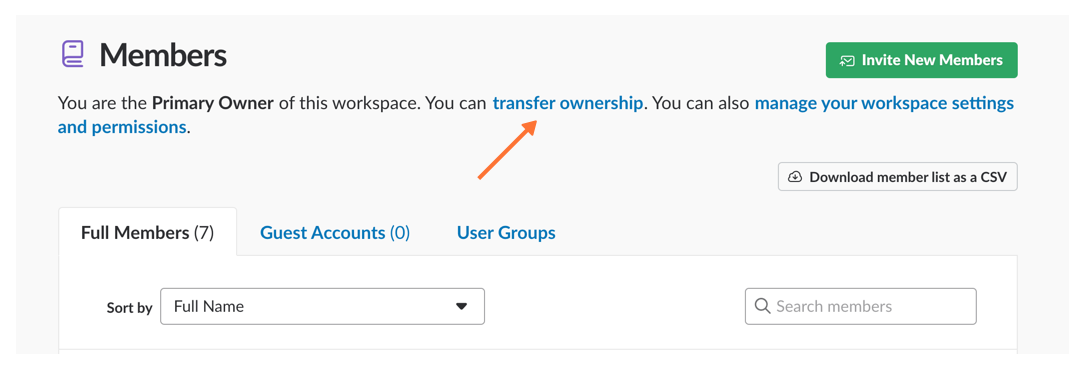
Then, Transfer Ownership to the user tasked with the integration.
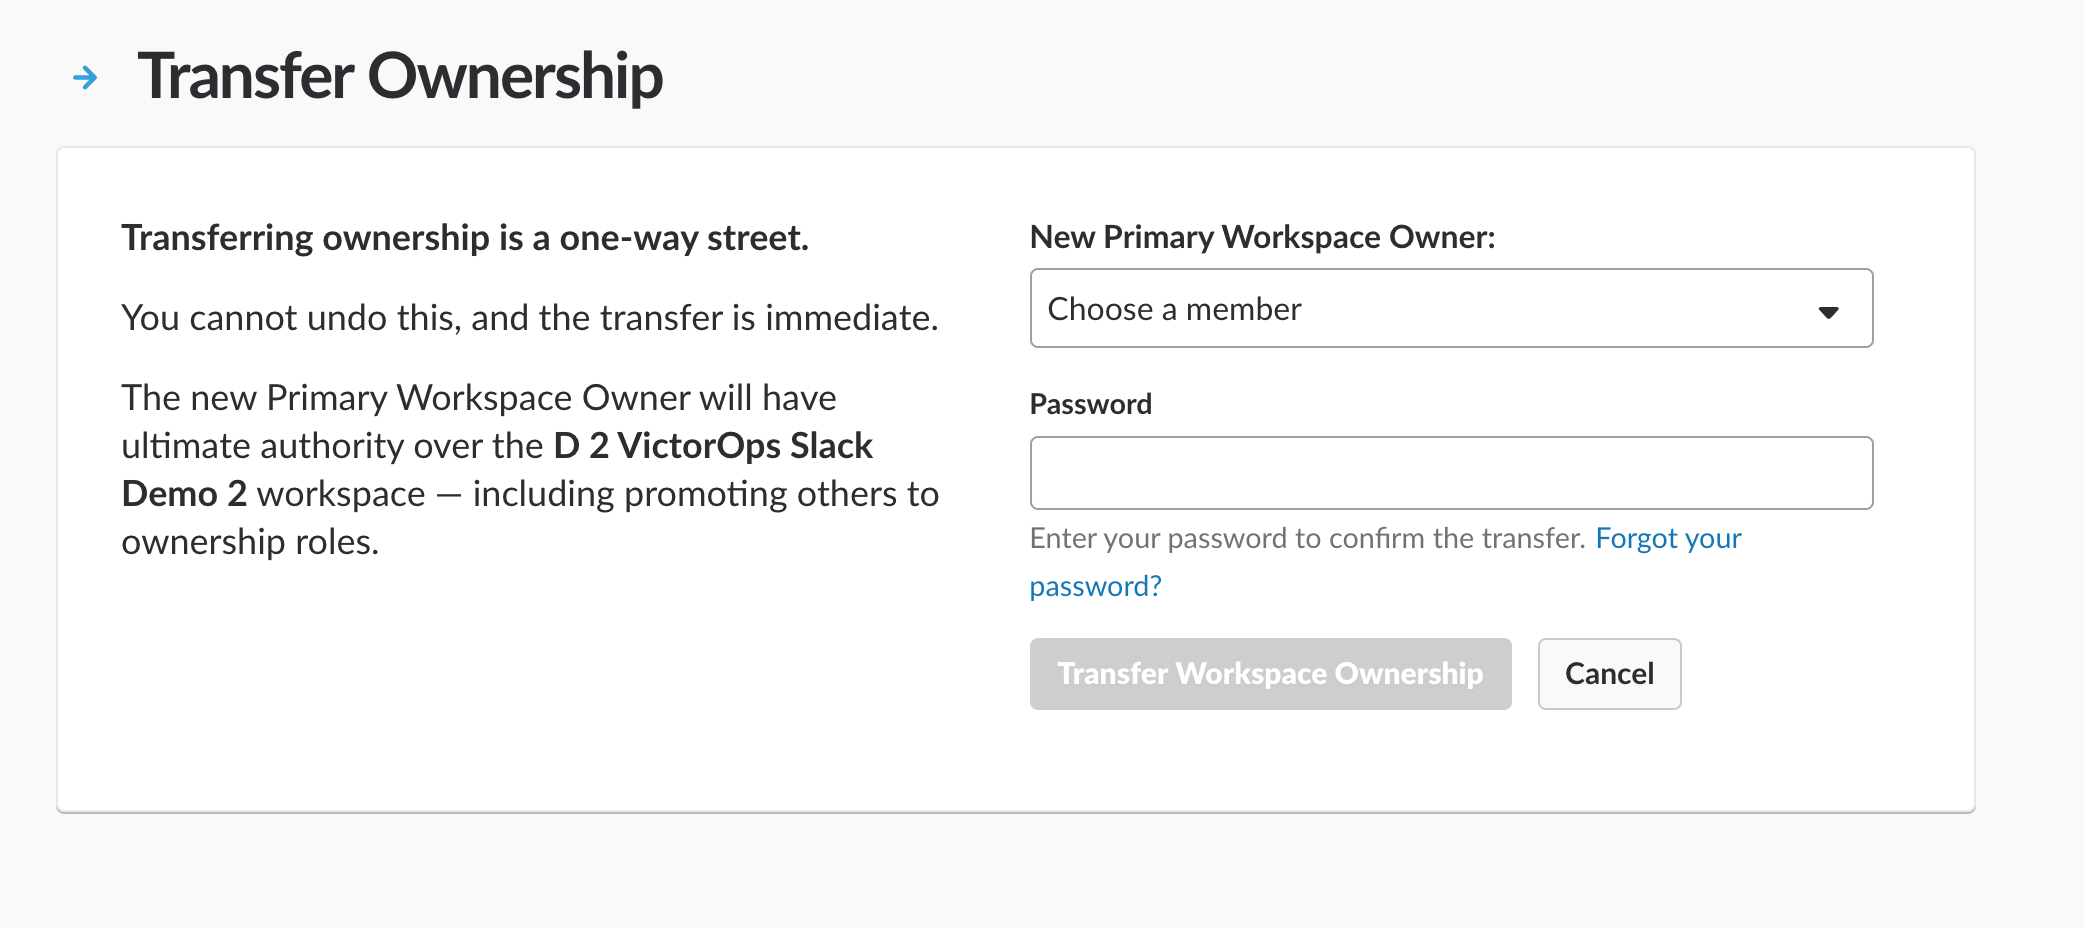
Primary Ownership may be easily transferred back to the original owner once the integration is complete.
In Splunk On-Call
From the Splunk On-Call web portal select Settings>>Alert Behavior>> Integrations.
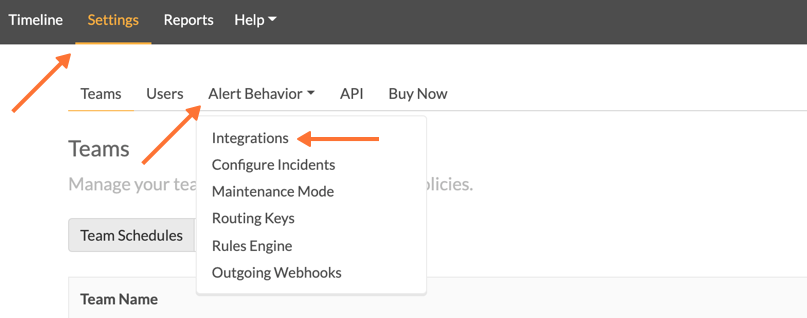
Next, select the Slack integration tile.
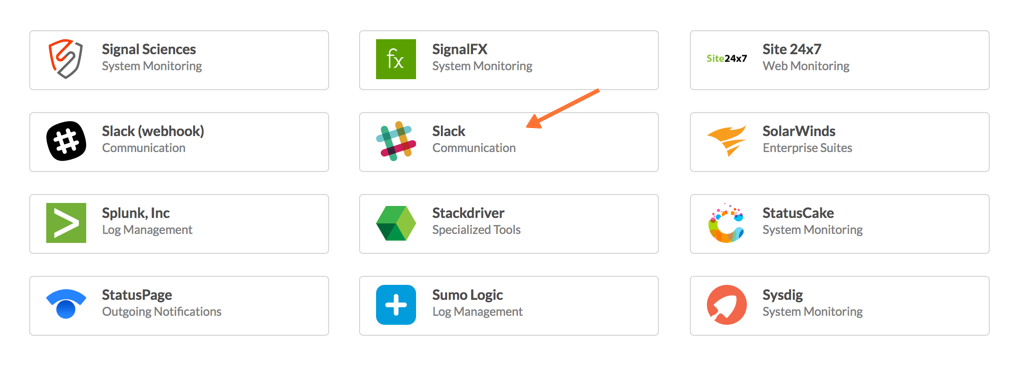
Then select Enable Integration.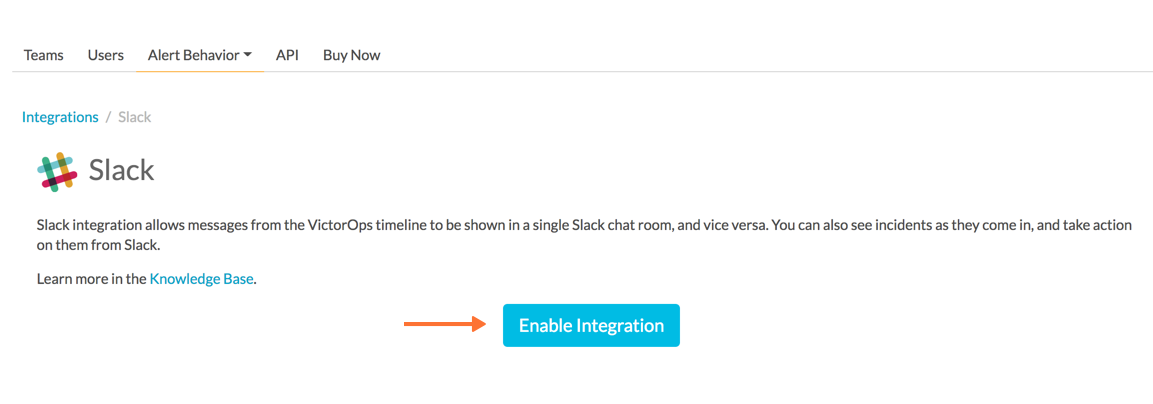
This will bring up a Slack authentication screen to first pick the team you want to integrate with and then to log in.
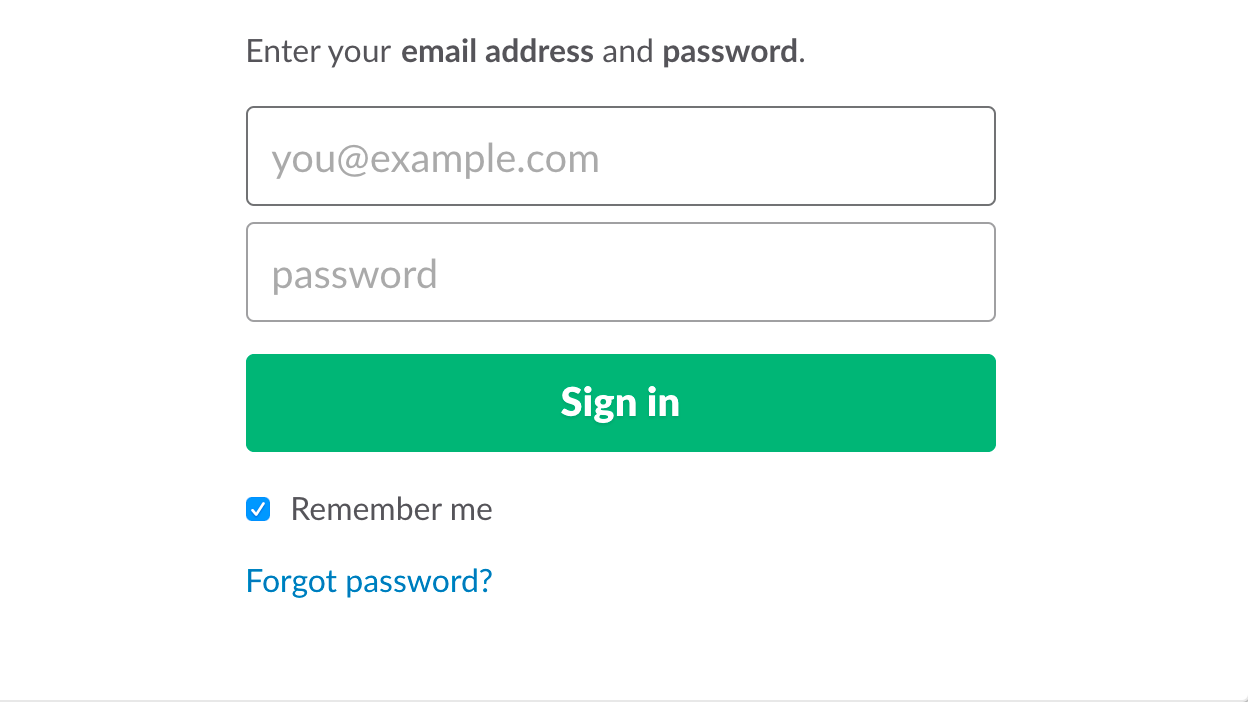
Then, enter your email and password.
Next, Authorize the application.
Once authorized, you’ll be prompted to select a Slack channel.
Finally, you’ll be redirected back to VictorOps and a message will display that the Authentication was successful.
Splunk On-Call web interface Settings
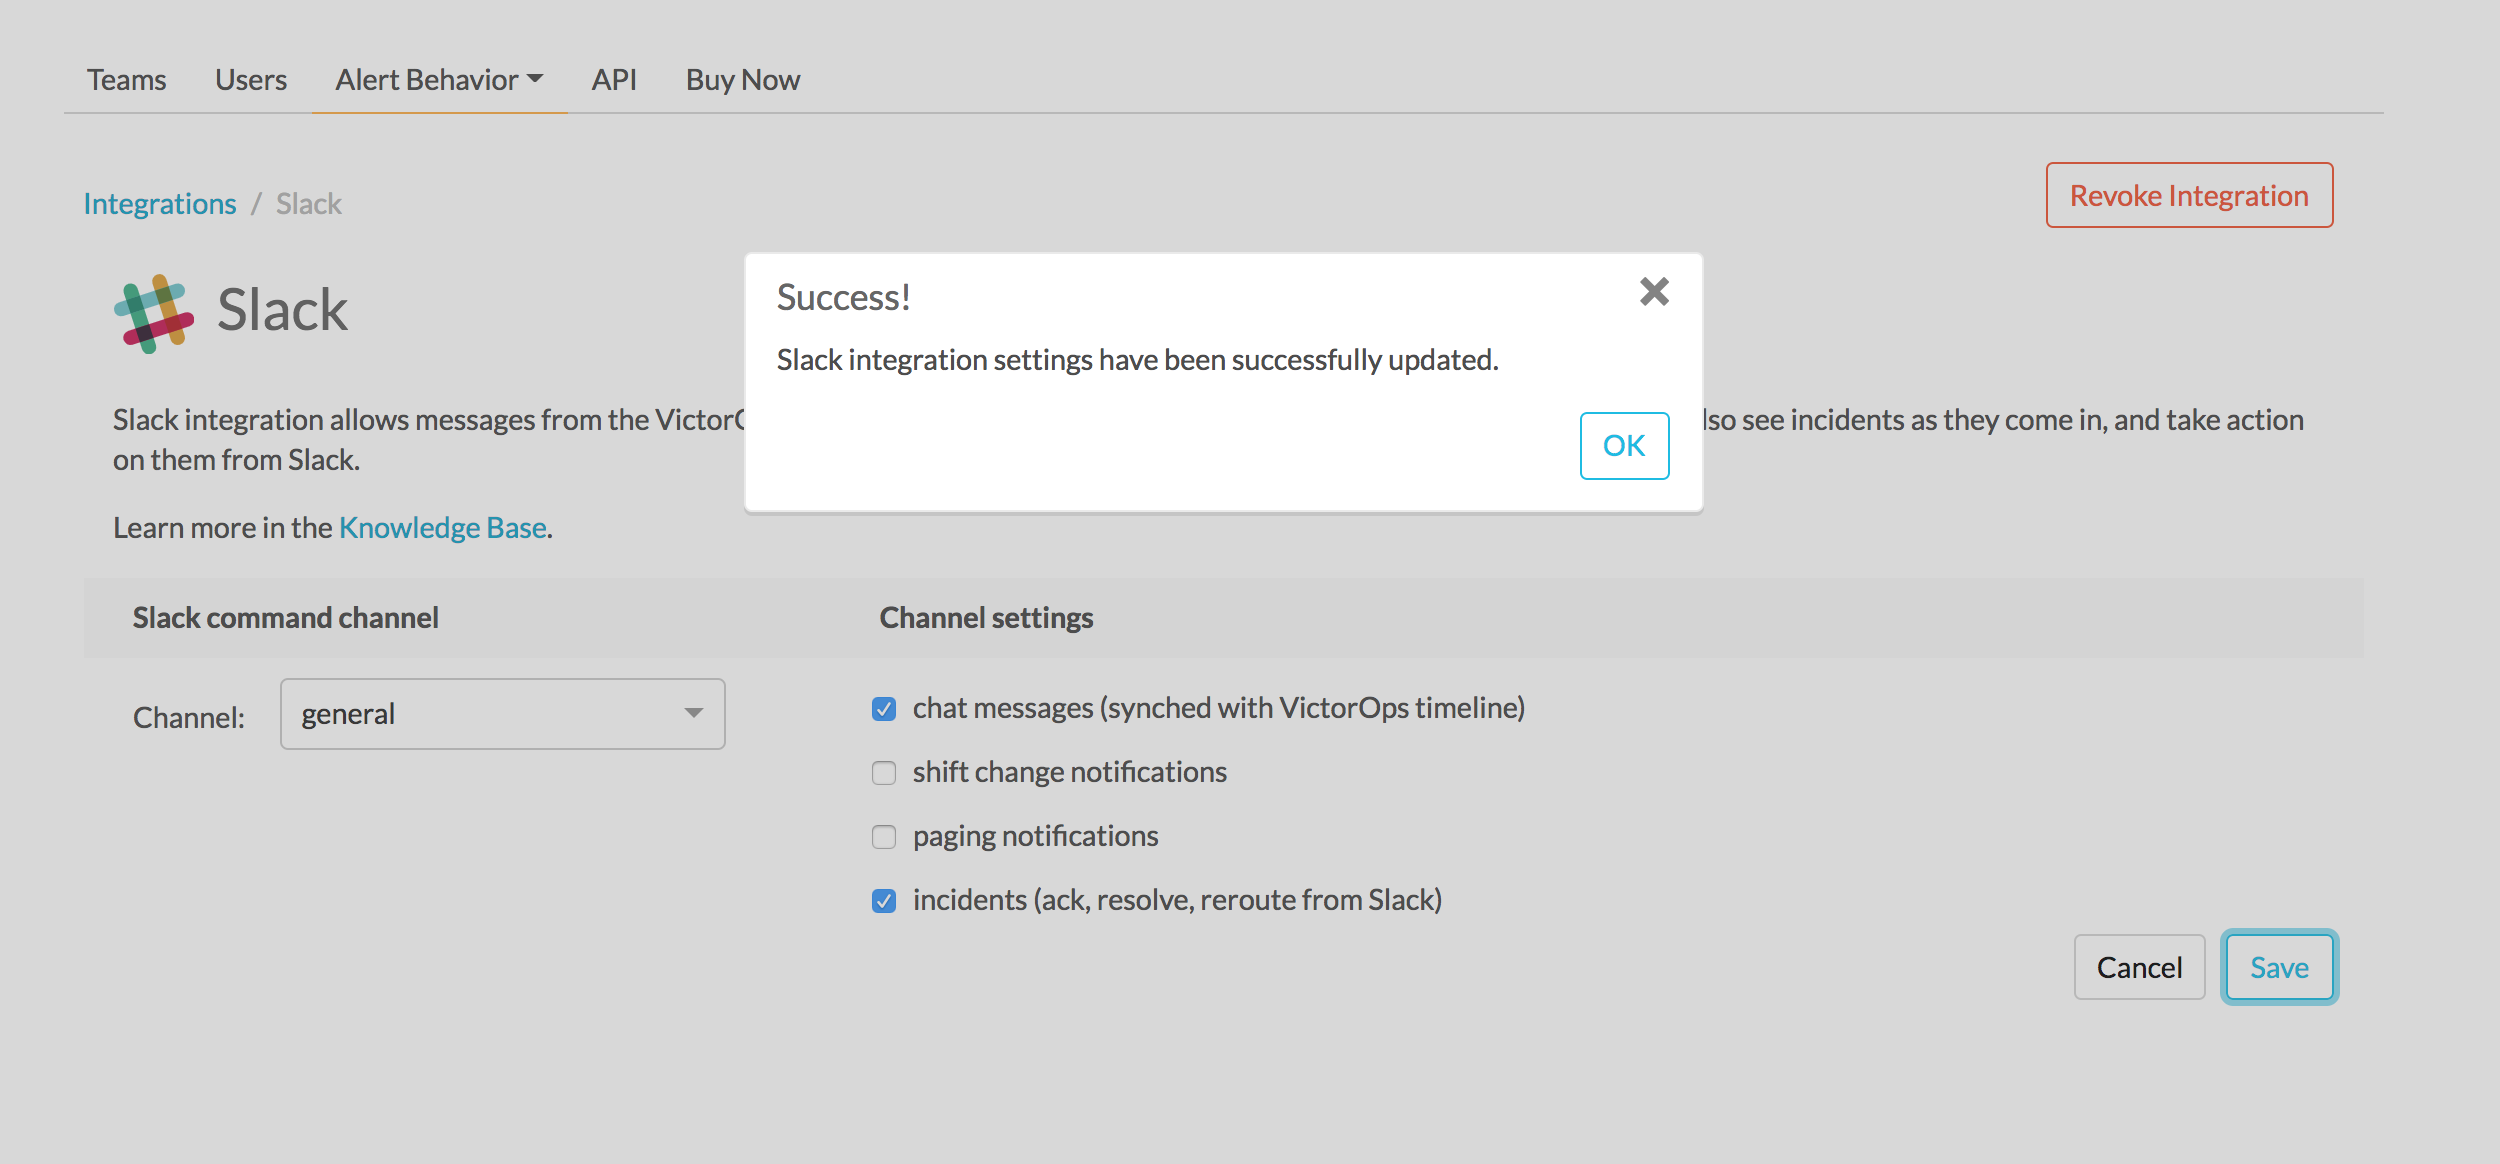
Now, from the web UI, you may configure aspects of the integration. For instance, you may choose a Slack channel you’d like to integrate with and control the message notifications from Splunk On-Call to Slack.
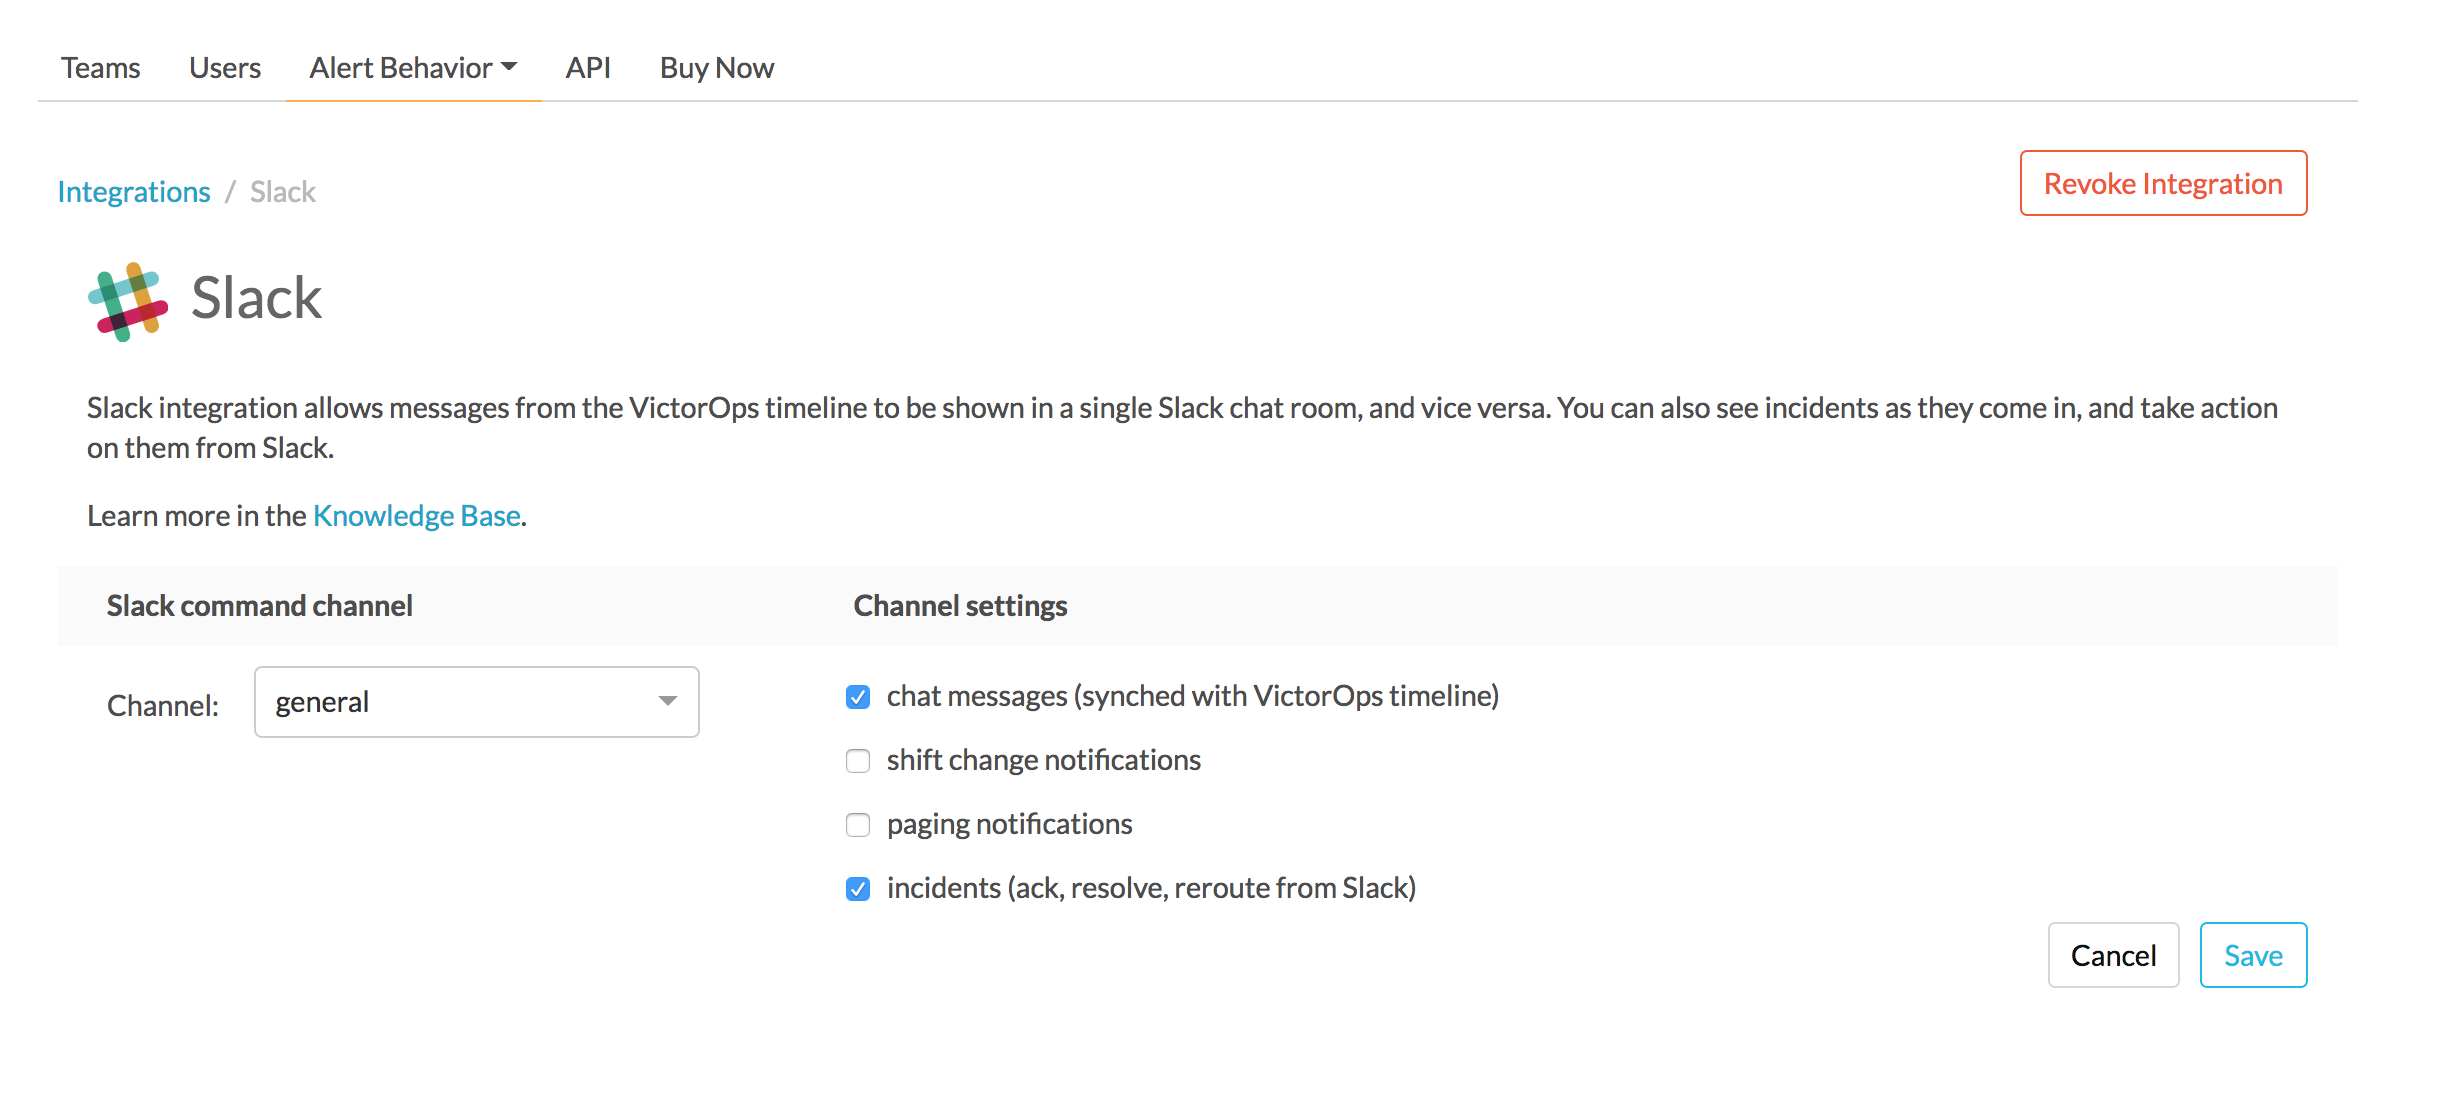
After you finish configuring your settings please be sure to press the Save button.

In Slack Channel
Invite the VictorOps Bot To The Channel
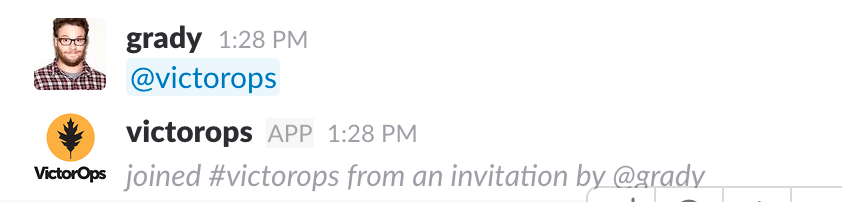
In Slack @ mention the @VictorOps bot user to add it to your channel if it doesn’t automatically appear.
Linking Your Slack User to your VictorOps User
From Slack, you can use the slash command /linkuser to generate a link that will initiate the linking process.
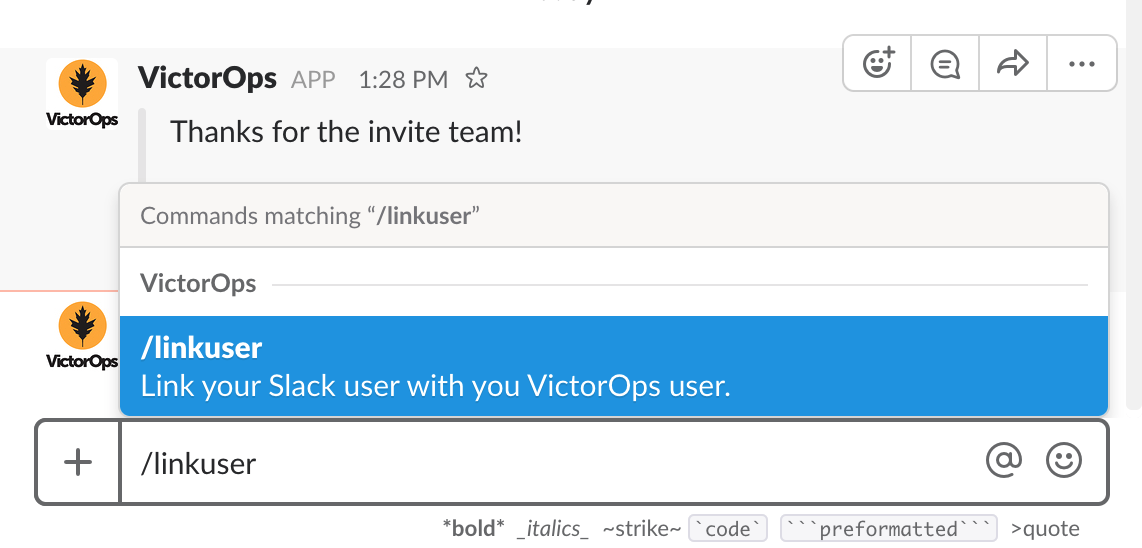
After running the /linkuser command, log into your VictorOps account and you will be notified that your user is linked.
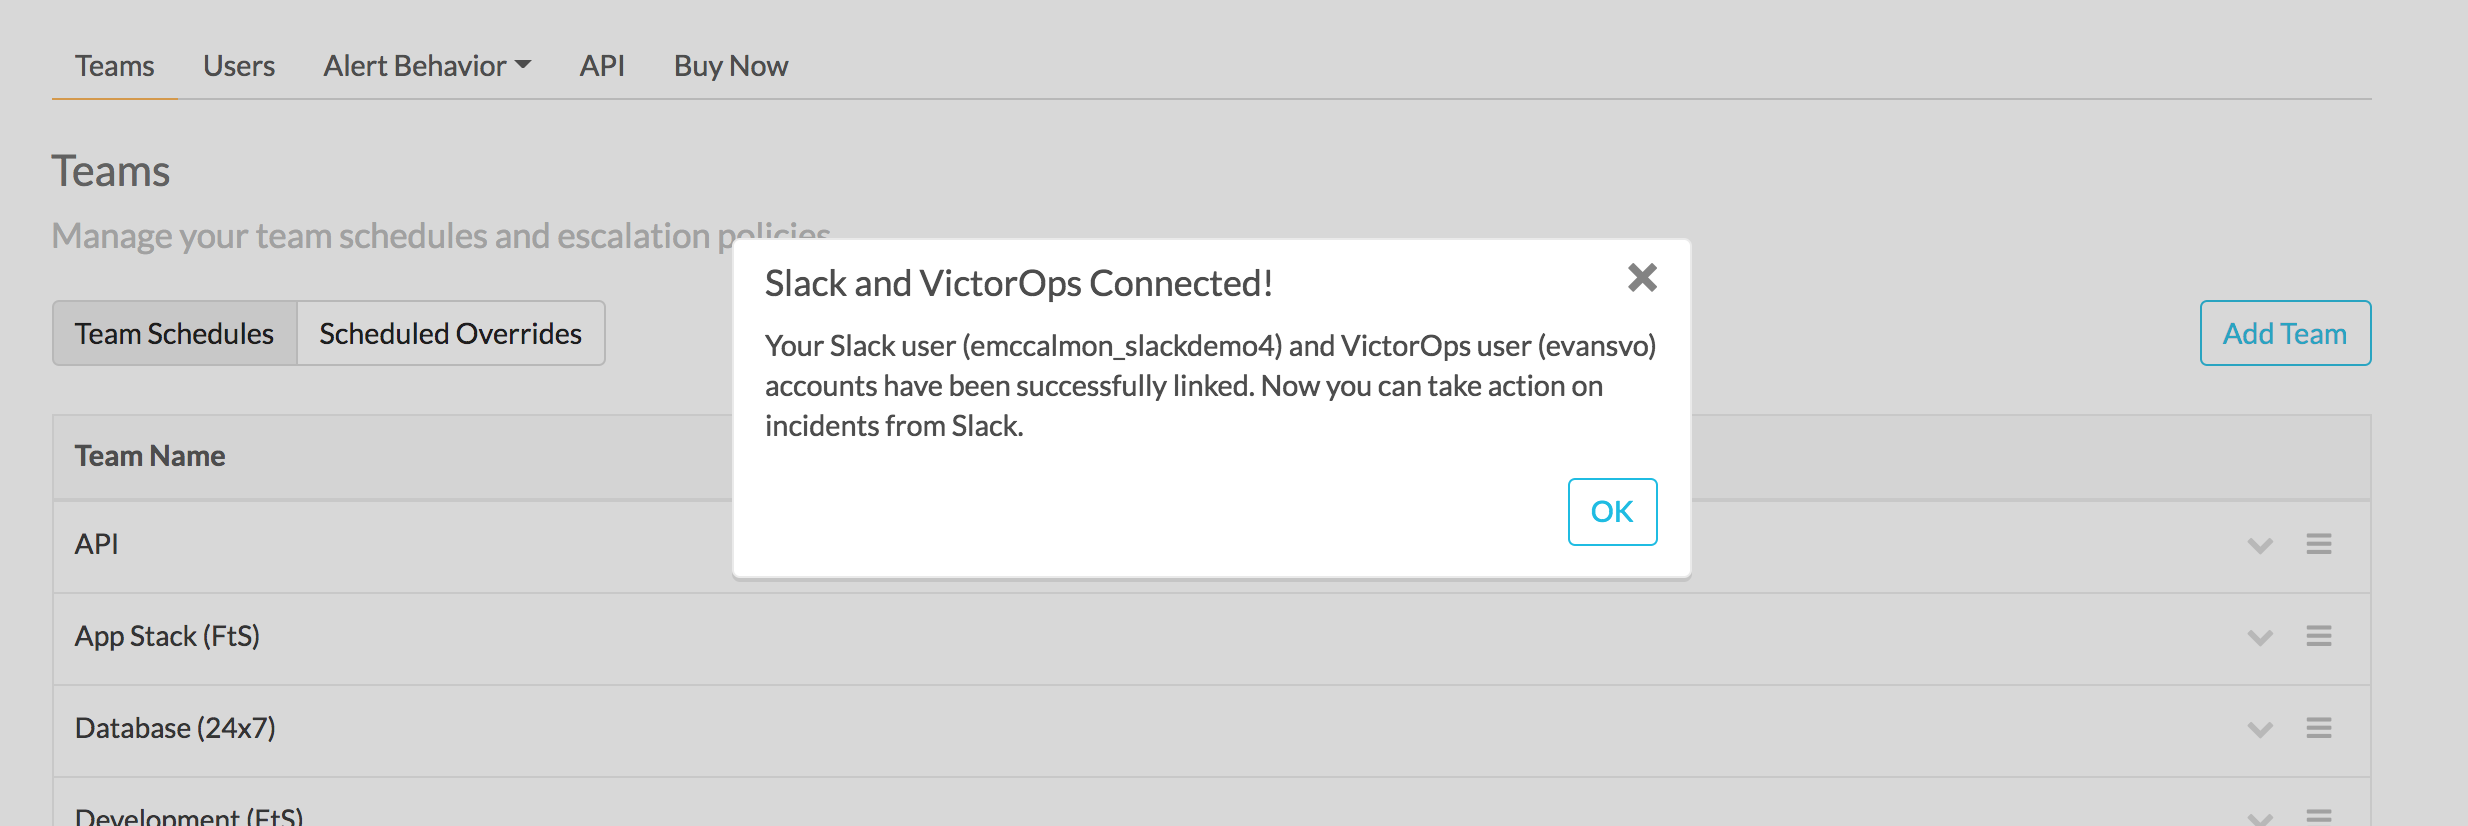
Once you’re connected you’ll be able to successfully ACK incidents in Slack. Note: If you do not link your user, incident actions in Slack will not be passed to VictorOps.
Unlinking Slack Users from Splunk On-Call
In the event that you need to unlink your Splunk On-Call user from your Slack user, please contact VictorOps Support (support@victorops.com). This is a simple and quick process, but currently, it must be initiated by our support team.
Ack and Resolve in Slack
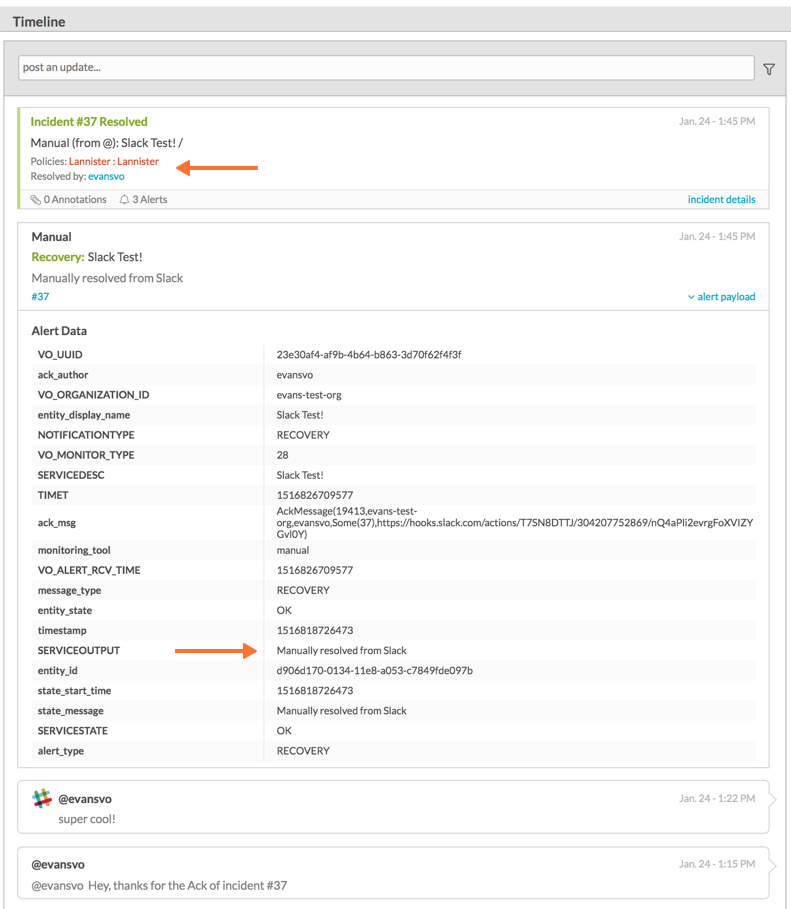
Now that your user is linked you can interact with VictorOps incidents from the slack channel.
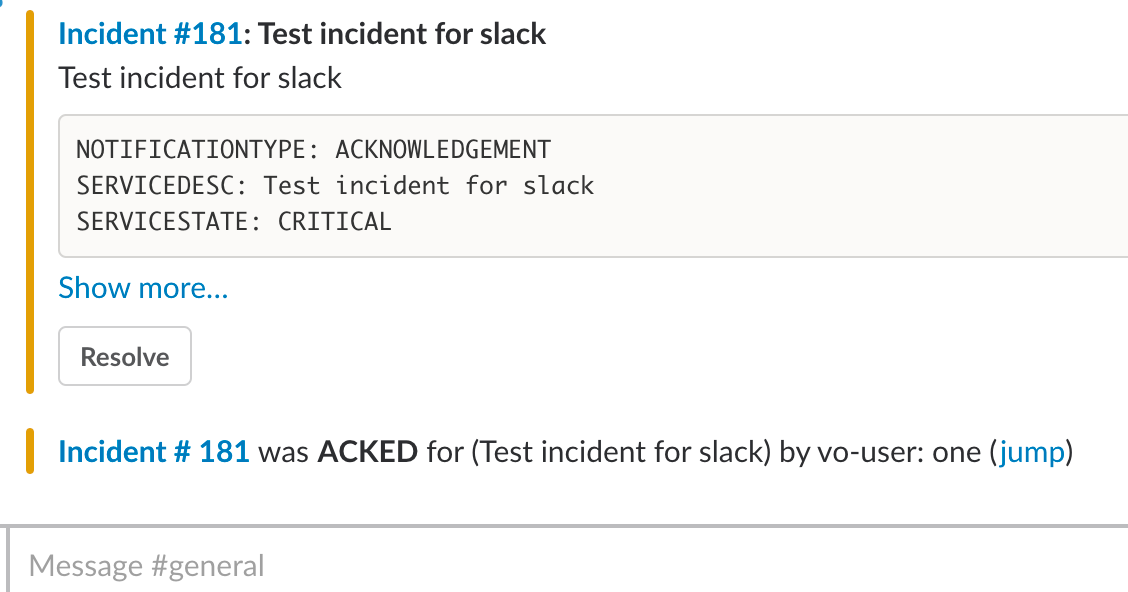
In the VictorOps Timeline, you’ll be notified of Ack and Resolve actions that occurred in Slack.
Legacy Slack Webhook Guide
Requirements:
Versions Supported: Slack 2.x
VictorOps Version Required: Getting Started/Essentials (Basic config), Enterprise (Multi-Channel config).
What you need to know: The basic configuration links your VictorOps timeline, bidirectionally, to a single Slack channel. The advanced configuration provides links and routing to multiple Slack channels with some limitations (must complete basic setup first).
Before we get started, please note that this integration is not the recommended Slack integration. We recommend integrating with the Slack App integration listed under the General Use section of this document. The newest iteration of our Slack integration provides more functionality within Slack.
Basic Webhooks Configuration
Enable the Integration
(You must be an admin user in VictorOps)
1. From the VictorOps Timeline select “Settings” >> “Alert Behavior” >> “Integrations”.
2. Scroll down and select the “Slack (webhook)” integration button (alphabetical order). If the integration has not been enabled, click “Enable Integration”.
3. Copy the Outgoing Webhook URL that is generated by enabling the integration, and keep this page open as you will return to paste in the webhook URL generated by Slack in subsequent steps.
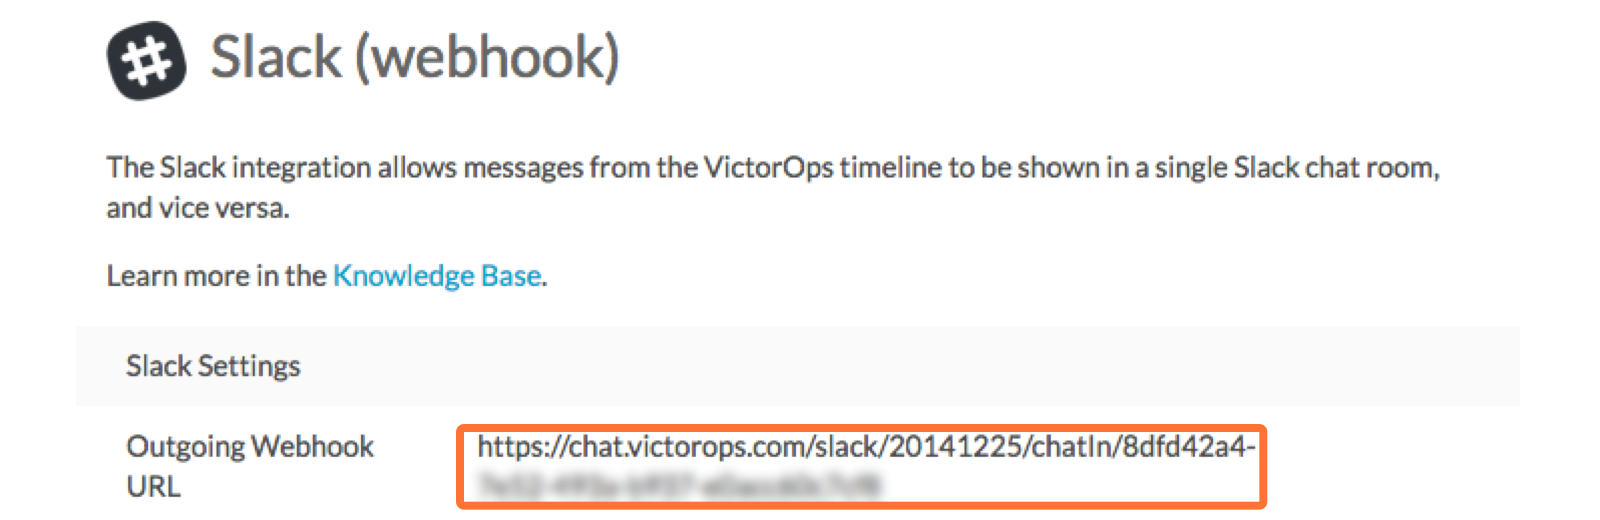
Webhooks: VictorOps to Slack
4. From your Slack account (as an Admin) navigate to the channel you wish to link and select the settings icon. Choose to Add an app or integration.
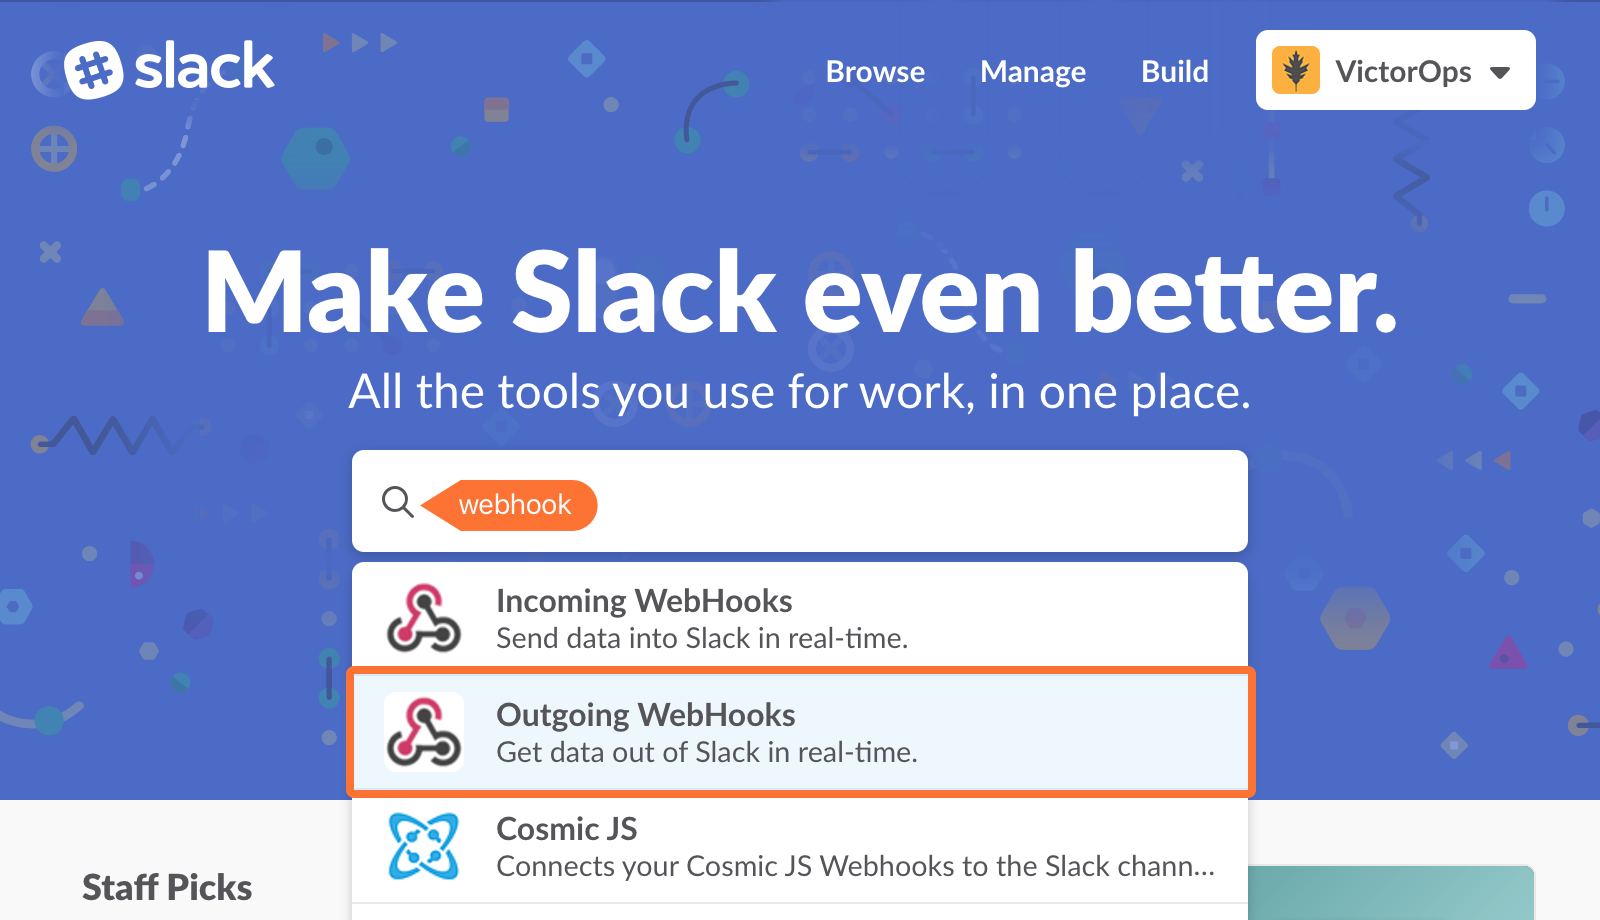
5. In the search function, type “webhooks” and select Incoming WebHooks
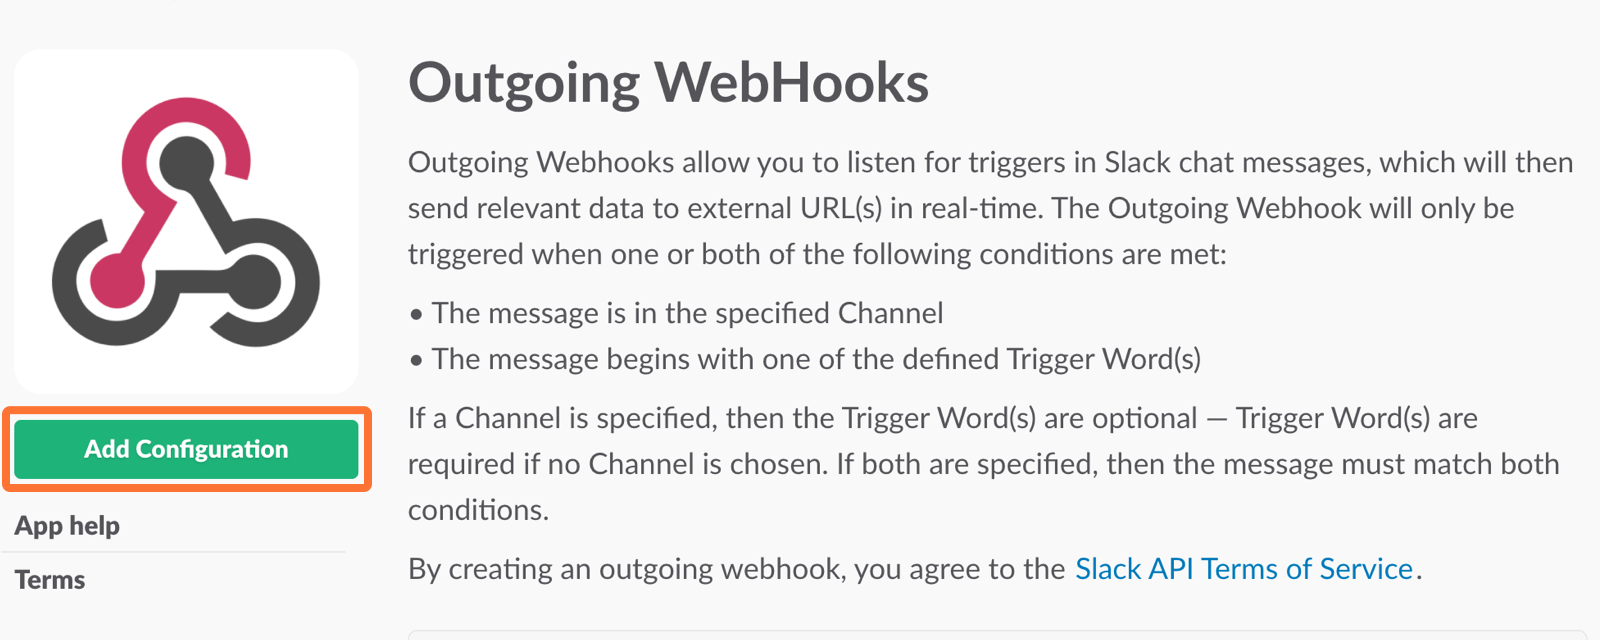
6. Click on Add Configuration
7. Select the channel you want to link to your VictorOps timeline.
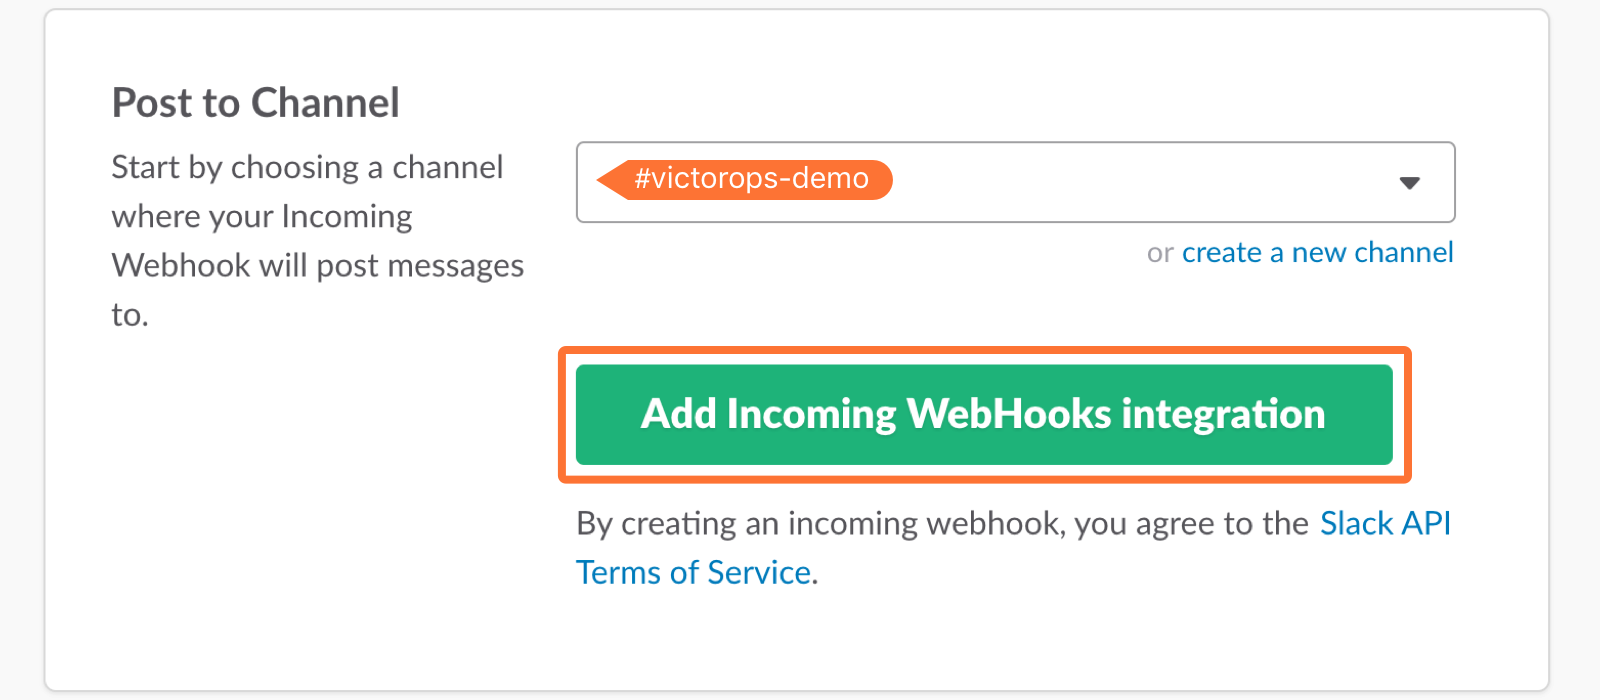
8. Copy the Webhooks URL to your clipboard.
9. Scroll to the bottom and click Save Settings.
10. Paste the URL into the Incoming Webhook URL section. (It saves automatically, nothing more to click)
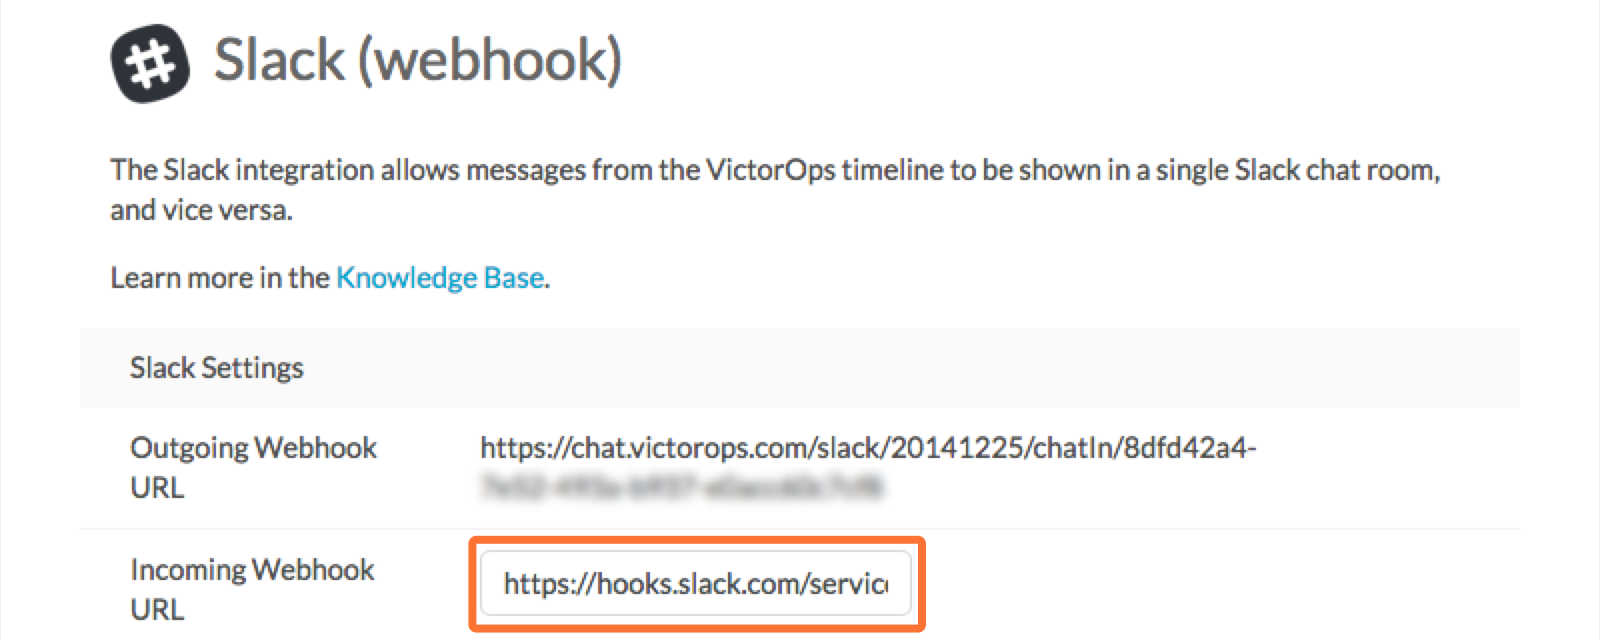
Webhooks: Slack to VictorOps
11. Return to the Slack integrations search function, and type “webhooks”. Select Outgoing WebHooks.
12. Click on Add Configuration.
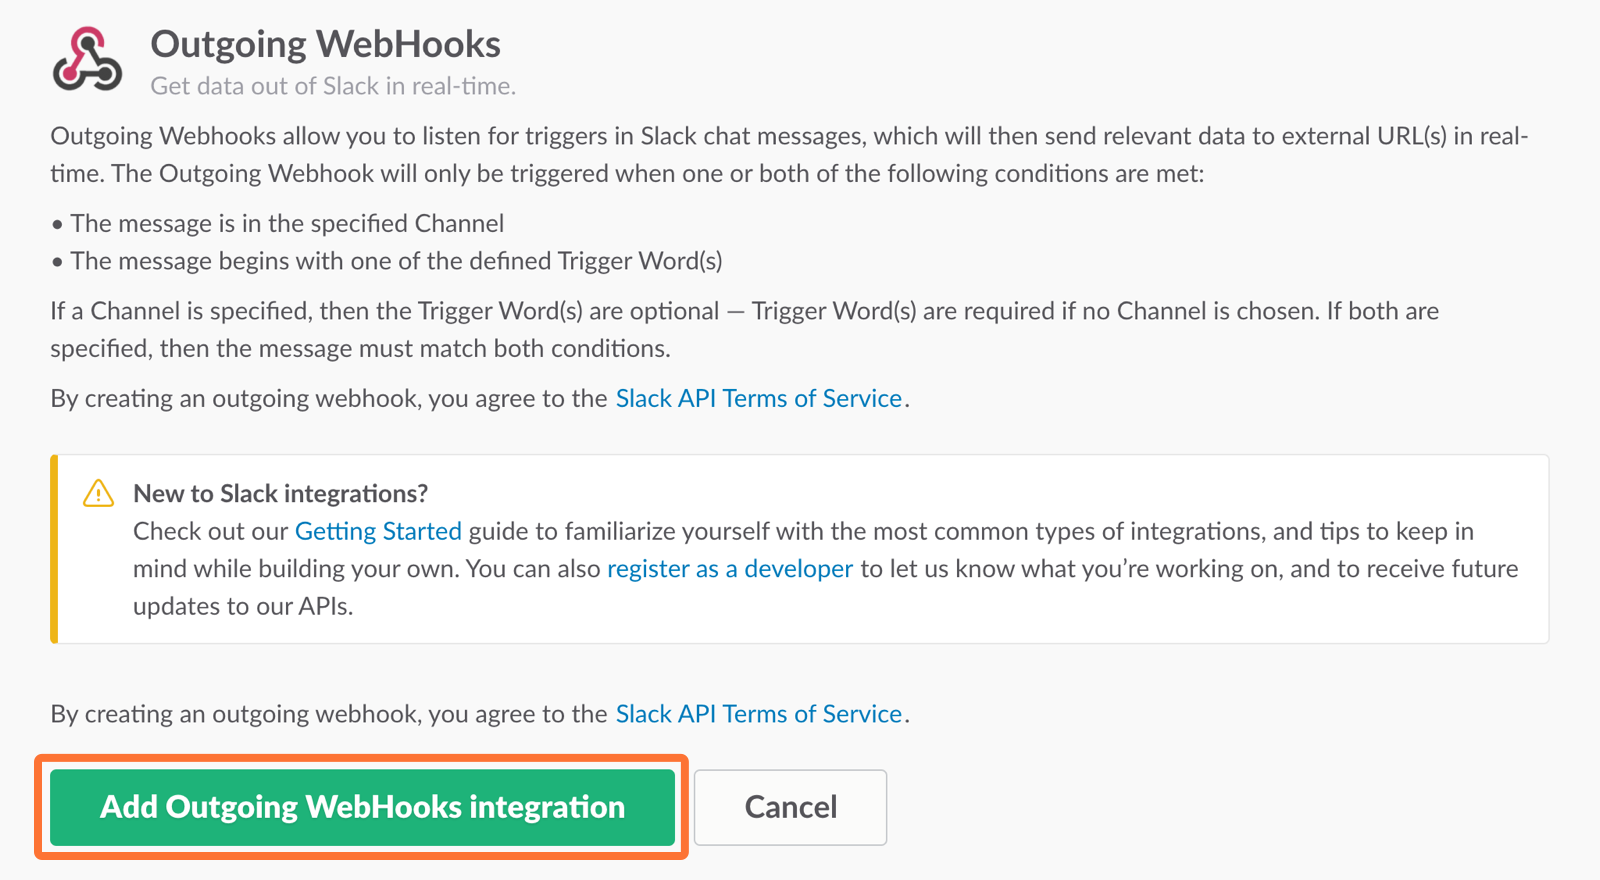
13. Click Add Outgoing WebHooks Integration.
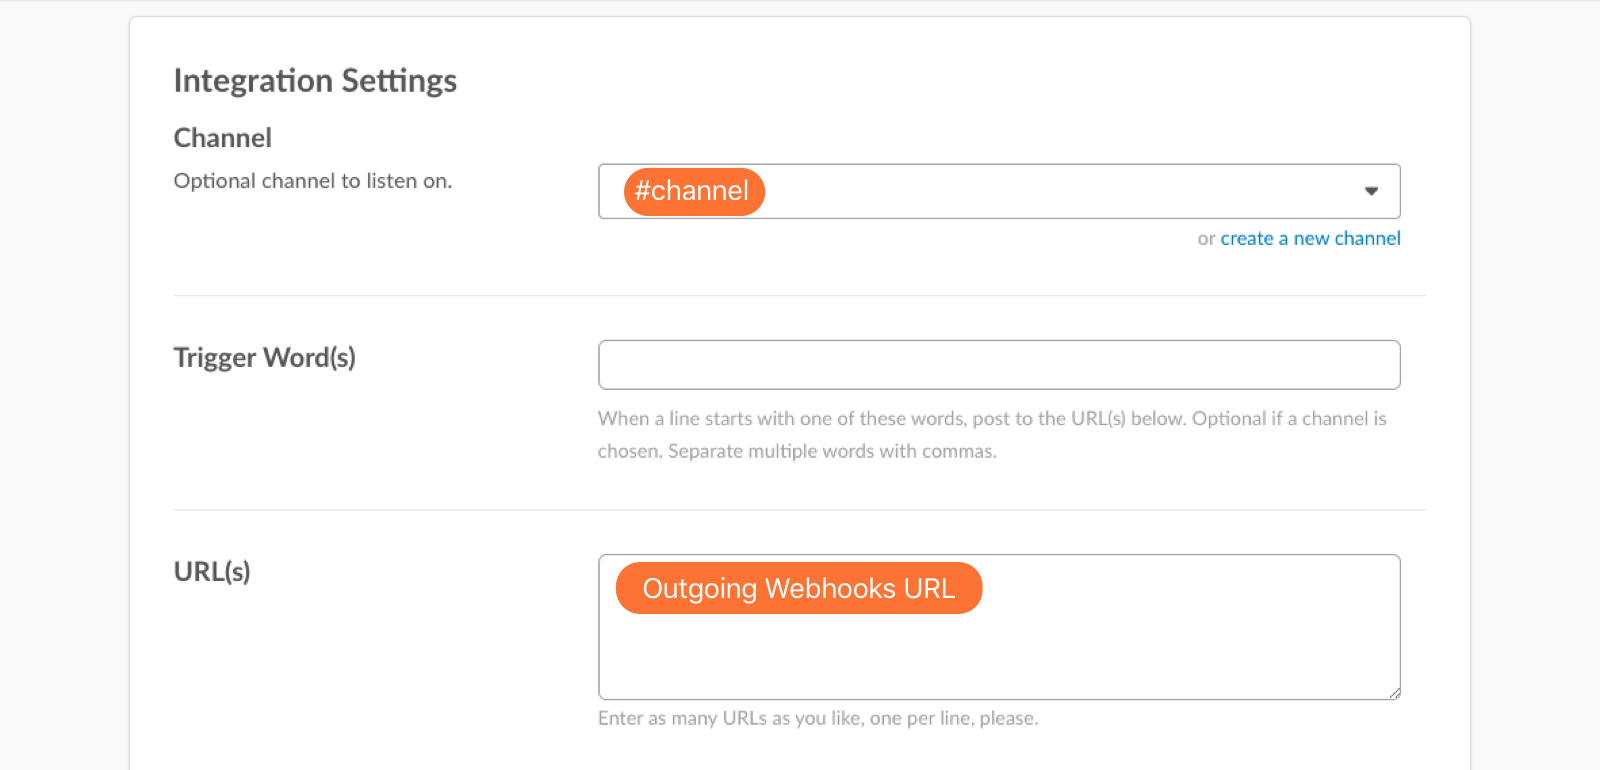
14. Scroll down to the Integration Settings section. Select the channel you are linking with VictorOps and then paste the URL you copied from the Outgoing Webhooks URL section in VictorOps (Step 3 above) into the URL(s) section in Slack.
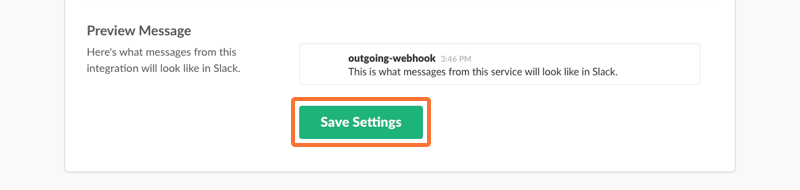
15. Scroll to the bottom and select Save Changes.
Configure and Test
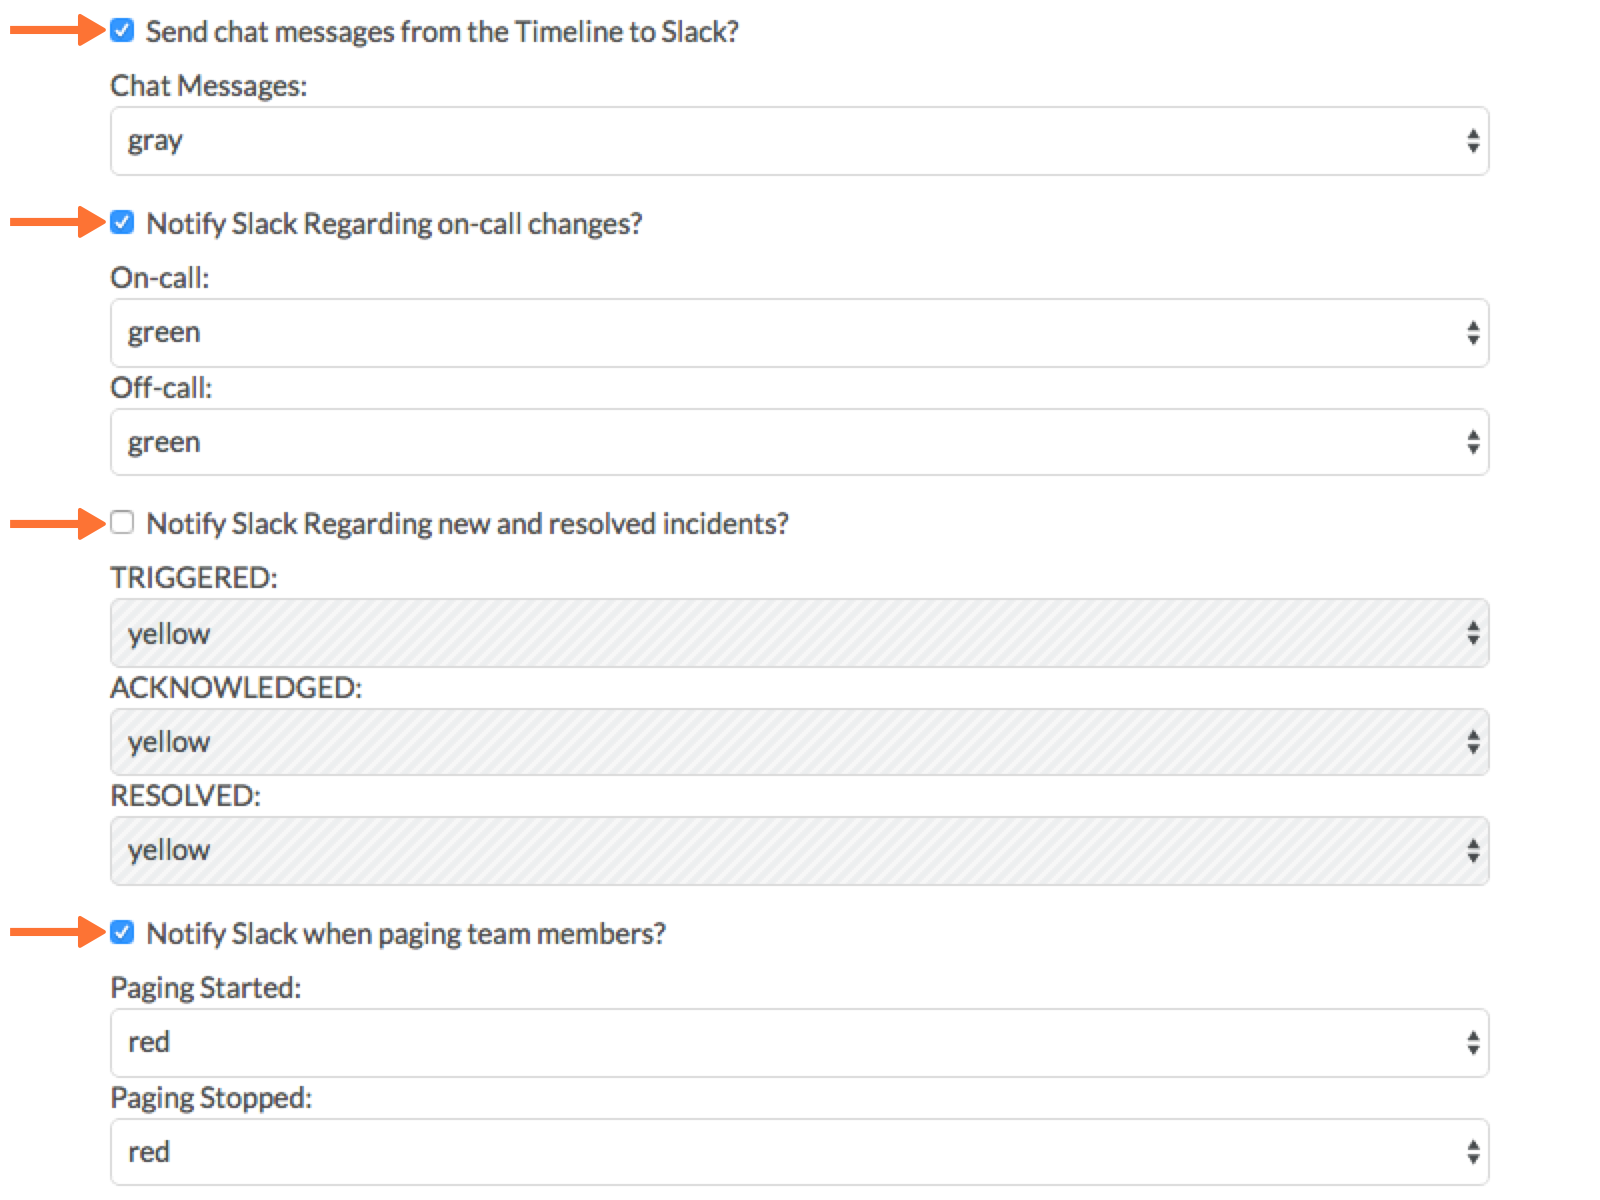
16. Return to the Slack integration settings in VictorOps and read through the Slack Options section to fine tune the integration.
17. Navigate to your main timeline in VictorOps, and enter any text into one of the two chat bars and press ENTER/RETURN. (Notice that the chat bar located in the incident pane (far right) will append the incident # to the chat) You should see the chat appear in your Slack channel. Reply to the chat from within Slack and you should see the response in the VictorOps timeline.